


'74 El Camino "Project Badass"
G3GM :: Media :: G3 Project Pictures
Page 2 of 7 •  1, 2, 3, 4, 5, 6, 7
 ![]()
Re: '74 El Camino "Project Badass"
![]() by Hs1973 Sat Dec 26, 2015 7:38 am
by Hs1973 Sat Dec 26, 2015 7:38 am

Hs1973- G3GM Enthusiast

- Street Cred : 14
Re: '74 El Camino "Project Badass"
![]() by builtnotbought Fri Jan 01, 2016 5:34 pm
by builtnotbought Fri Jan 01, 2016 5:34 pm
Let's continue the story...
Body was ready to go sand blasting
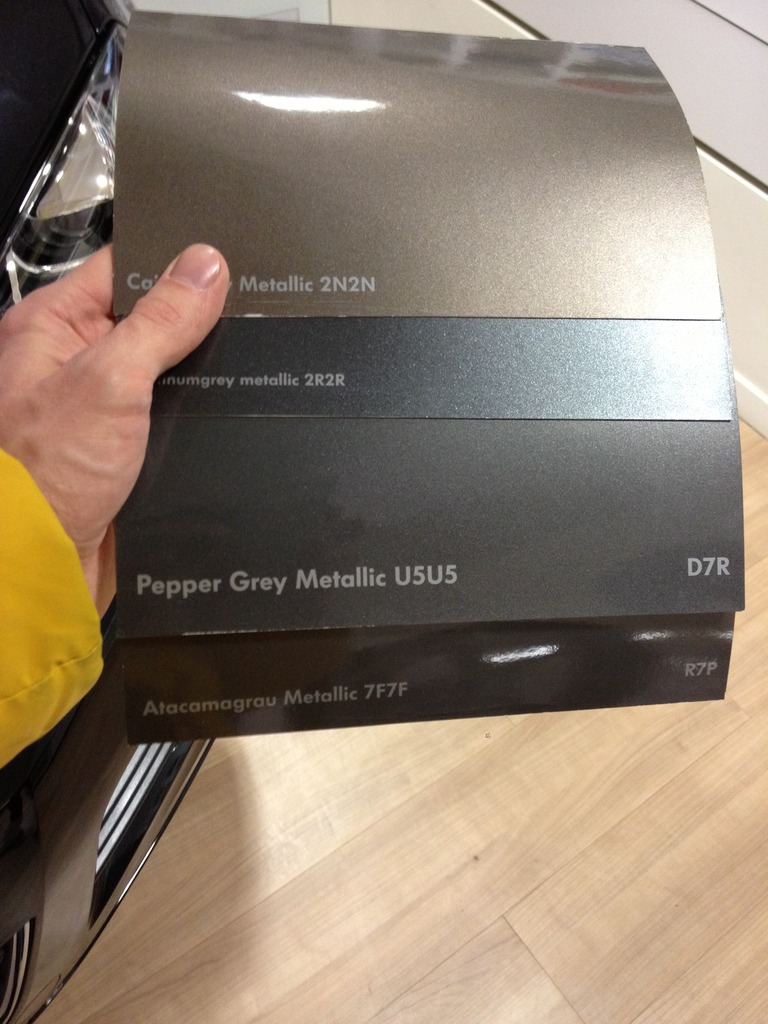
And I was ready to break my head while choosing the new color, prefering VAG concern colors.
Some russian landscapes during body flying to sand blasting


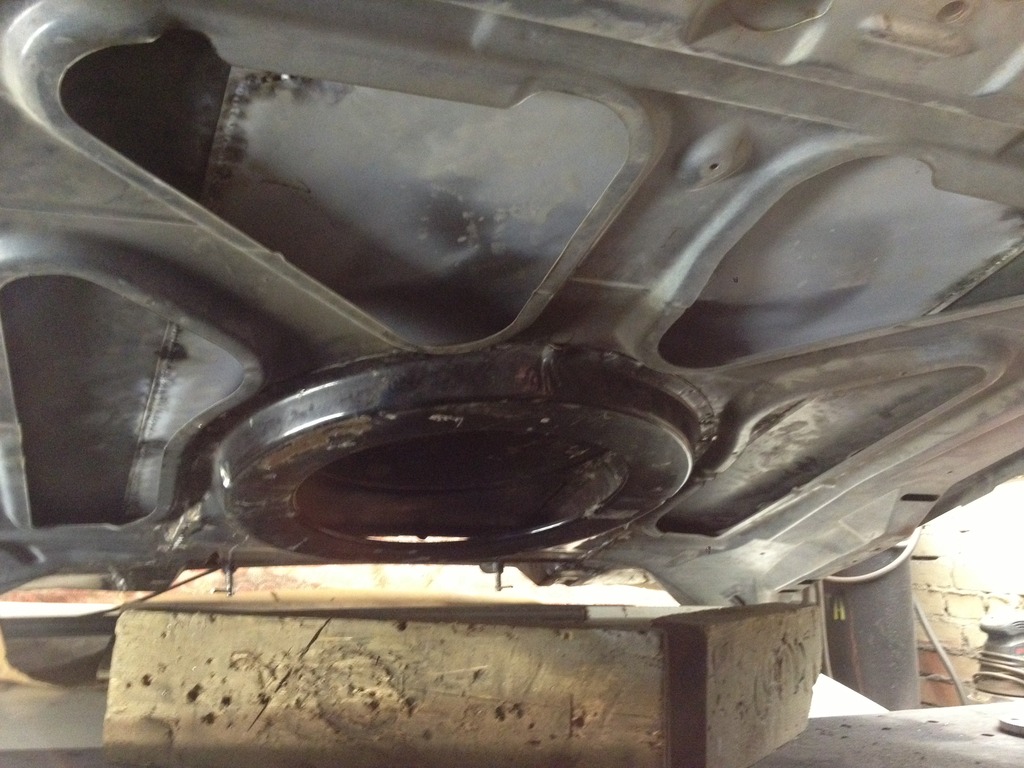
I think a week later body came to the service for sitting inside for the next long 8 months in such a look
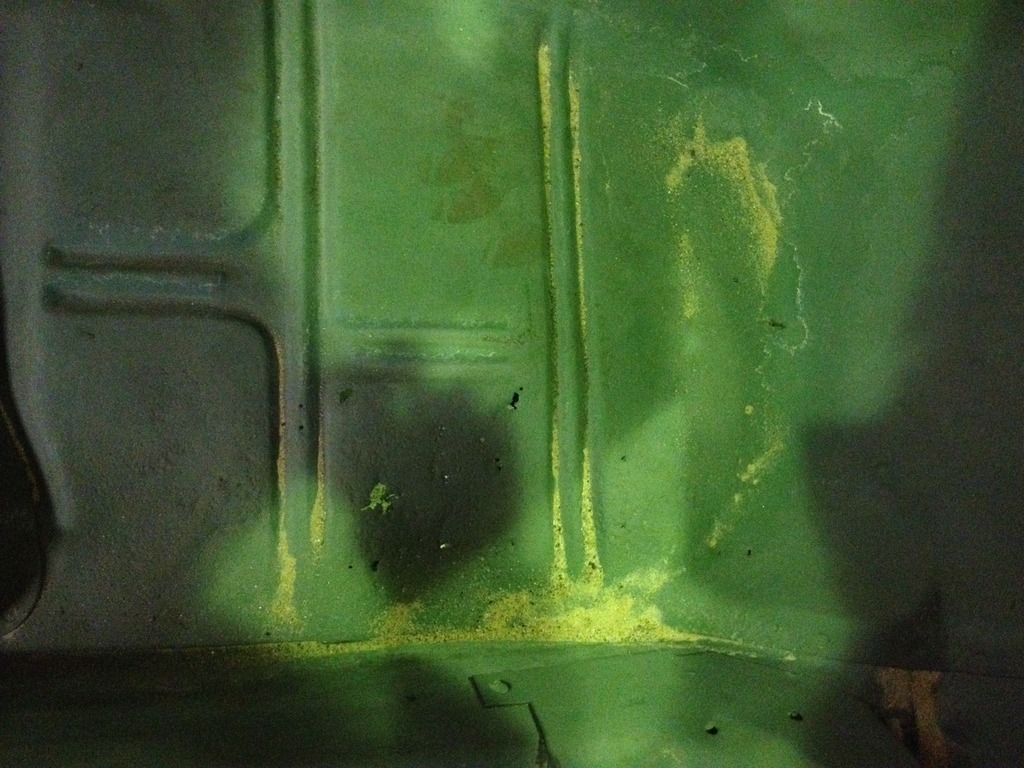
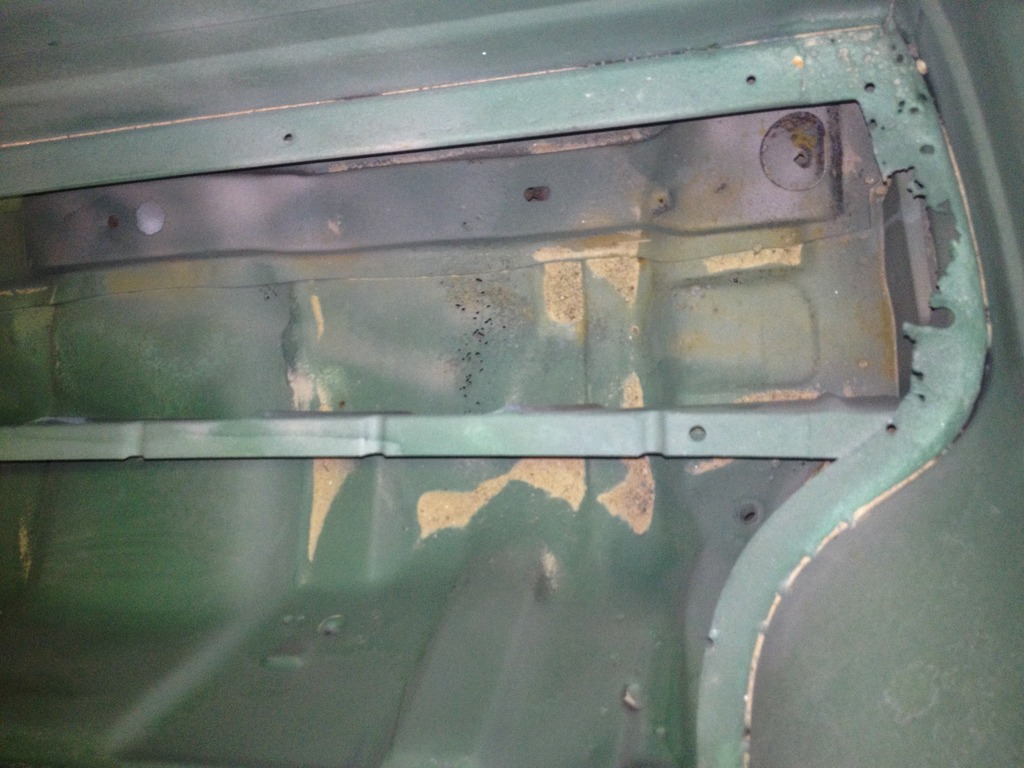
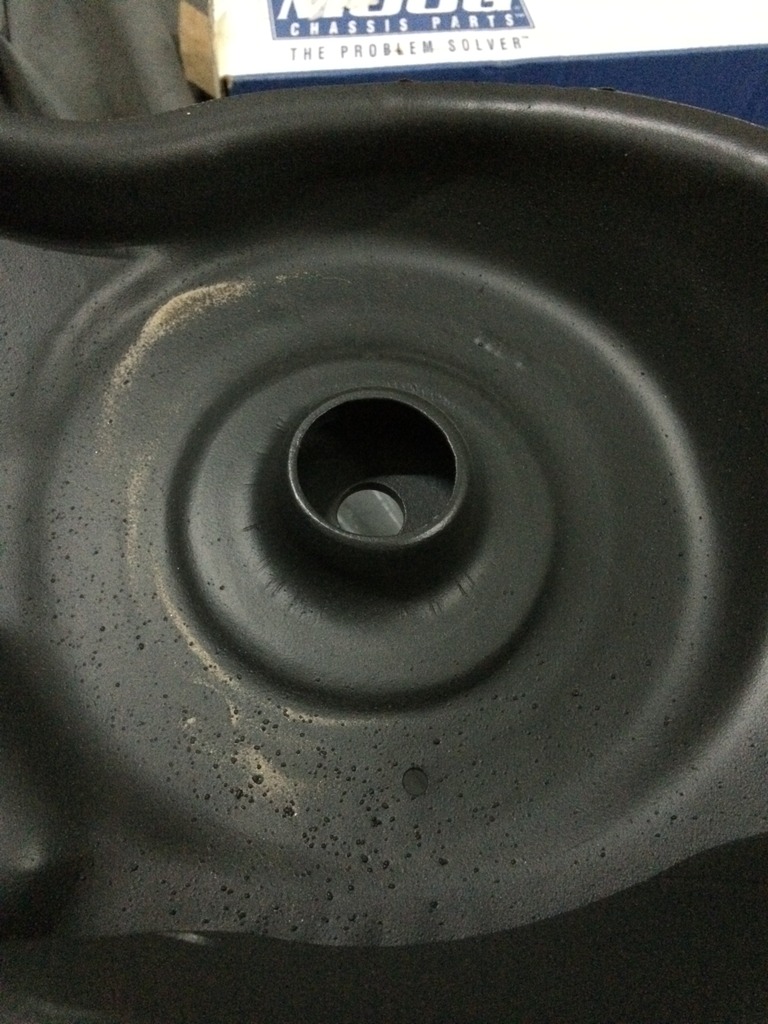
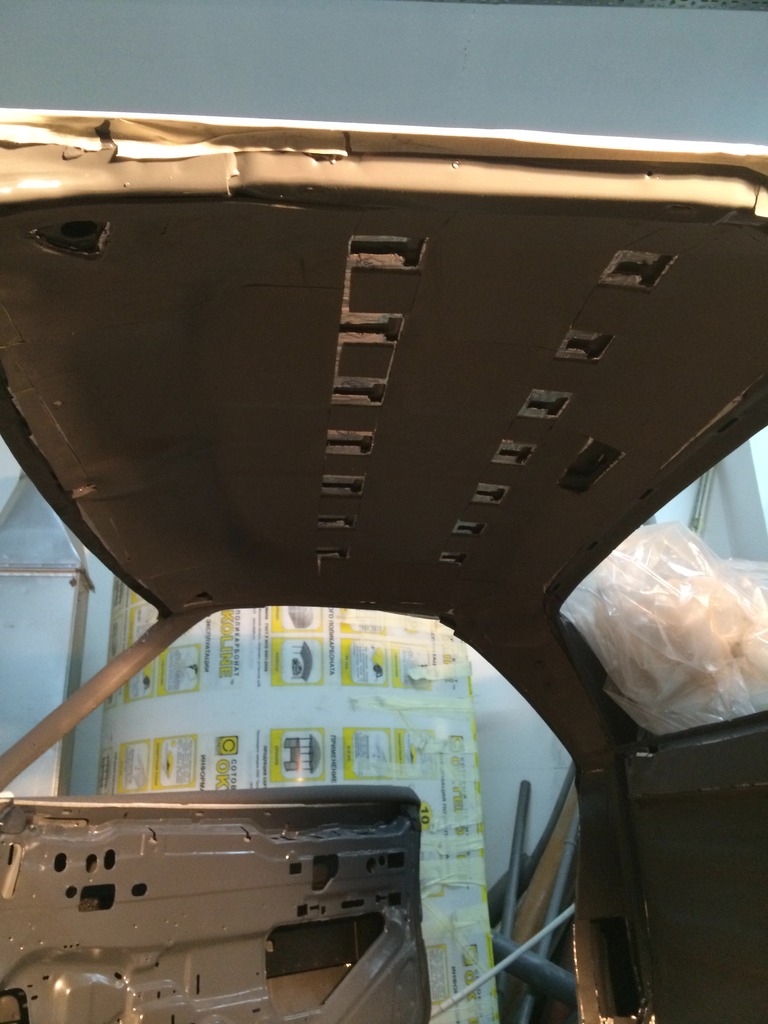
Anybody knows what for these windows in floor are made? For water draining?


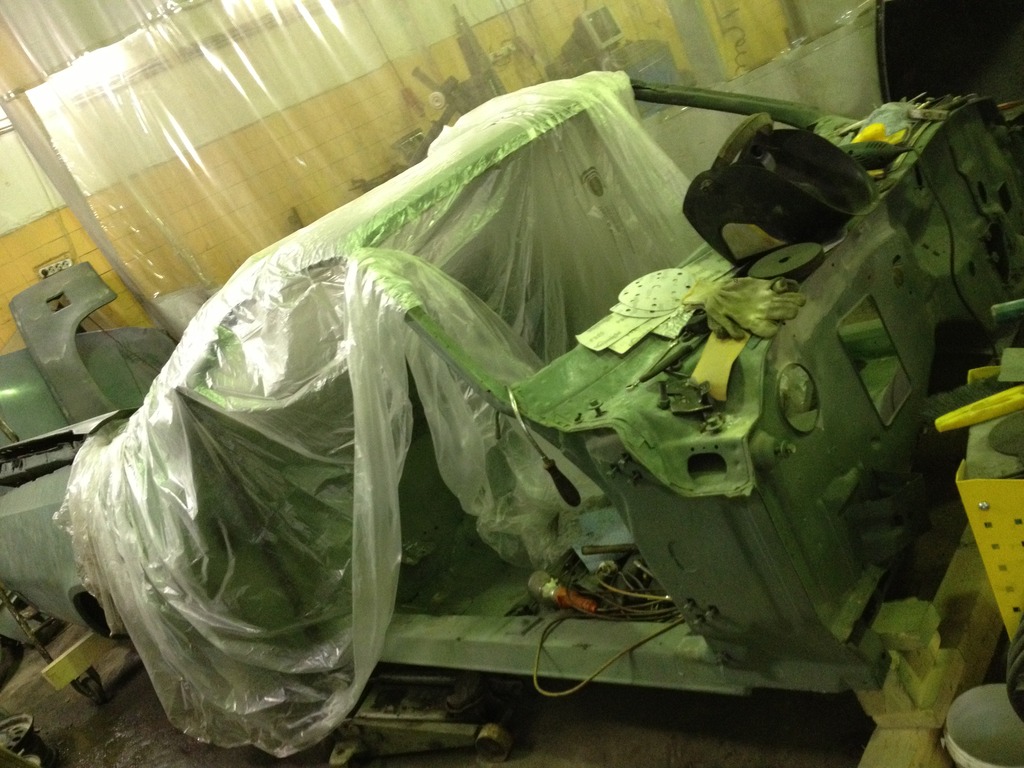


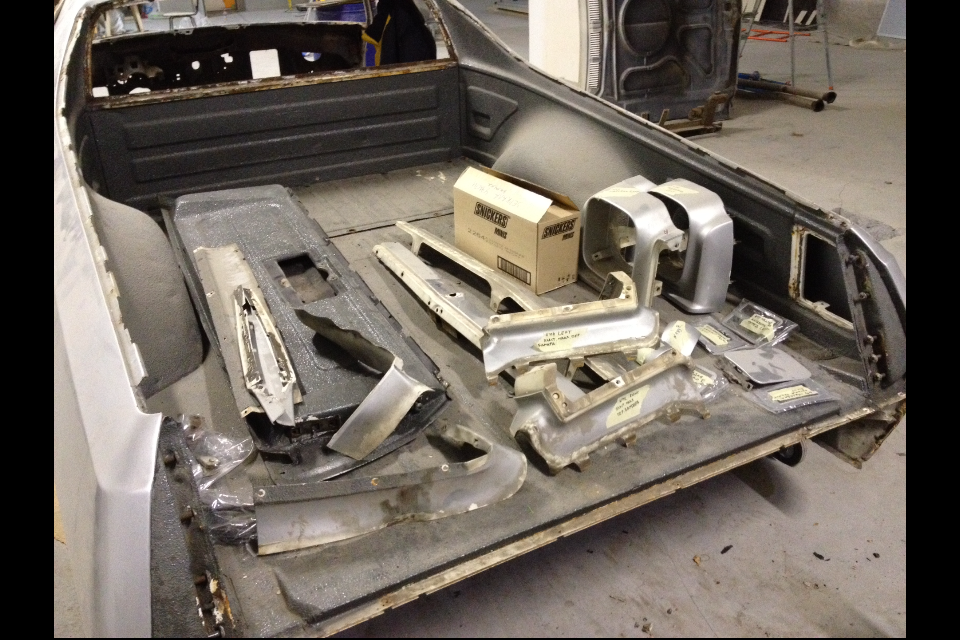
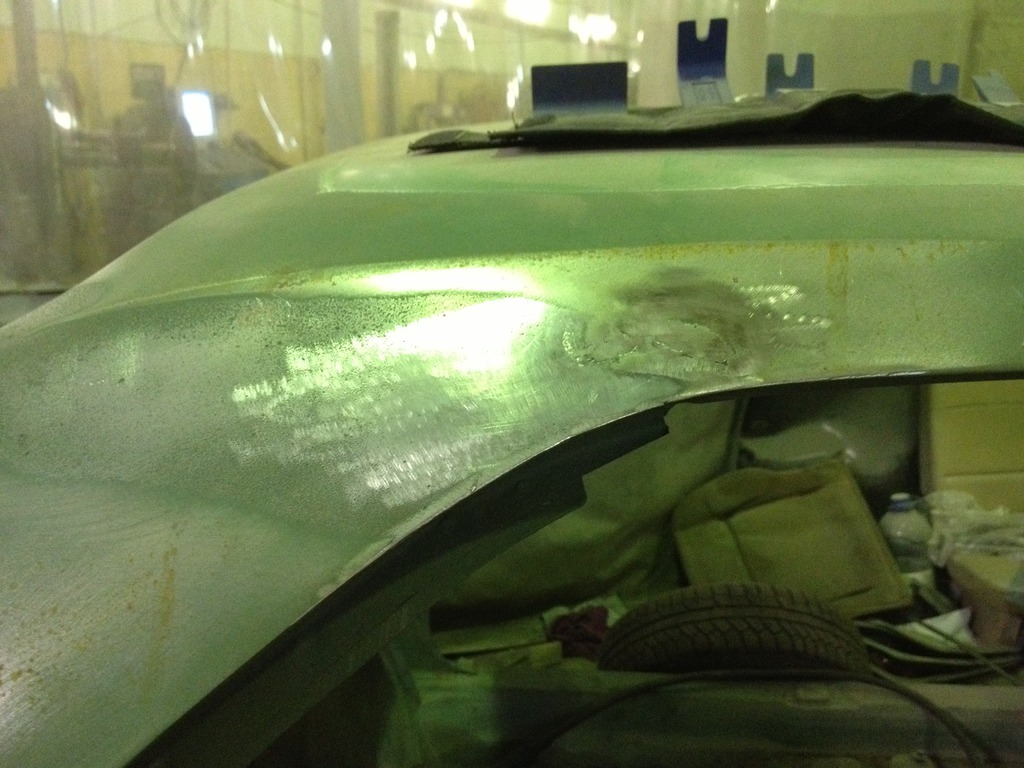
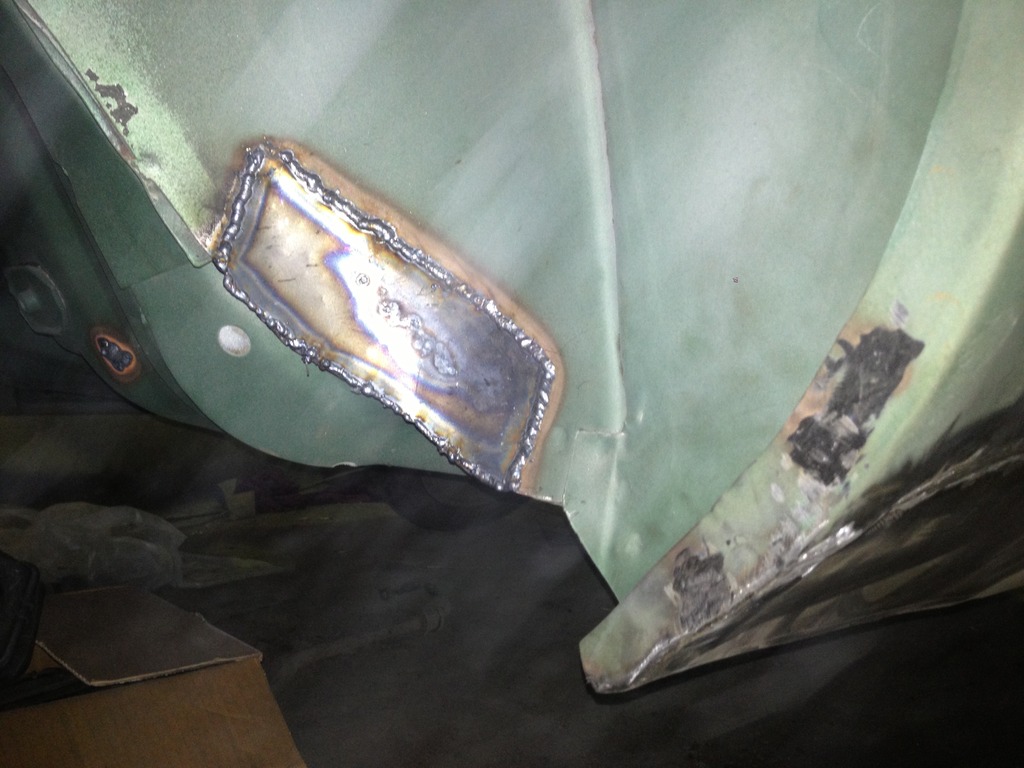
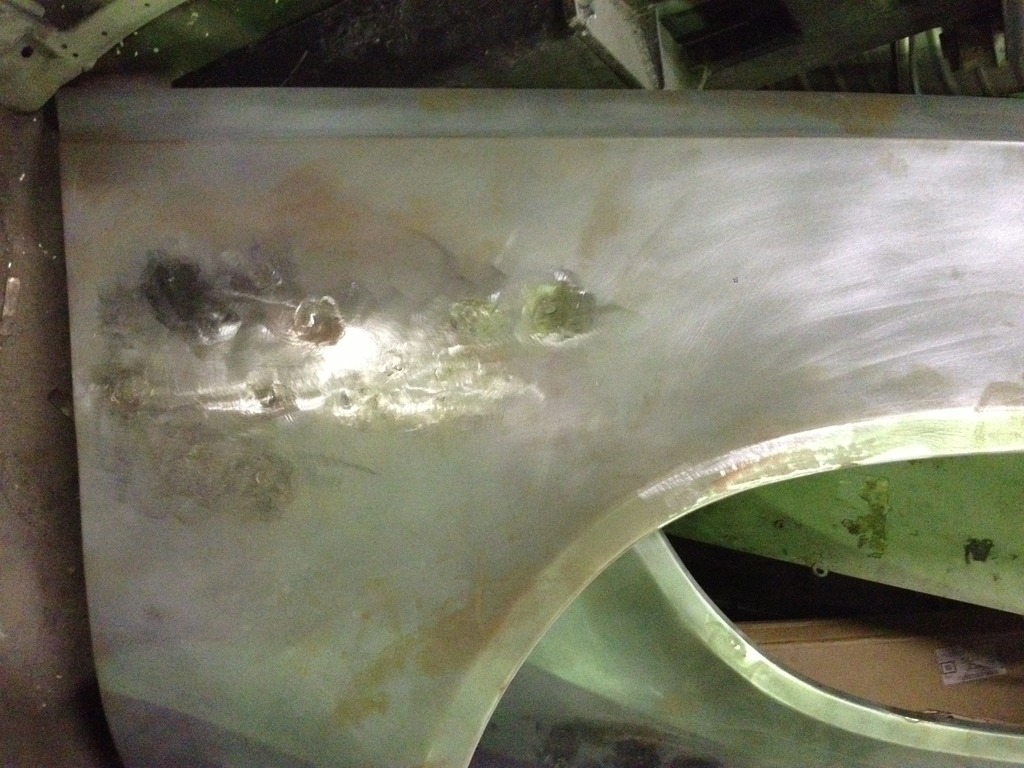
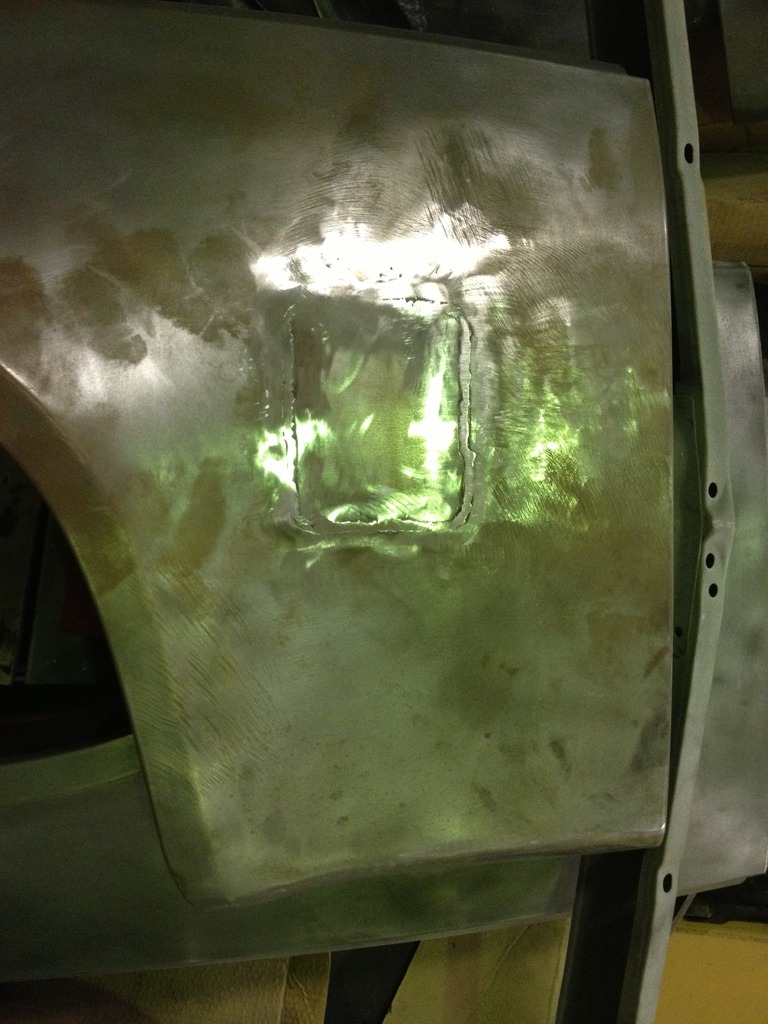
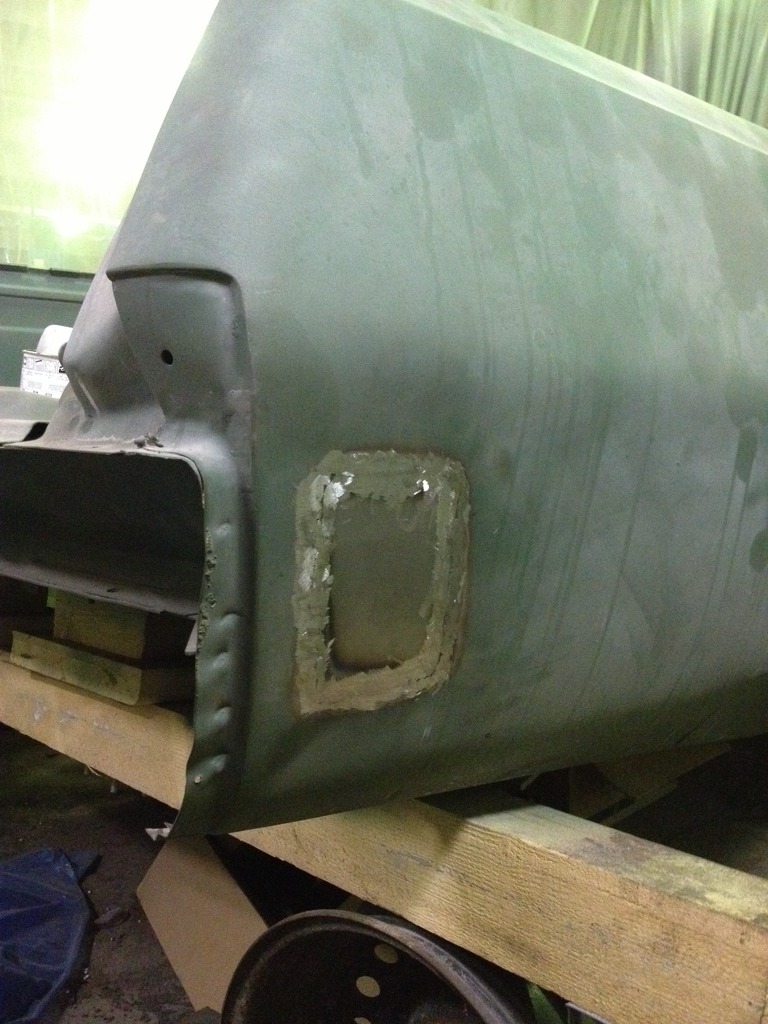
I was happy because body and panels were not like cheese with holes and for 40 year old car it was like new for me. First the idea of restoring was to weld and re-weld all problem places, including holes from 454 badges (I don't know how they appeared on my front fenders having 350 under hood), front chevy sign holder hole above the grill, hole from antenna in left fender, holes from some equipment in the bed. As for the floor panels, I made a decision to repair old, because I couldn't find direct fit elcamino floor panels, only chevelle that needed to be modified as it was told, because of price of them shipped to Russia and because of wasting time. May be it wasn't right decision.
The more car was sitting in service much more new ideas were flying in my head. Something protouring-modern-not like all-not the same-exclusive.
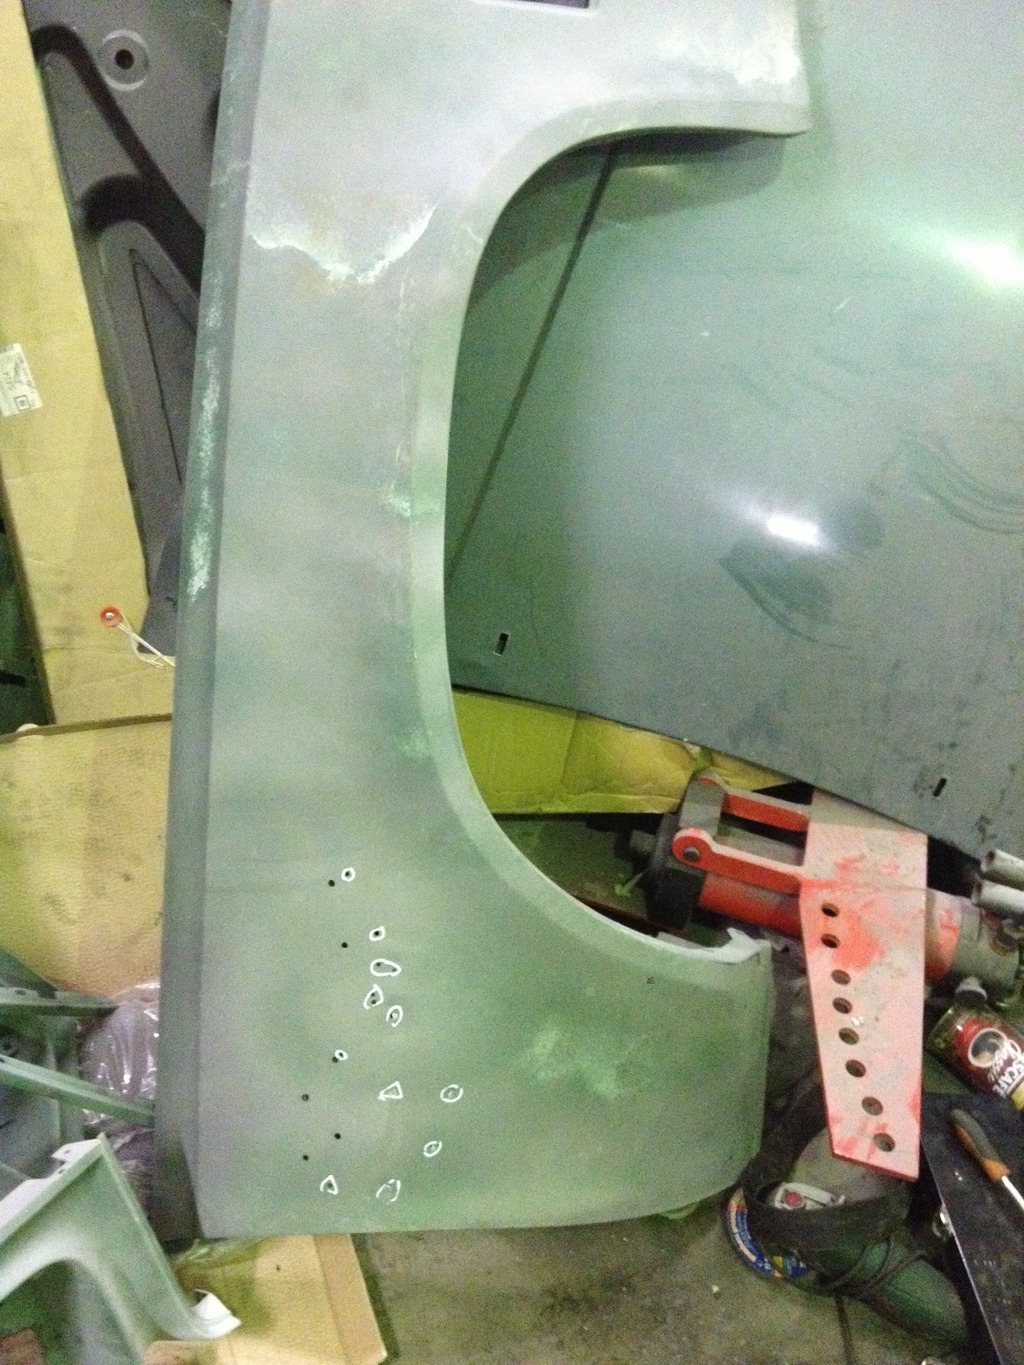
So one nice day while metal man was working on the holes I appeared in the service full of ideas and plans))) Smooth body, no more enormous quantity of chrome, no more badges, no more separate body panels, smooth smooth and smooth

No more holes under glass weatherstrip
No more millions of holes for different door mirrors mounts. Sport mirrors with left remote one from 77 buick were bought. I didn't know all this time till mirrors were painted and screwed on if they will directly fit my doors

No more spare wheels, no more smugglers box. Crazy idea of using bed space under the rear window broke my head.

No more roof holes
No more rear quaters and rear inside fenders rusty metal, no more holes for fender chrome moldings

No more lower chrome


No more badges
No more front/rear side markers
No more tailgate handle and badge

No more upper piece of grille sign holder
Repaired partly bed floor. I want it color coded to all the body but to make it like new it might be cutted out fully. Again the same Parts-shipping-waste time. It was repaired for how much it could be on that moment. Now I know that if you want to restore car in high quality before disassembling it you need to have all new, nos, used/restored parts, you need to have all the car laying behind you in boxes, everything that you need laying in one place and in one moment.

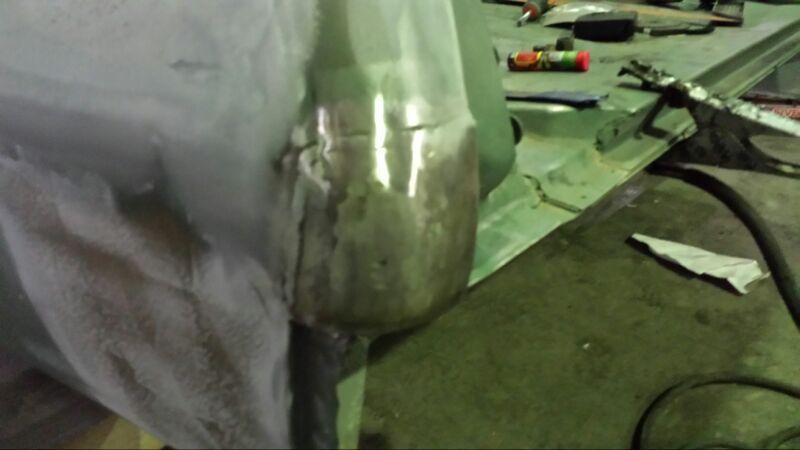
No more separate elements on the body. First custom handmade parts from my metal man were going in the game. Of coarse service guys managed to spoil everything in the best way. Corners were welded without measuring with tailgate on, so as a result clearences between the body and tailgate run away. And of coarse I noticed this only a year later when was mounting painted tailgate and searching for clearences. Sad but true.

"No more mister nice guy" )))
All of this time I was thinking about the color. Squared my head not to make a mistake. And it was chosen. Lamborghini Grigio Telesto. Goodbuy chrome moldings.

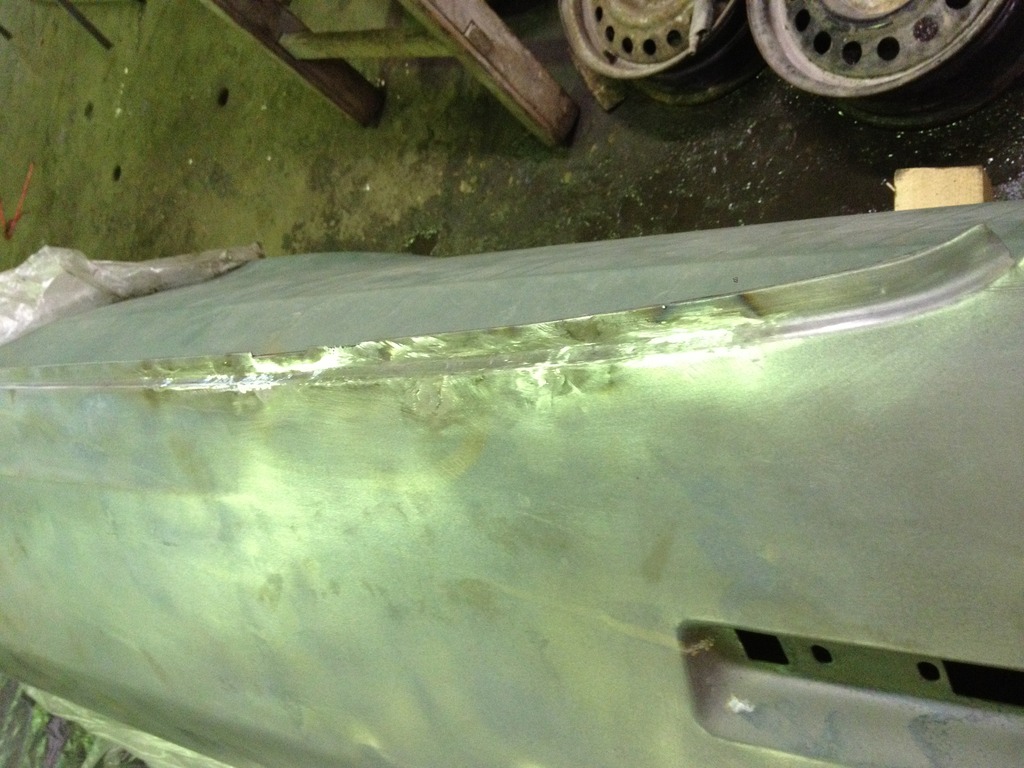
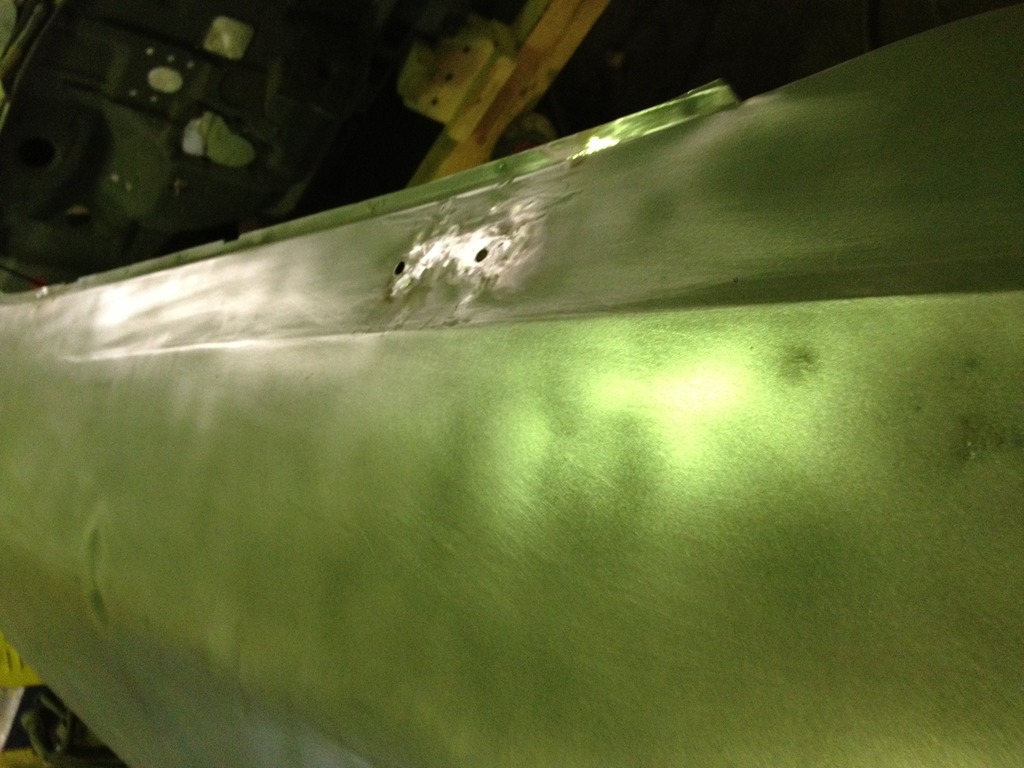
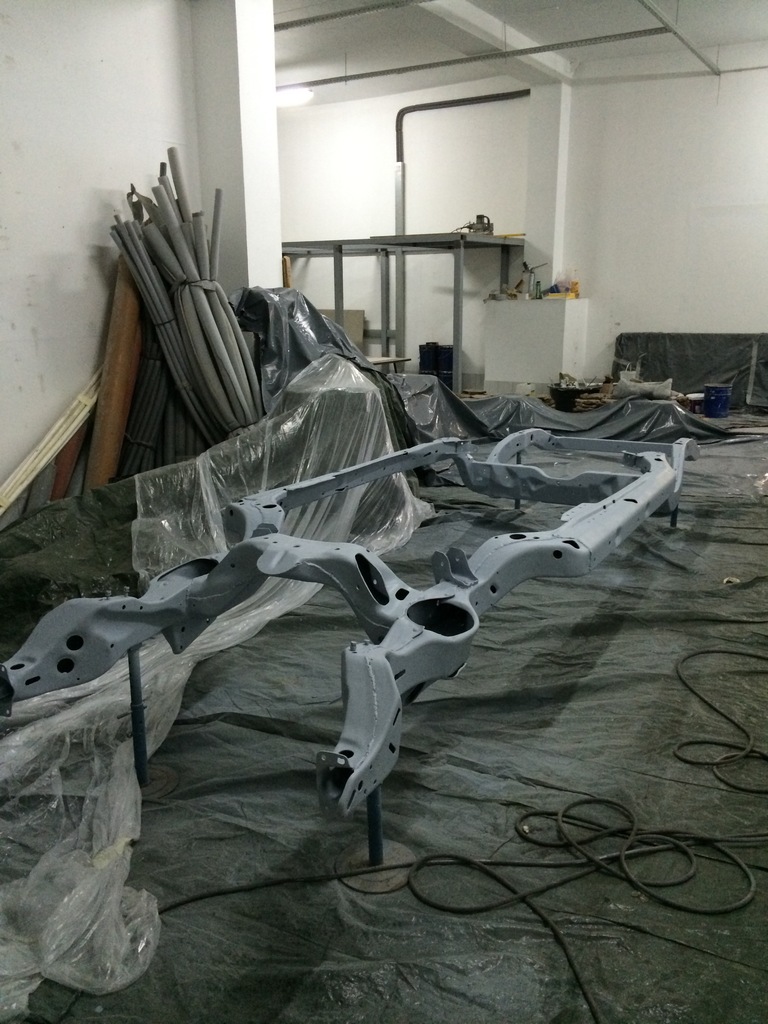
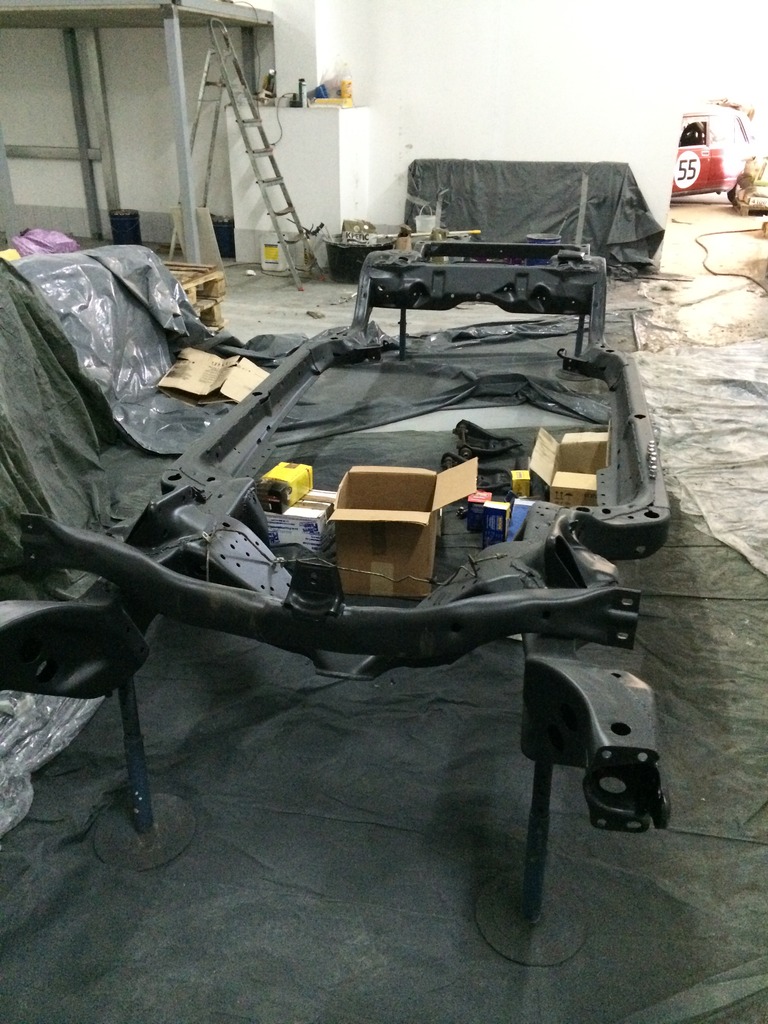
While body was getting tons of body filler to make surfaces plain, as painter said metal was deformed everywhere, may be from sand blasting may be because of 40 year history, frame, rear axle, a-arms, rear arms, swaybar and other small pieces were going to sand blasting and painting/powder coating.
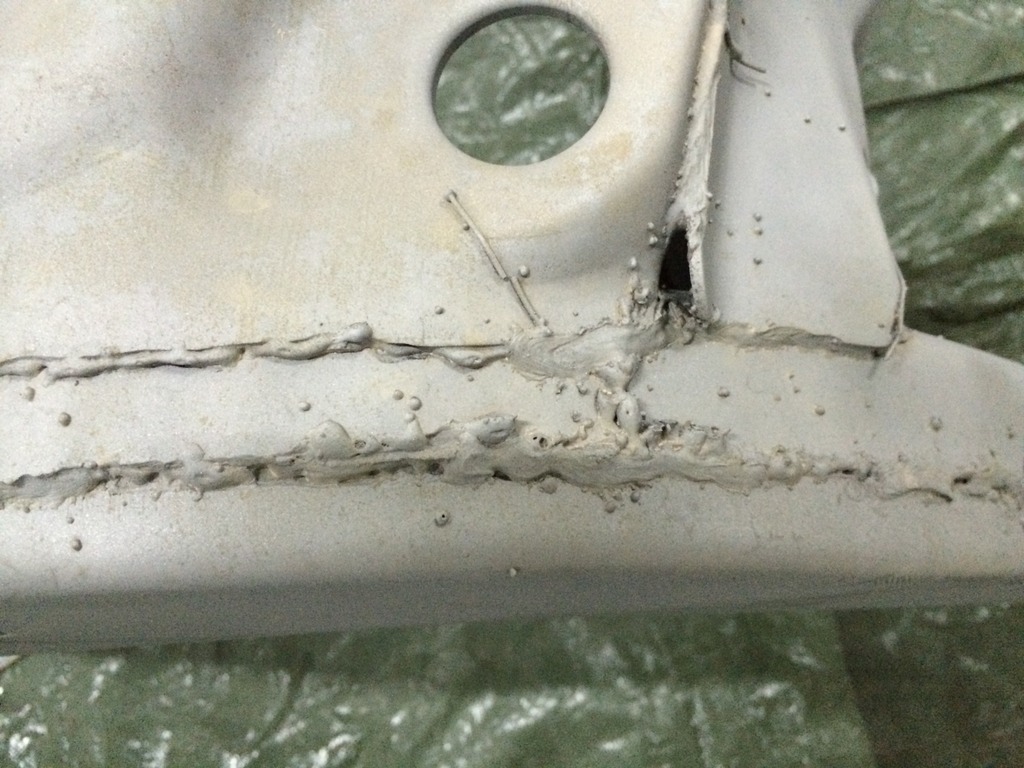
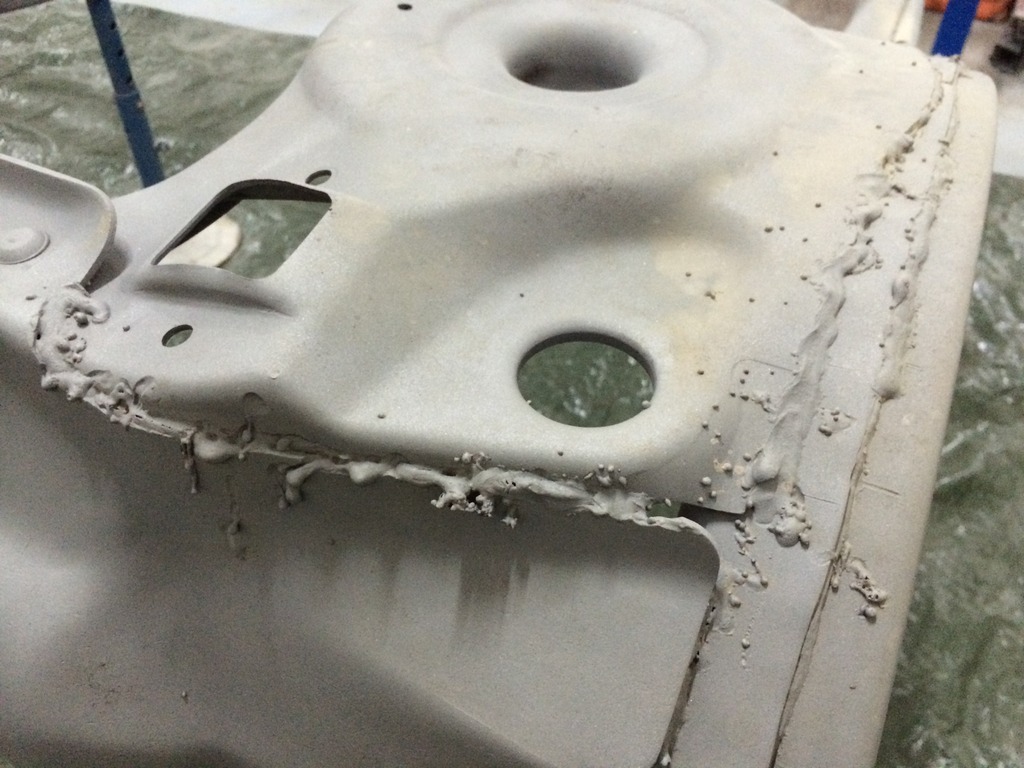
When the frame came from sand I was shocked when I saw how "accurate" were all the welds. As for me it was like a school boy weld lessons were made on my frame))) I understand that all welds are handmade on each frame but I wanted to see smth quality and solid.
So all welds were re-welded again and frame was painted with paint similar to your POR. There was no powder coat room found with frame dimensions.

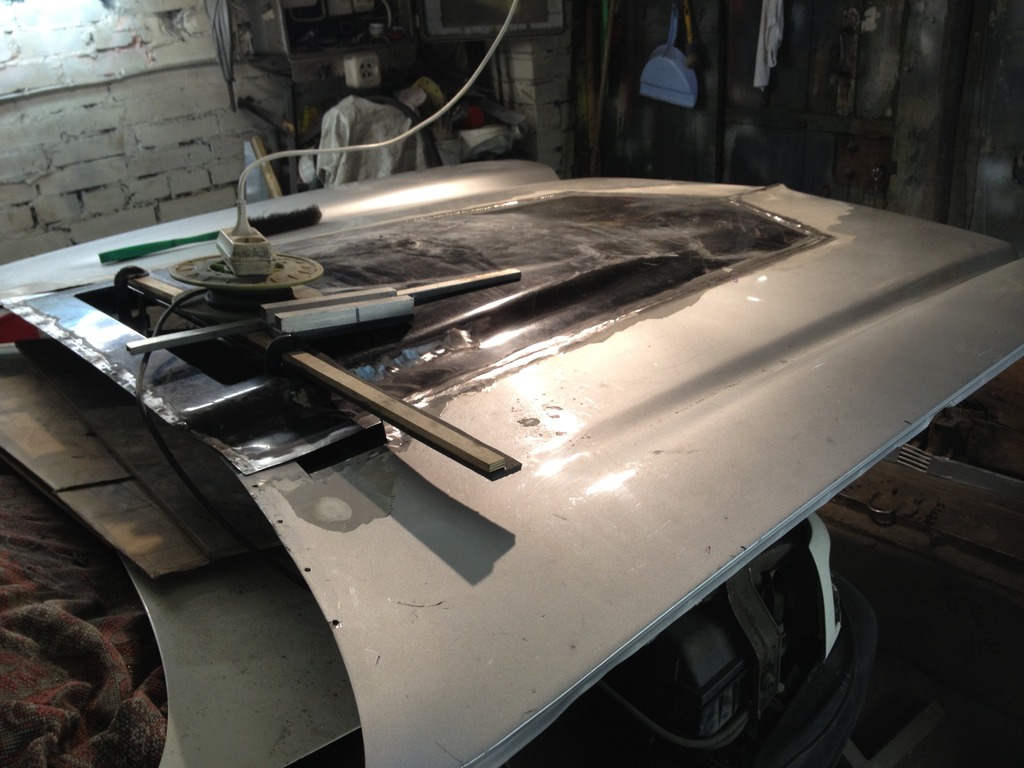
The only body part left alone with no work at it was hood. I was dreaming of cowl hood scoop smth like 70-72 cars head. I was crazy about cowl flapper, it was so coooool.
There were 2 ways - fiberglass hood and welded metal scoop. Fibeglass was a good idea because of scoop shape, all aftermarket metal ones were ugly welded in stock hood. Fiberglass were out of stock and made each per order in US of coarse. It wasn't good in fitting with fenders as I saw on other cars. I was afraid of different clearenses and curvature of the aftermarket item. And of coarse shipping price the same as hood cost with no warranty of getting non broken item.
Hours of web searching and this guy's car came on my way. Now his website is closed but I remember the address is scaldinghotelcamino.com. I saved some photos. I think you all know this car and may be its owner.

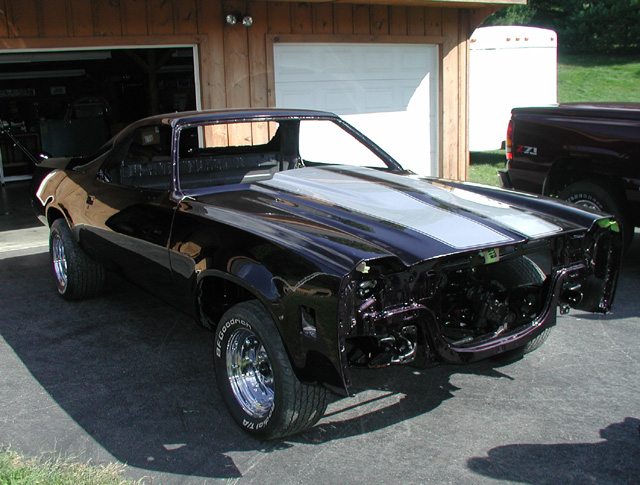
Thaaaaaaaaaaaaaaaaaaaat was all I want!!! 70-72 scoop welded in 73-77 hood! It was genious! This guy gave life to a great idea but not so great as I wanted it to be on my project)))
He only weld in upper list of metal from 70-72 hood, all reinforcements underneath were stock and his 70-72 hood was without flapper and with no cowl induction function.
"I will made first cowl induction 73-77 hood! Yes it will be first in the world!" - Such thoughts were flying in my head)))
But after sometime thinking of where I can find 70-72 cowl hood with flapper in Russia, not to pay for shipping from US for extremely heavy metal hood hit me back on the ground.
Thoughts were forgotten for sometimes as the rebuilt process went on. Sometimes I was looking through ebay for someparts, dreaming to find smth and one nice day I found it.
Yes, it was used 70-72 cowl induction hood, with flapper. Yes it was a little crumpled. Yes it was there on the other side of the ocean only for 150$. And yes it was only Pick up. Pick up items and foreign ebay buyers are the best friends as you know.
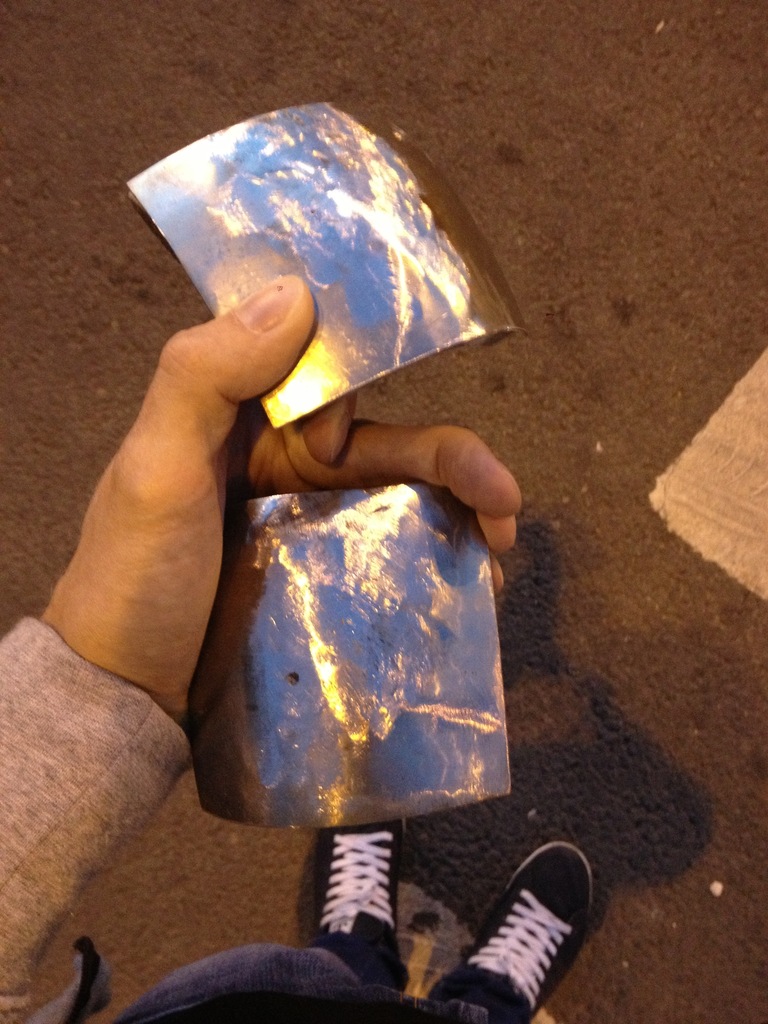
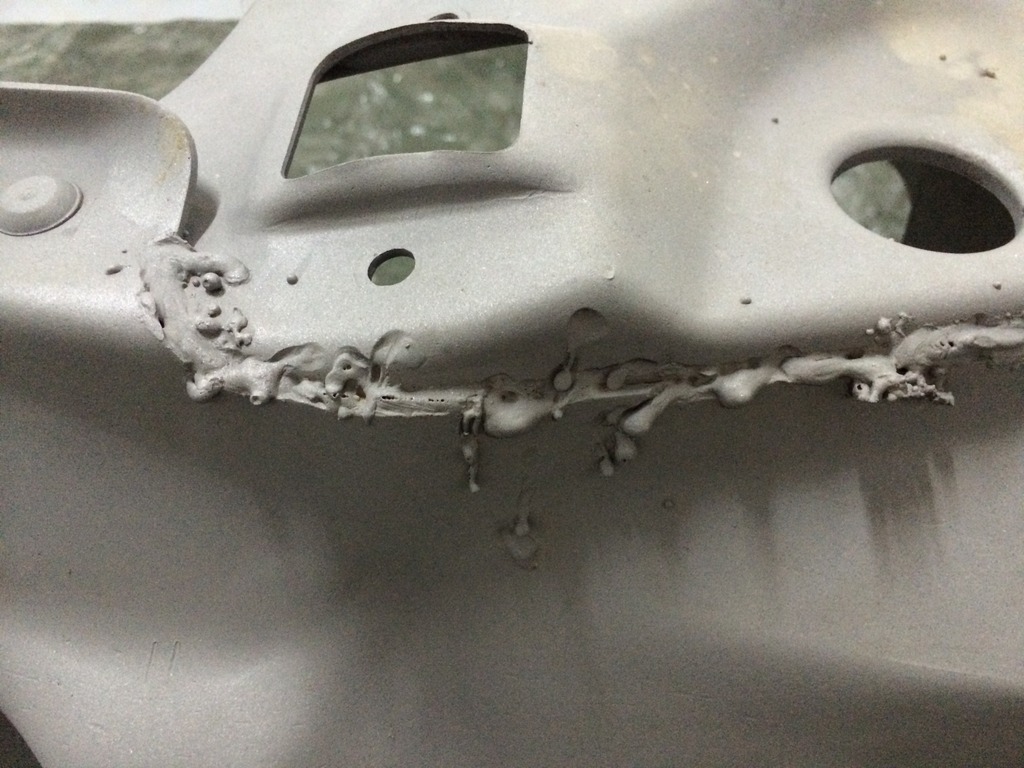
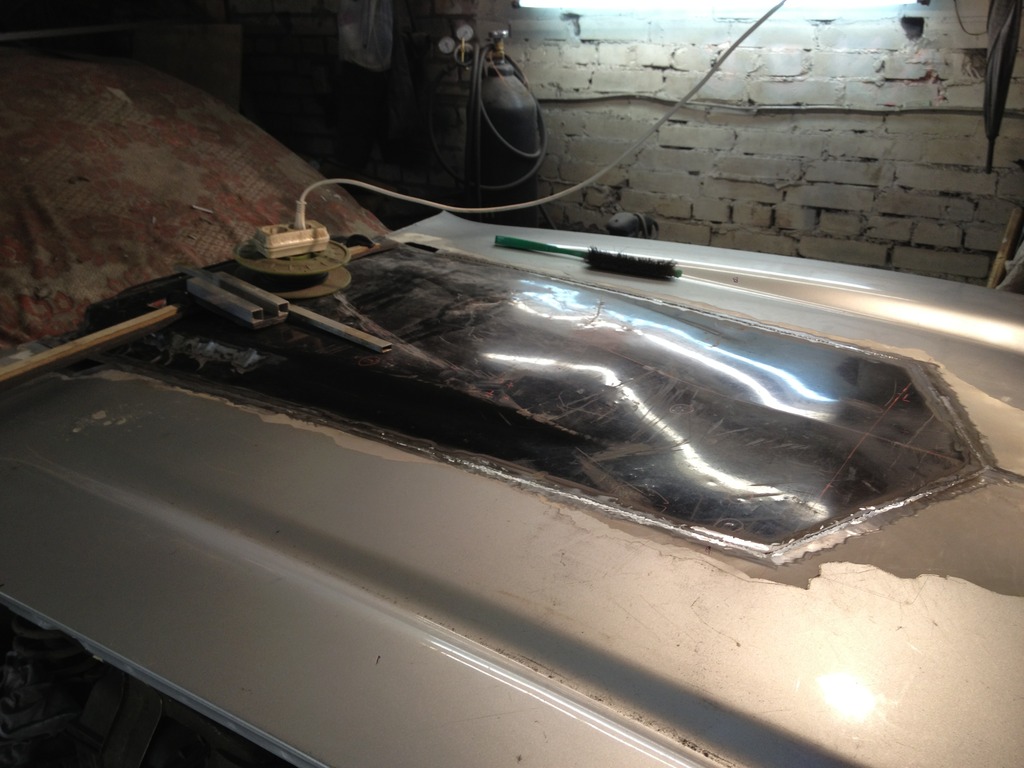
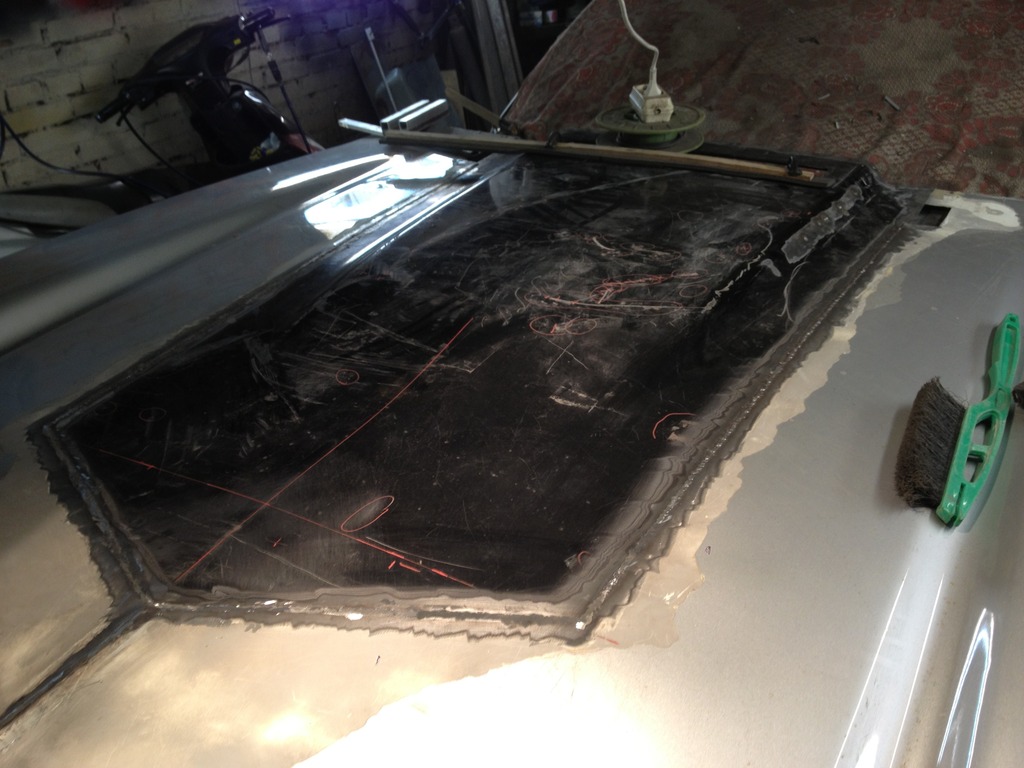
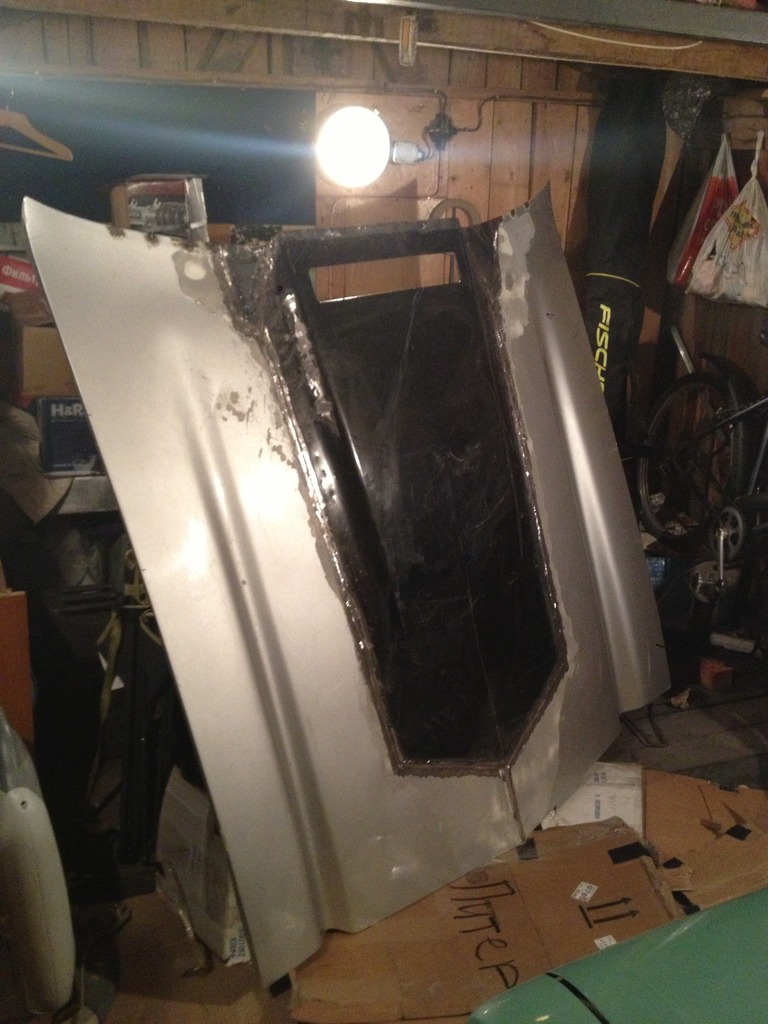
I, want, cowl hood, now, in Russia. I've contacted seller to know will he be able to ship hood somewhere, I forgot but I think he said of coarse only Pick it up. I don't know how but and don't remember after how much time of thinking I send seller this pics:
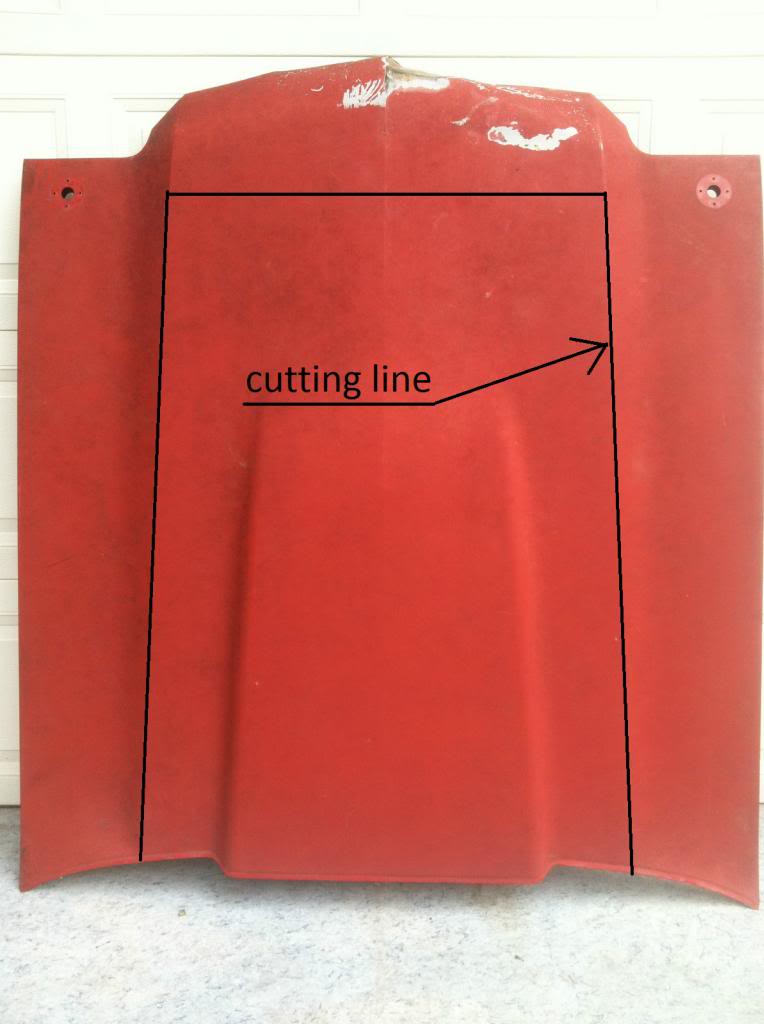

With the words - I will pay all 150$ and even more but please cut the center part of the hood with all reinforcemens and save please cowl induction section. Then ship it to my shipping company in Brooklyn and thats all from you. PLease.
I don't understand even now how this guy made up his mind to help some foreign guy from other side of the planet to do such a strange request but it was a great win.
Yes he made this cuts as I planned, yes he shipped to Brooklyn and somehow after a month I got these
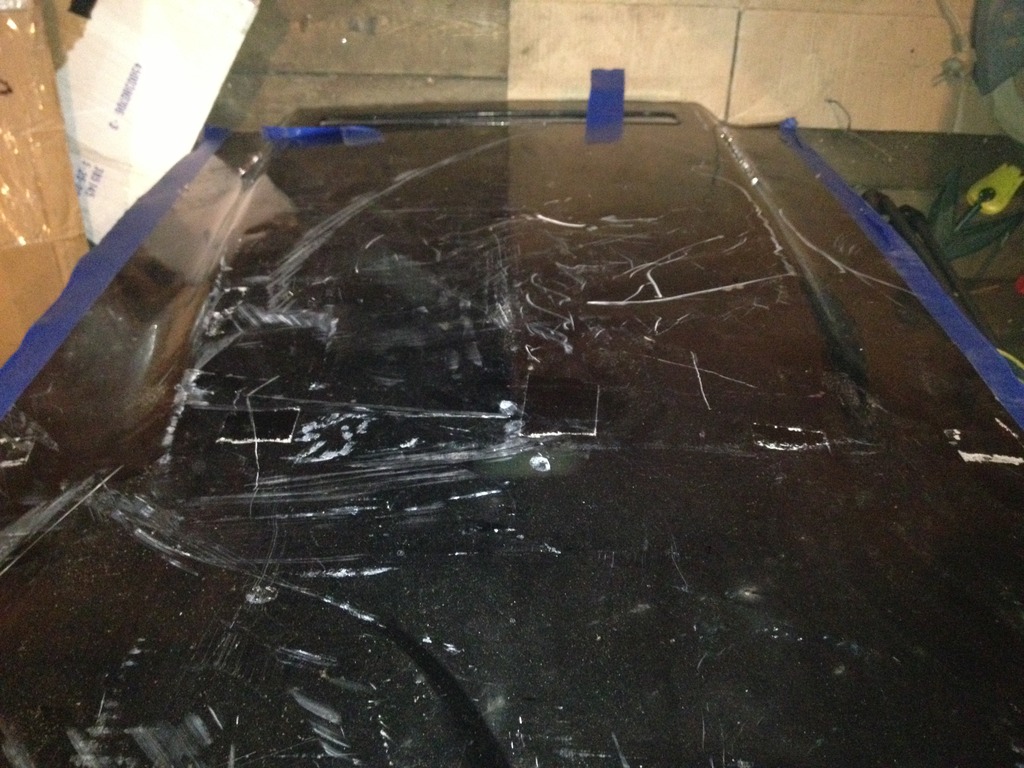

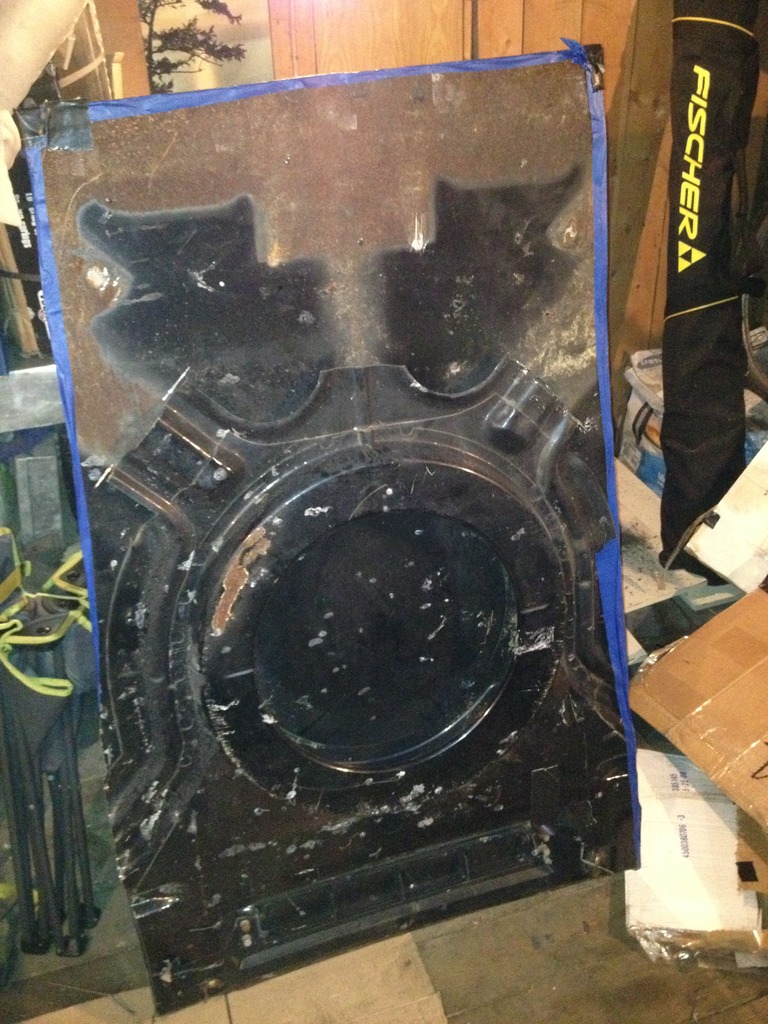
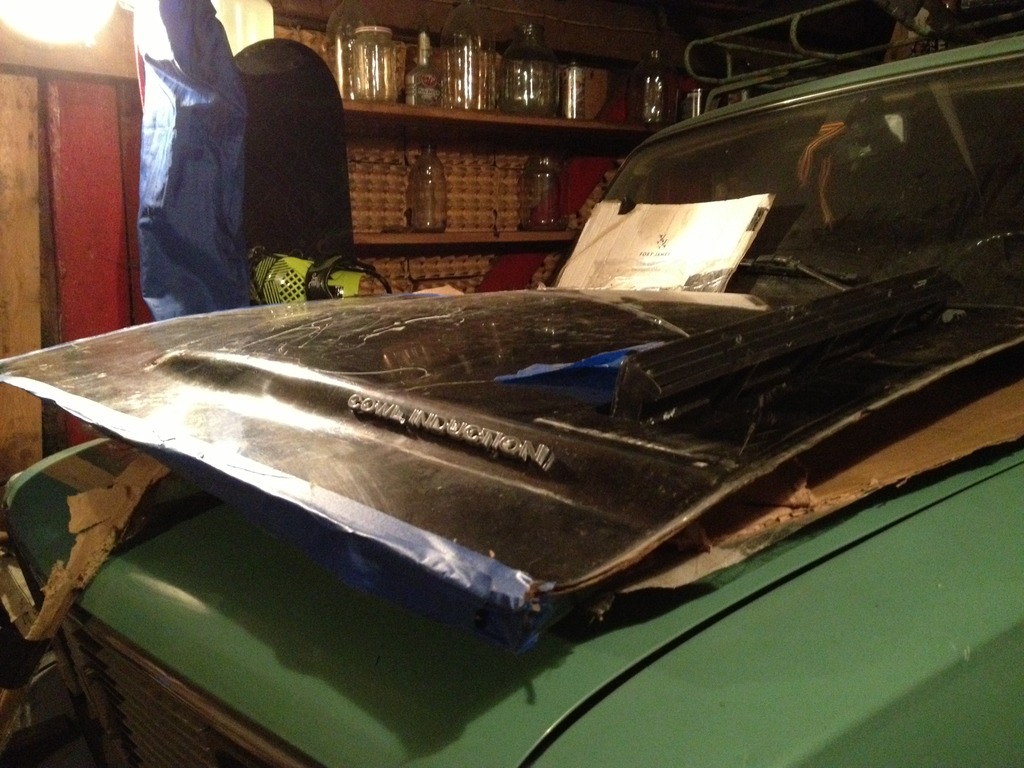
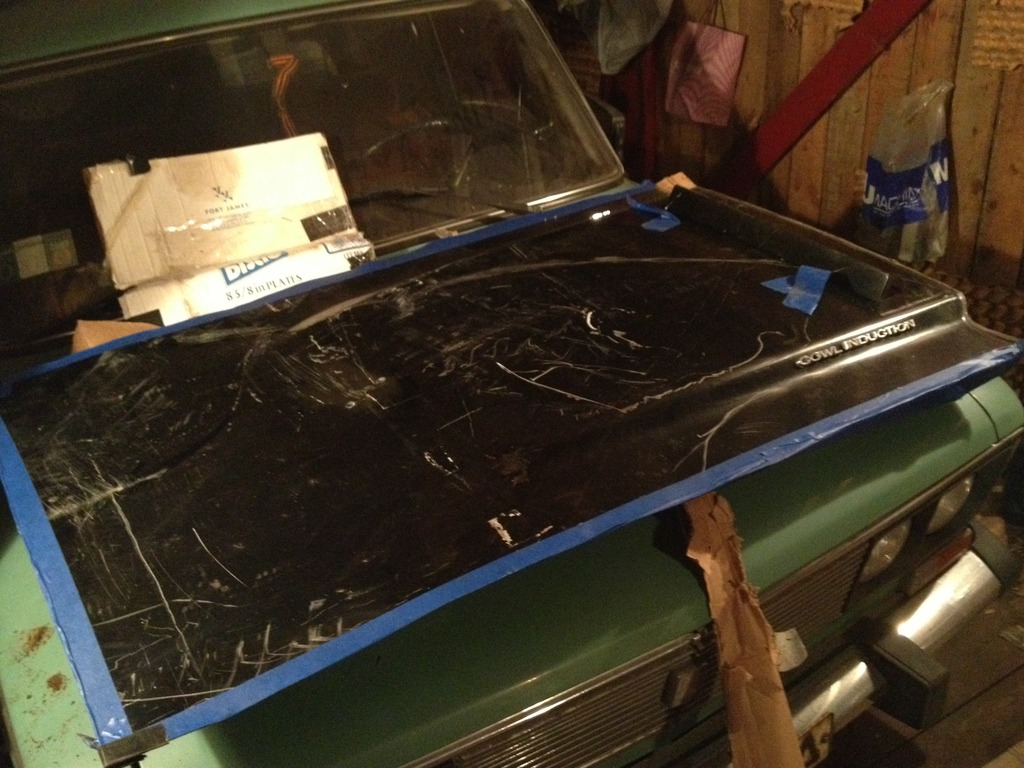
It was dented during shipping, scratched, but it was a real not reproduction 45 years old nowadays piece of history!!!
On the back stage is my grandpa's green VAZ 2106 as I remember 1986 production year.
to be continued
builtnotbought- G3GM Member

- Street Cred : 3
Re: '74 El Camino "Project Badass"
![]() by Joe73 Fri Jan 01, 2016 6:14 pm
by Joe73 Fri Jan 01, 2016 6:14 pm
Cant wait to see that cowl on the stock hood.

Joe73- Donating Member

- Street Cred : 83
Re: '74 El Camino "Project Badass"
![]() by builtnotbought Fri Jan 01, 2016 6:45 pm
by builtnotbought Fri Jan 01, 2016 6:45 pm
I will prepare photos of the next part and you will see=)
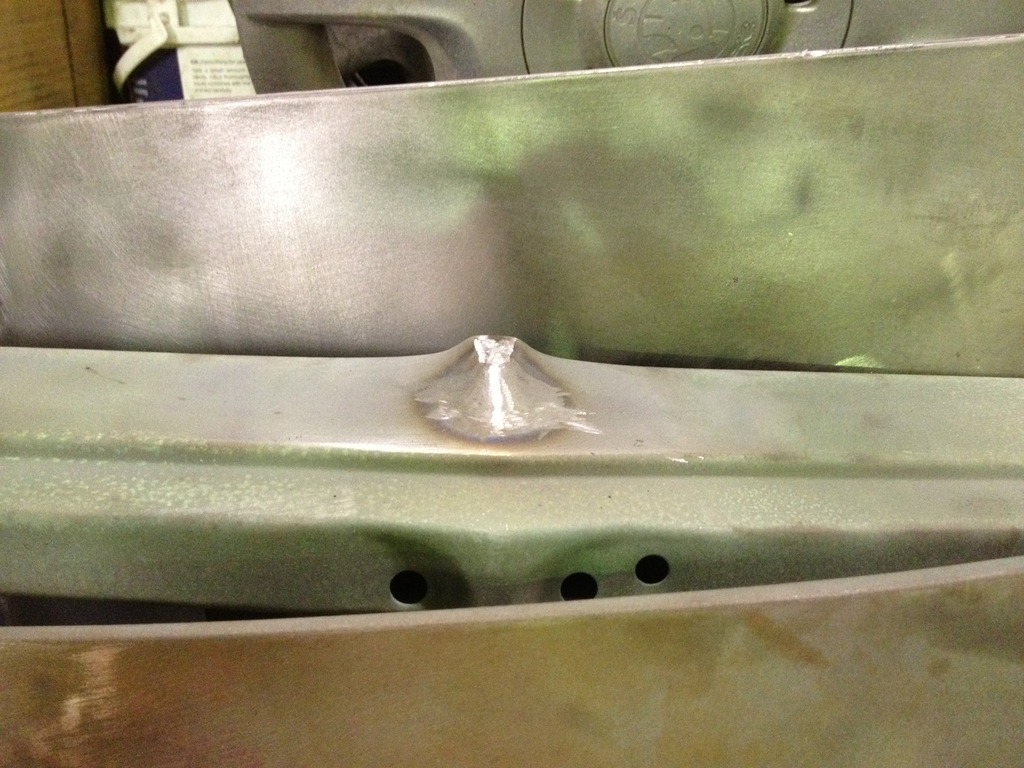
As for the wavy panels on this only car - it has a very very thick metal comparing to modern cars. Body guys were not ready for such a thickness, they tried to straight all dented parts with spotter (I think it's called this way in english, a thing that get welded to piece of metal and then pulling to straigh the sheet) so they used a usual hammer )))
May be you are right about sand but it would be a crime to pull off 2 layers of paint by hands. We do not have any dustless blasting, I heard only about blasting with dry ice but it's much more expensive than sanding. It's my first restoration and of coarse it's full of mistakes as I had no experience.
builtnotbought- G3GM Member
- Street Cred : 3
Re: '74 El Camino "Project Badass"
![]() by DaveFury Fri Jan 01, 2016 7:54 pm
by DaveFury Fri Jan 01, 2016 7:54 pm
Great progress on the Camino. Good to see the rust was not worse than it appeared. I love the Cowl induction scoop idea on your hood. It will look fantastic! Keep up the great work and keep the pictures coming.
Have a Happy New Year!
Dave W.

DaveFury- G3GM Member
- Street Cred : 5
Re: '74 El Camino "Project Badass"
![]() by knightfan26917 Mon Jan 04, 2016 12:53 am
by knightfan26917 Mon Jan 04, 2016 12:53 am
Cort > www.oldcarsstronghearts.com
pigValve.paceMaker.cowValve | 1979 Caprice Classic (needs new owner)
"Are we having fun yet?" __ Nickelback __ 'This Is How You Remind Me'

knightfan26917- G3GM Senior Member

- Street Cred : 8
Re: '74 El Camino "Project Badass"
![]() by builtnotbought Mon Jan 04, 2016 6:24 pm
by builtnotbought Mon Jan 04, 2016 6:24 pm
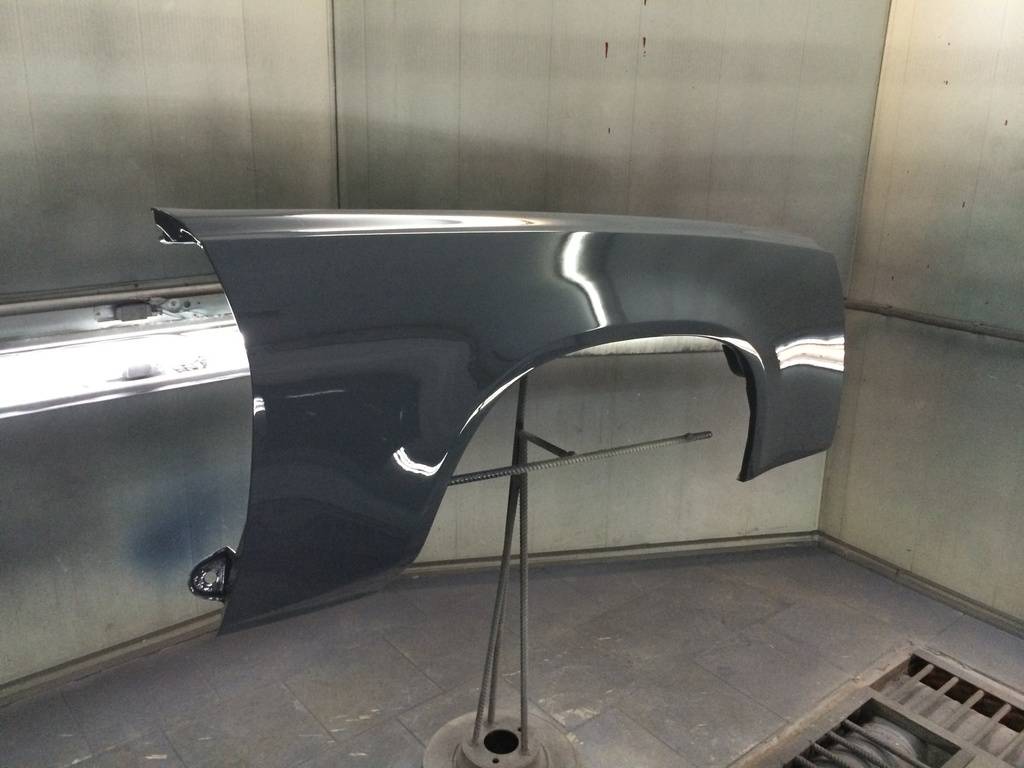
Here comes the hood directly from my metal man. In the end of work it appeared to be cheaper than fiberglass shipped hood. But there was a mystery, nobody knew including me if it will close without hitting the firewall or not as nobody fitted the hood after welding in new center part.
After the hood was ready everything was prepared and painted. I think came out well as for the color. As for the quality of works now after 2 years I don't like it.


Till that moment, it was in Jan 2014, 2 years ago, assembling of the car began and still isn't over.
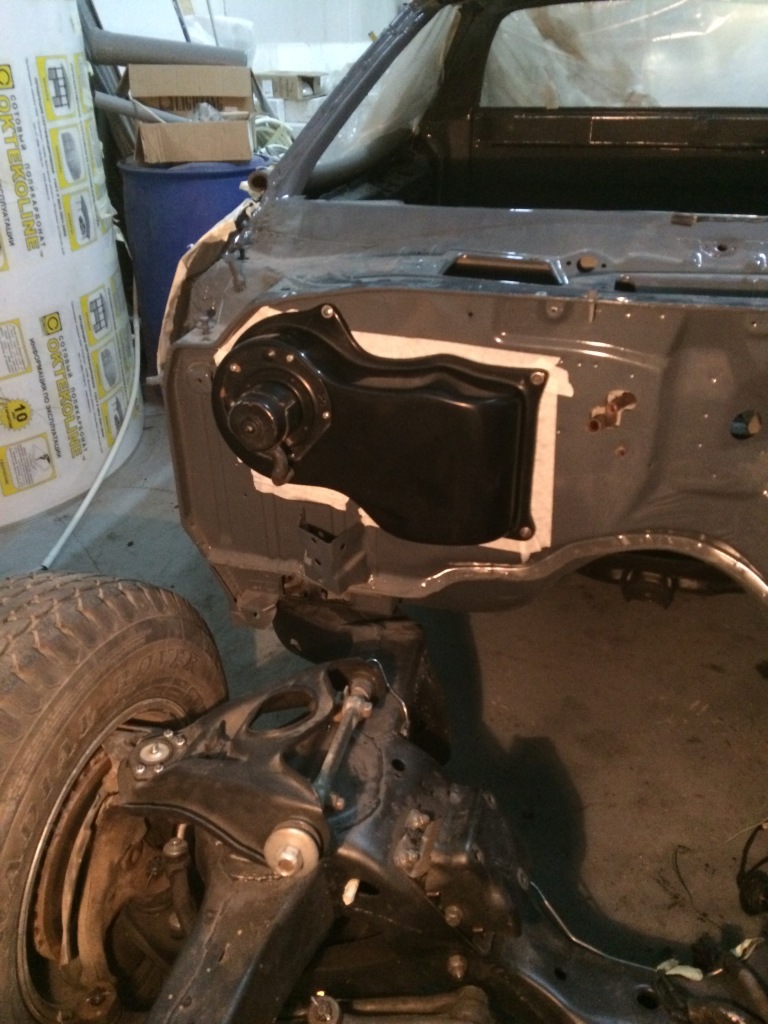
During the car was in paint shop I with the help of my metal man restored radiator support and front inner fenders after they were eaten by batteries. They were sandblasted/powdercoated and then colormatched to car color.
But it was a surprize 2 years later that right inner fender isn't fitting ok the right fender because about 1/4 of inner fender was cutted out and made again in steel.

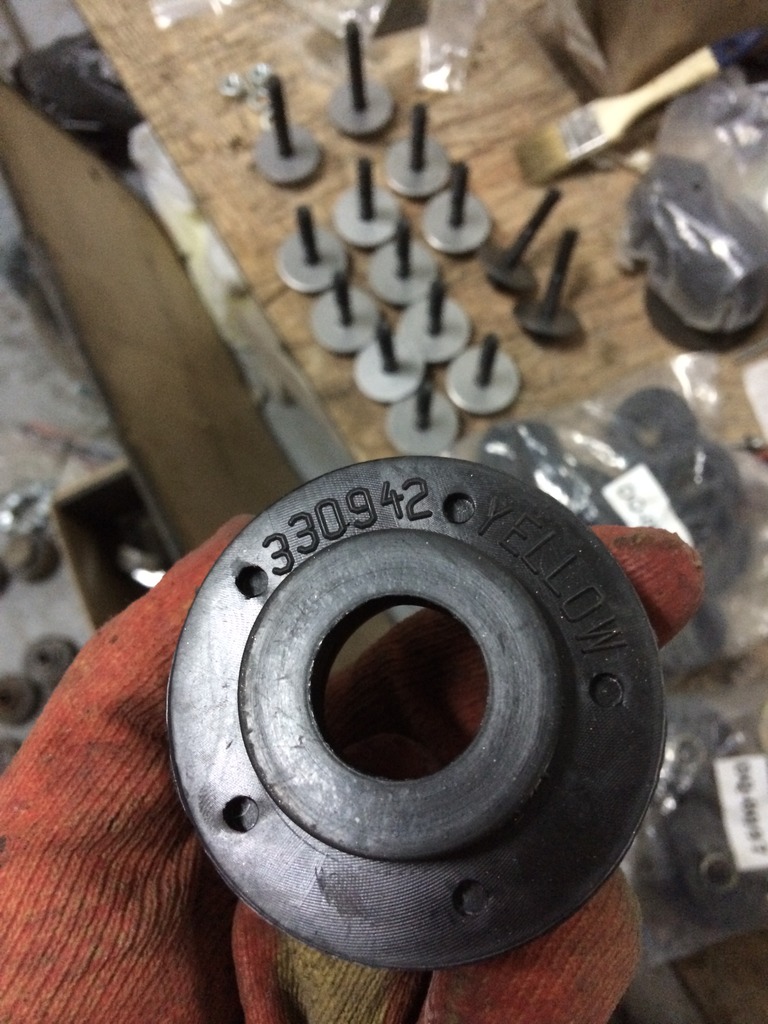
Frame was painted with smth sismilar to US POR. First time I had thoughts about buying polyurethane a-arms/rear arms/body bushings but read somewhere that car will be too stiff with them. As I wasn't building any sportscar I decided to buy all new stock rubber MOOG front/rear suspension bushings, balljoints, idlers arm, swaybar bushings, sway bar links, all new tie rod ends, all new rubber stop bumps. Guy's from MOOG are very helpfull, because I discover that there were several types of bushings in front a-arms and didn't know what to choose. Besides that all new Energy Susp engine mounts, trans mount.
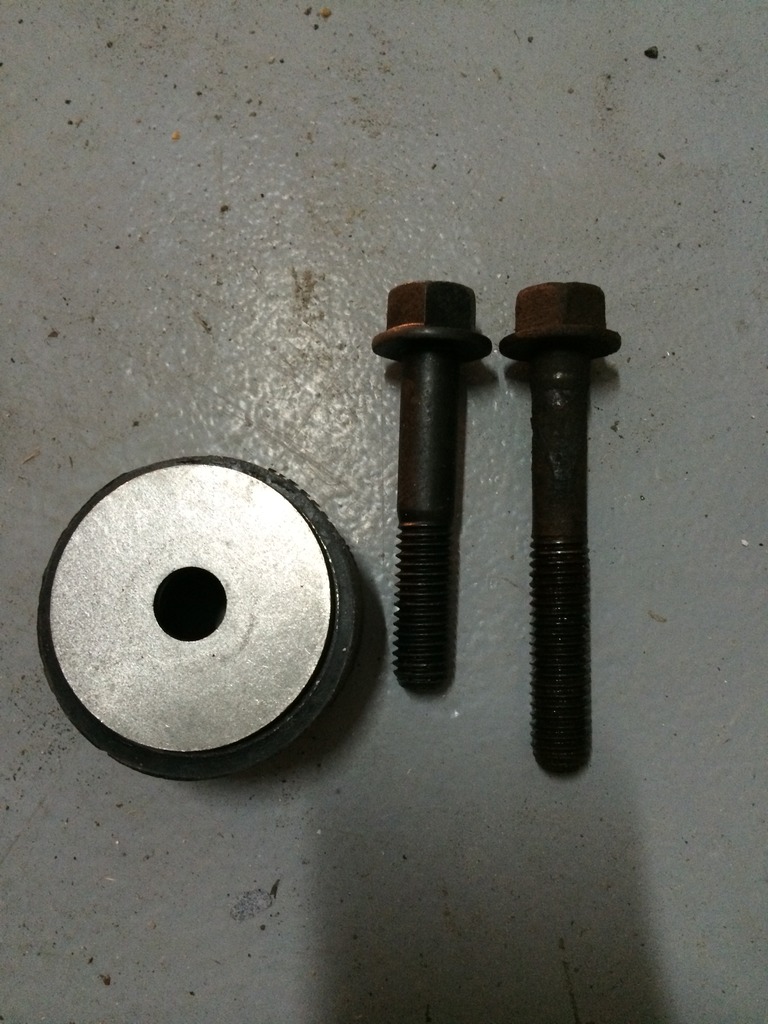
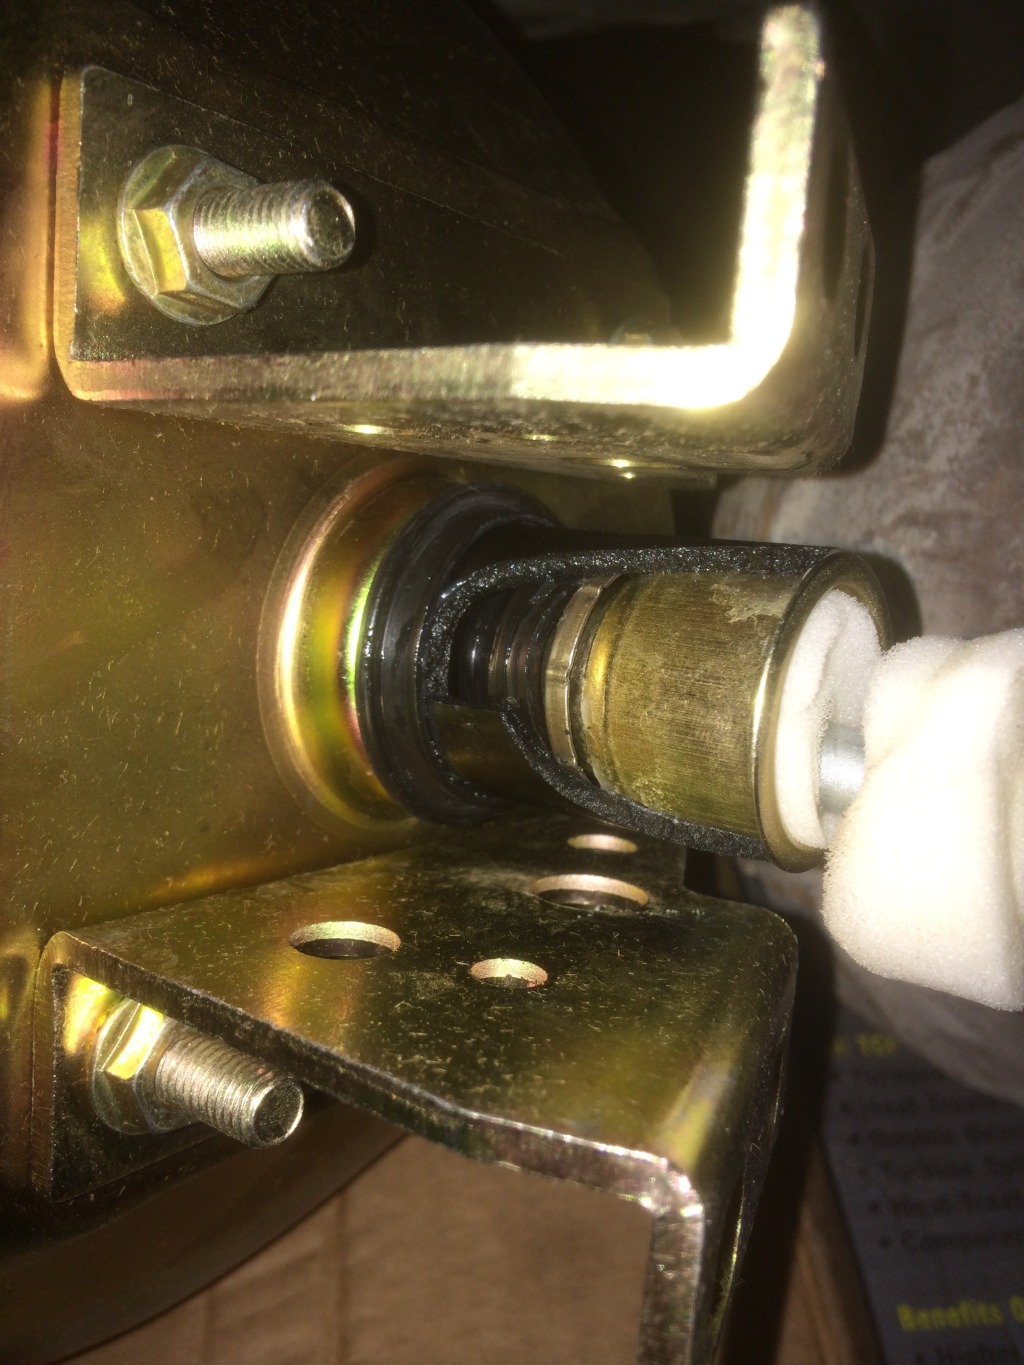
When screwing on th350 mount like it was in description first one of the bolts came out with the thread on it. After metric thread was tapped and when tighting again second inch bolt came out of the thread. Second hole was tapped metric, trans mount was tuned a little and metric bolts with hard loctite were screwed in. Don't know how long they will be ok but that is the way it's done for now. The reason of that thing is that Energy Susp trans mount is made in the way that bolts are not simply holding mount on the trans, bolts compress a rubber part of mount with metal plate and are always under stress. May be it's a smth modern in trans mount science but 40 years old th350 couldn't hold that stress anyway.
As for th350, it was rebuild with full rebiuld kit from MonsterTransmission, adding a new O-ring or race I forgot how it's cold to hold more torque.
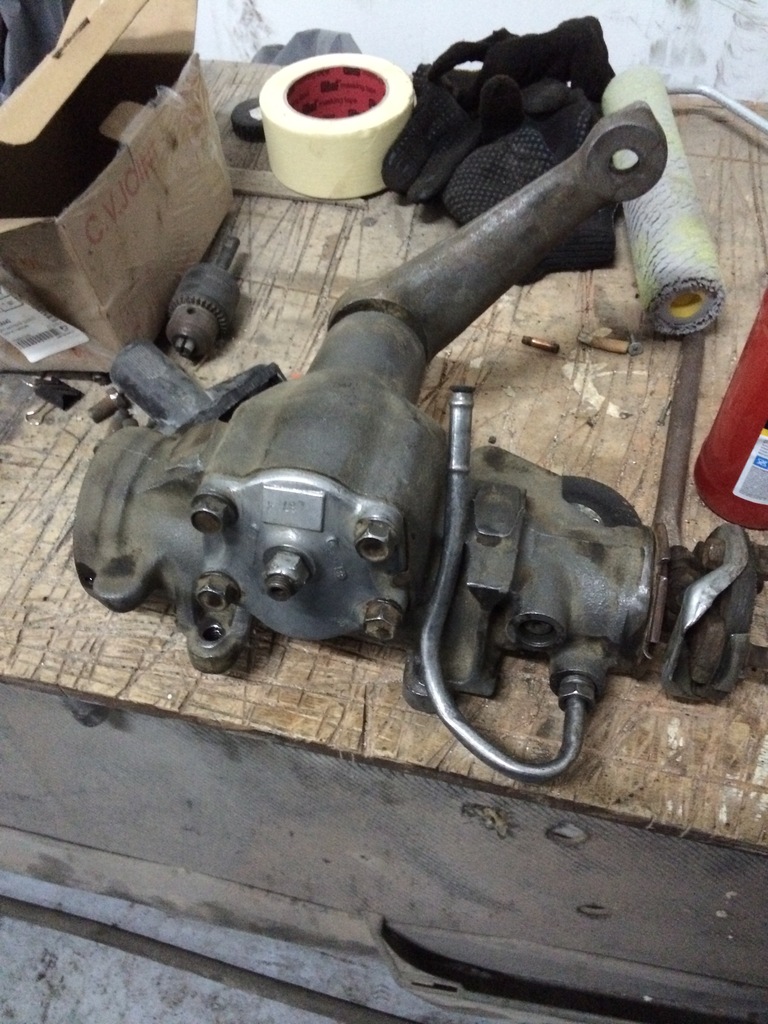
Steering unit I think is in good shape and there were no plans in buying smth ne or modern so I just cleaned it.

Body bushings with hardware were bought from ThePartsplaceinc. I know that it was a kit for many a-bodies and several bushings were not used. But the real surprize was that new bolts were shorter that stock and won't fit anyway. Several weeks of emailing, waiting, but with the result - guys send me new longer bolts for free! Great work! Wanted to find a good scheme of frame bushings installation, where are empty where are with bolts, found nothing. Installed as it looked right and as I remembered.
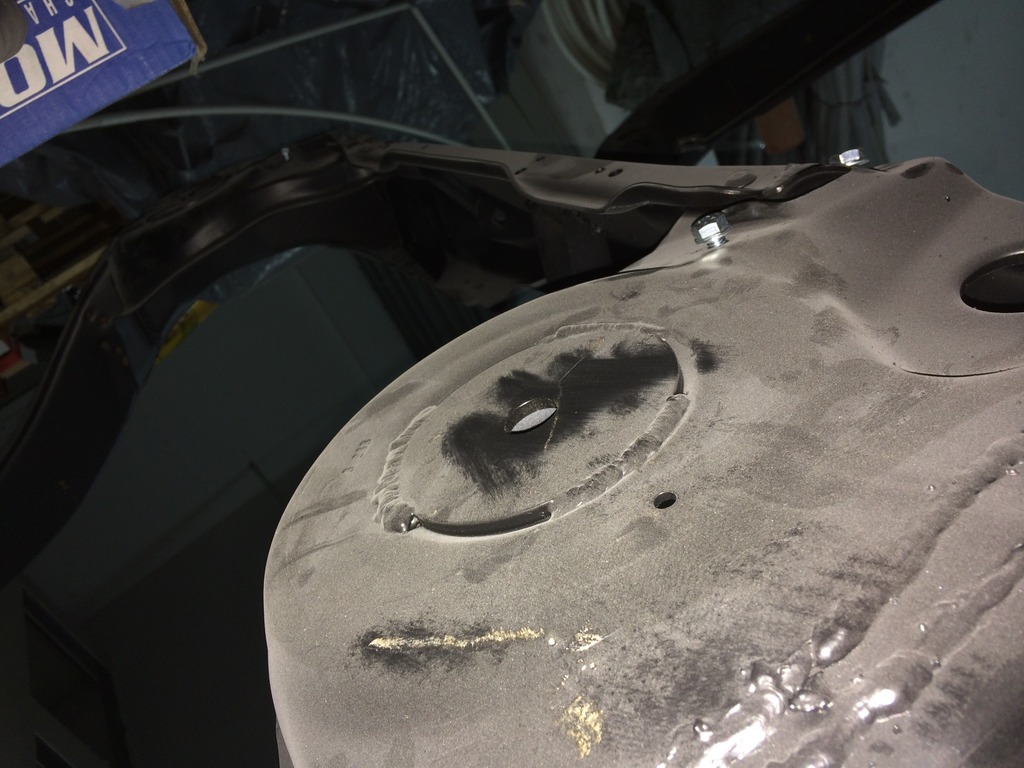
Fuel line and brake lines were in great shape so were only cleaned. Driver's side metal line that was as I guess for vapor canister was thrown away. Later a harness from fuel sending unit was runned there. It was a surprize that there was no wire from gas tank to cluster, but when the car was alive fuel gauge showed info, don't know how. Sending unit was ok, only sock was changed. Fuel tank had one weld in the corner but was painted with the same paint as frame.
As for the rear end it wasn't rebuilt, of coarse I want new gears, new diff, disk brakes...but it's no aligning with my budget now. So, drums, free diff and I forgot how much 2.87 or so ratio for now.
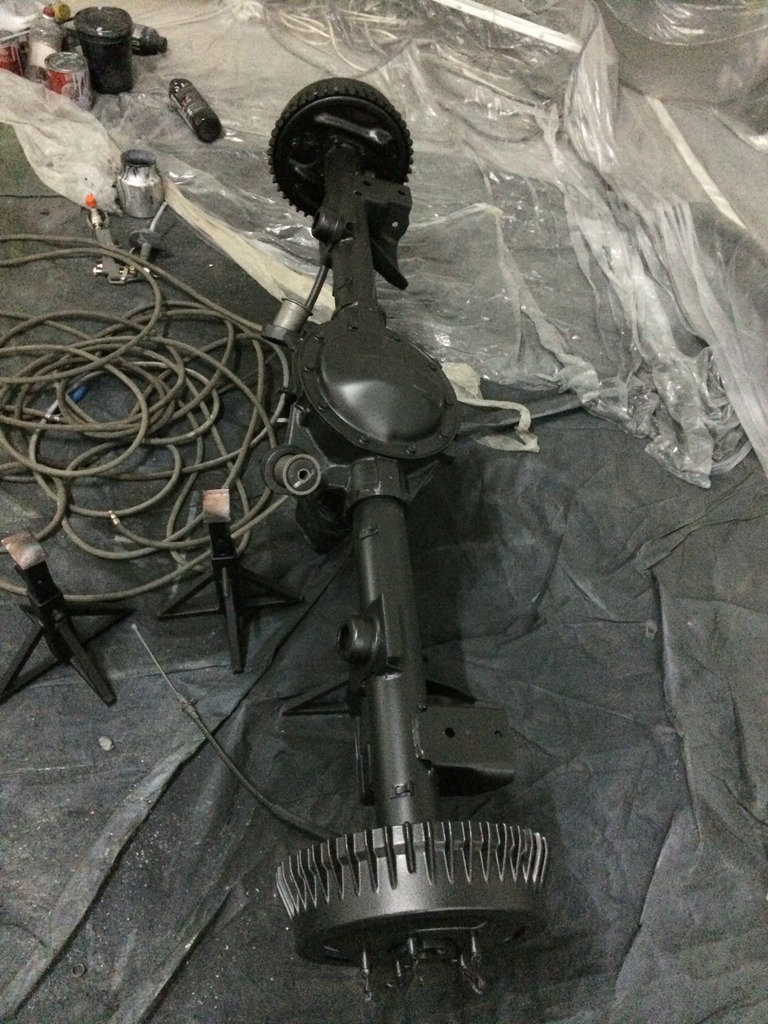
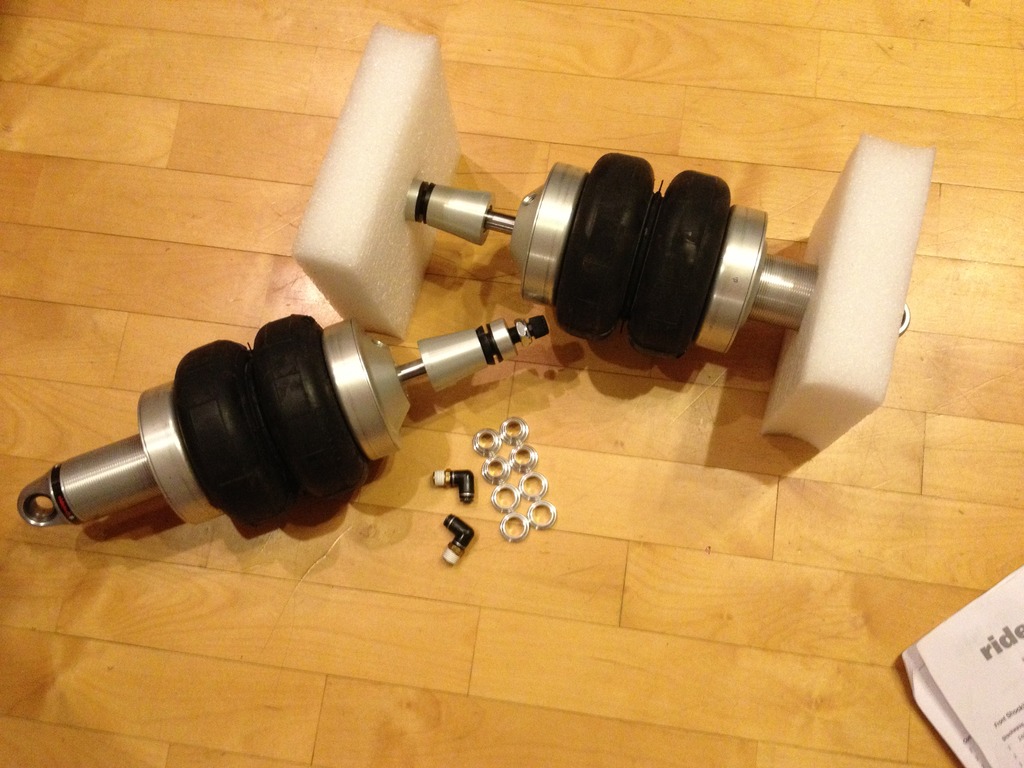
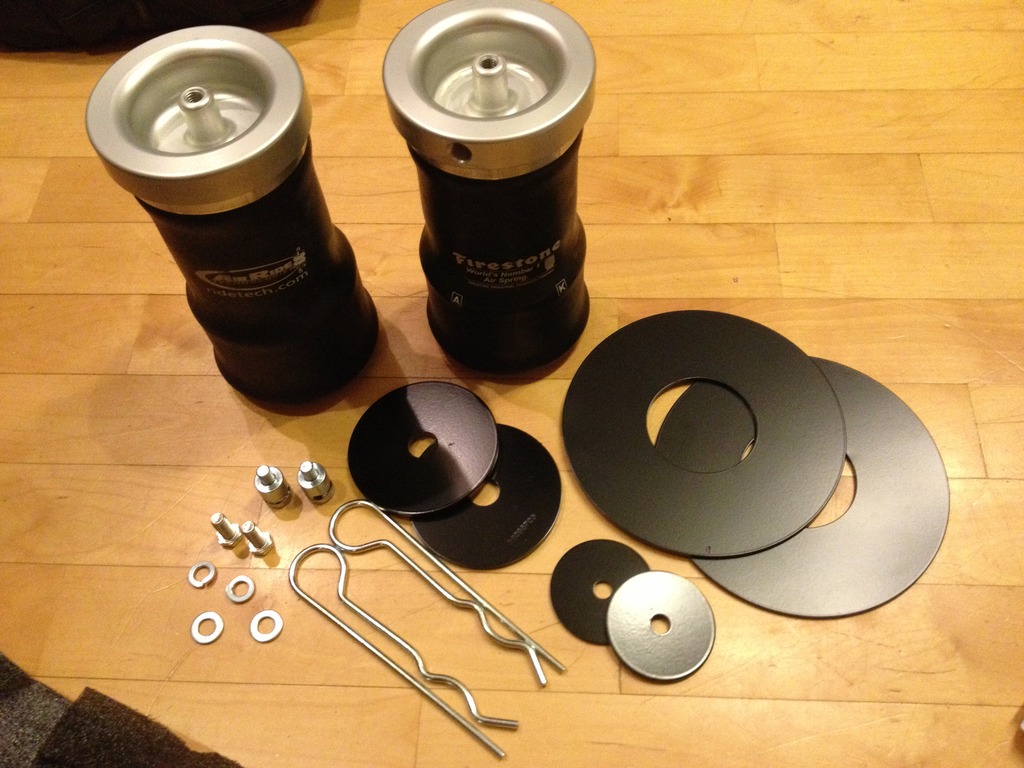
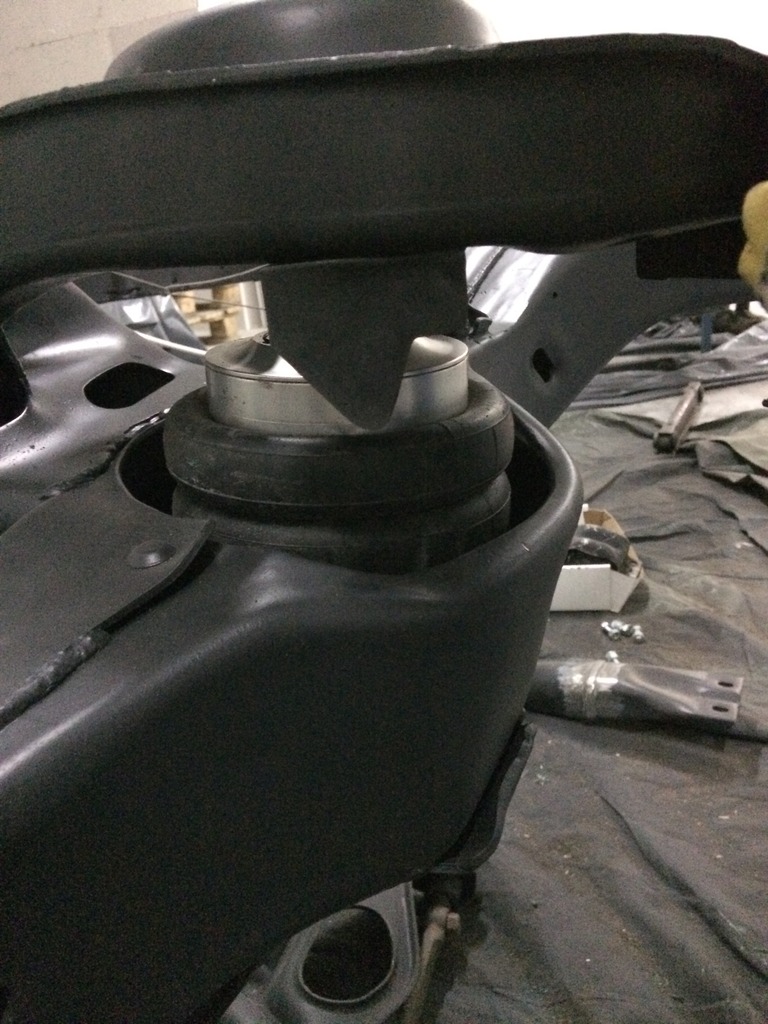
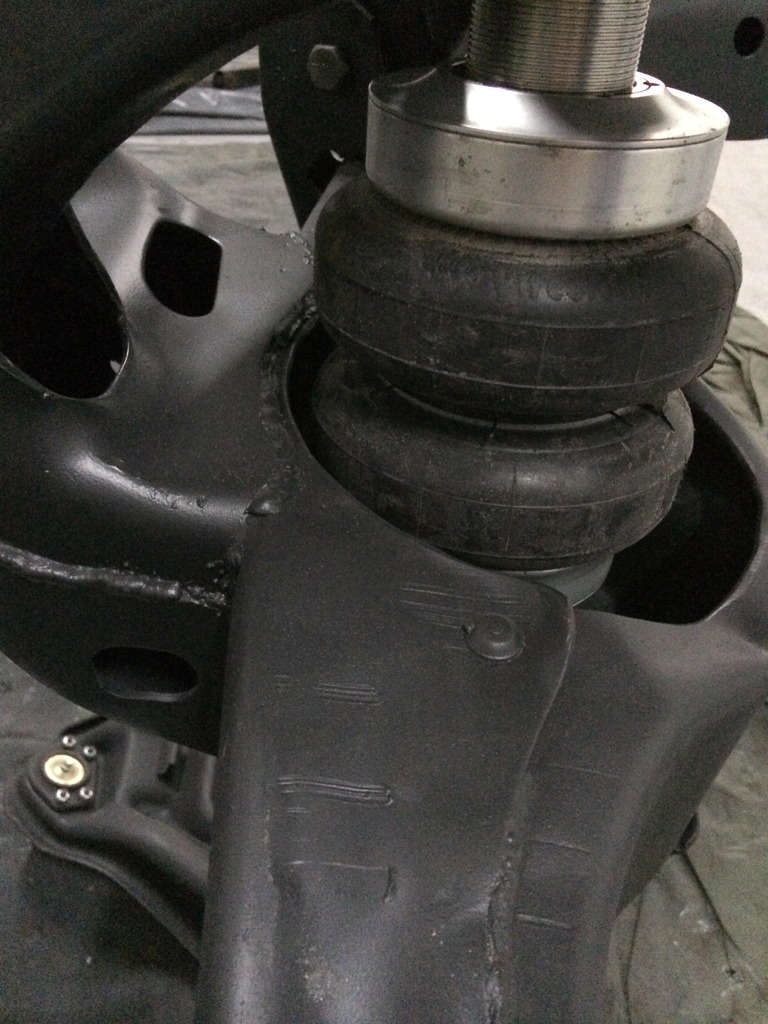
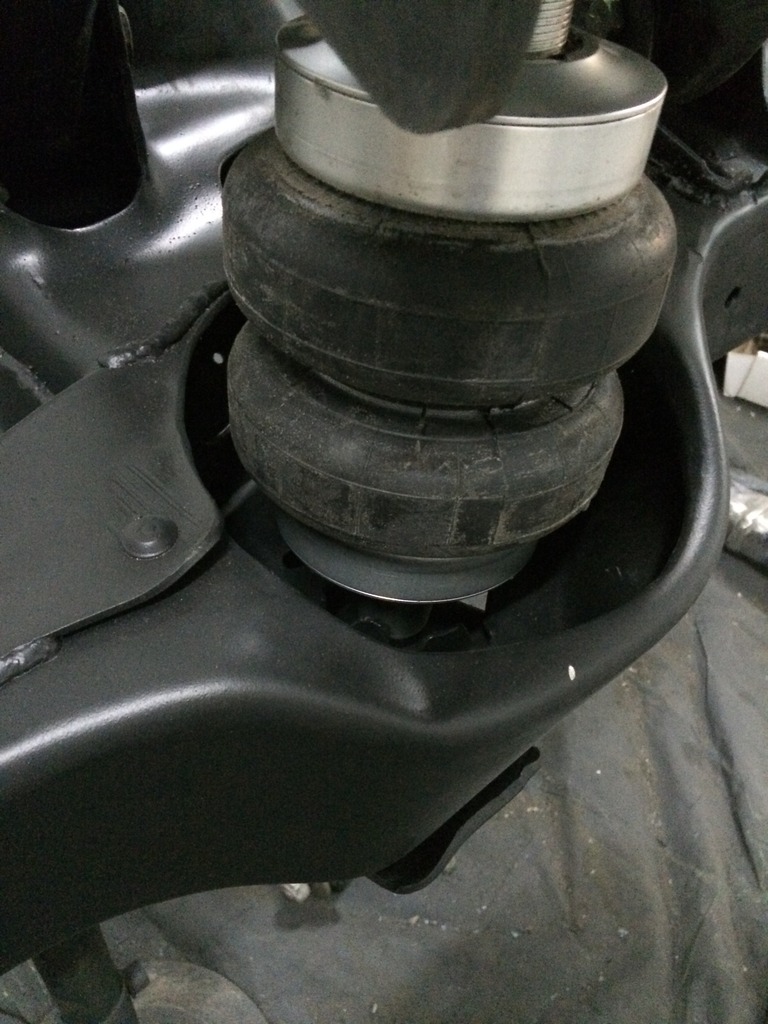
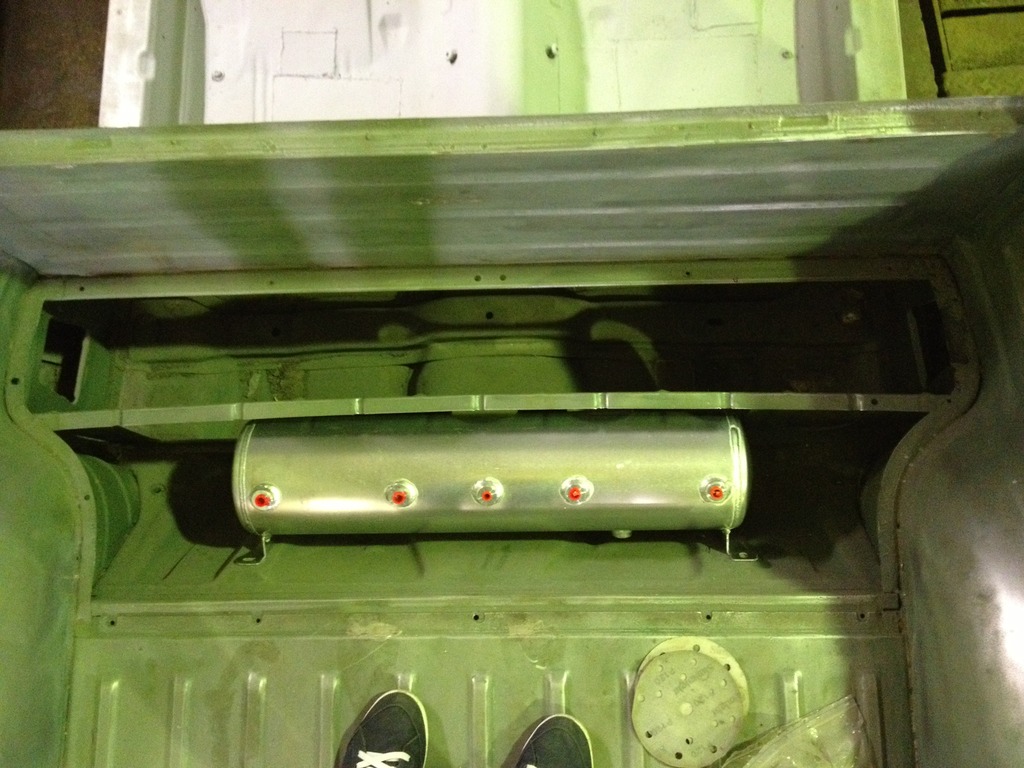
As I grew on car stance culture and was in process of tuning euro car, I needed to do smth cool with this US unit. I always dreamed about airride, had no chance on installing it on euro, so elco was the unit where I can use all my fantasies. So Ridetech front bags + Coolride rear sleeves were ordered + tank. As for management always wanted to have digital, but till the last moment have confusions of going manual or digital, of coarse everything was confused with the budget.
As for Ridetech, not high level of communication, smth in the middle, not always can answer questions but helpful guys too. Sended forgotten trunnion bars for a-arms for free. Respect.
Of coarse going with ridetech caused wishes of having all tubular control arms but...not in the budget. Even rear shocks for now I bought here from other euro car and modified mounts a little to fit. Ridetech rear shocks are too pricey.

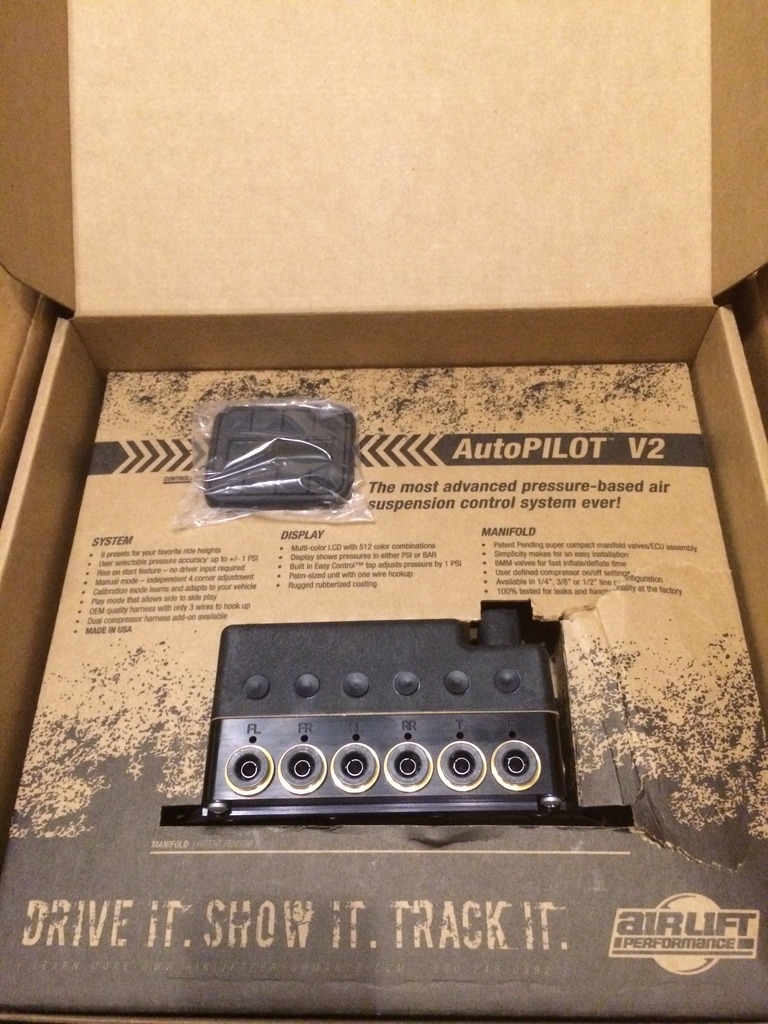
That summer I had a great deal on new digital management, so I can't go away without purchasing. So the head of my system will be Airlift Autopilot V2 with 3/8" air lines.
As for bolt on suspension kits, it wasn't. Front upper shock mounting holes redrilled for larger diameter. Frame was cutted a little in the front around the strut to clear airbags, but not like it's described in Ridetech manual where they cut off half of the frame. On rear upper spring seats plates were welded to fix the air sleeve and spring fixing nipples were shaved air sleeve to fit in place. On lower springs seats custom brackets on rearend were bolted on.

As for the place in car where all system could be installed. I think the best place in this car to locate airride management is behind the cabin in the bed where smugglers box used to be. I've already measured my ridetech tank while the car was in paintshop. I think it will be cool when finished.
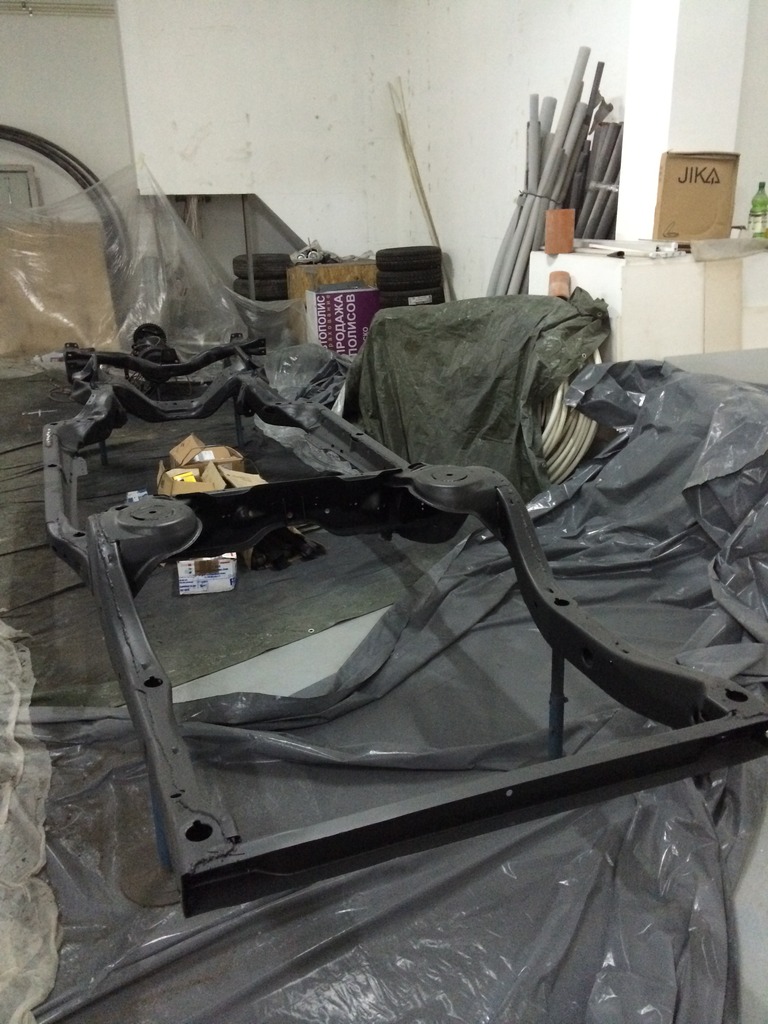
So, front suspension - done.
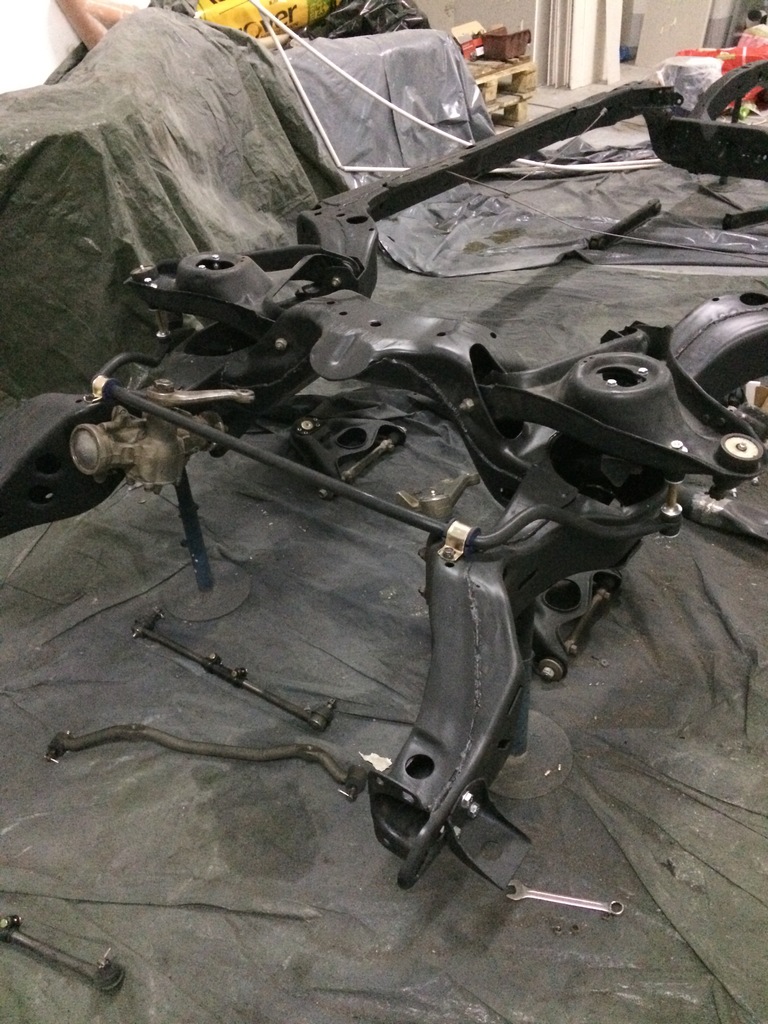

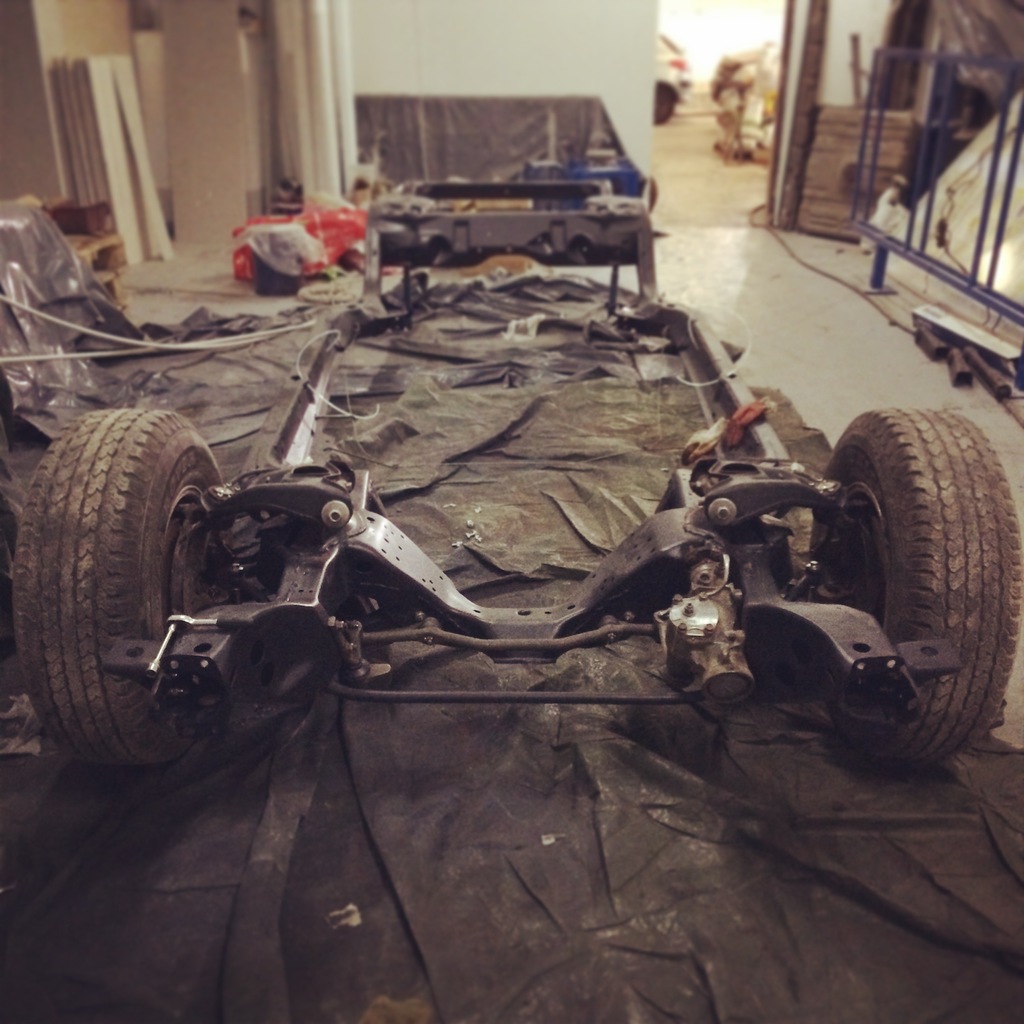
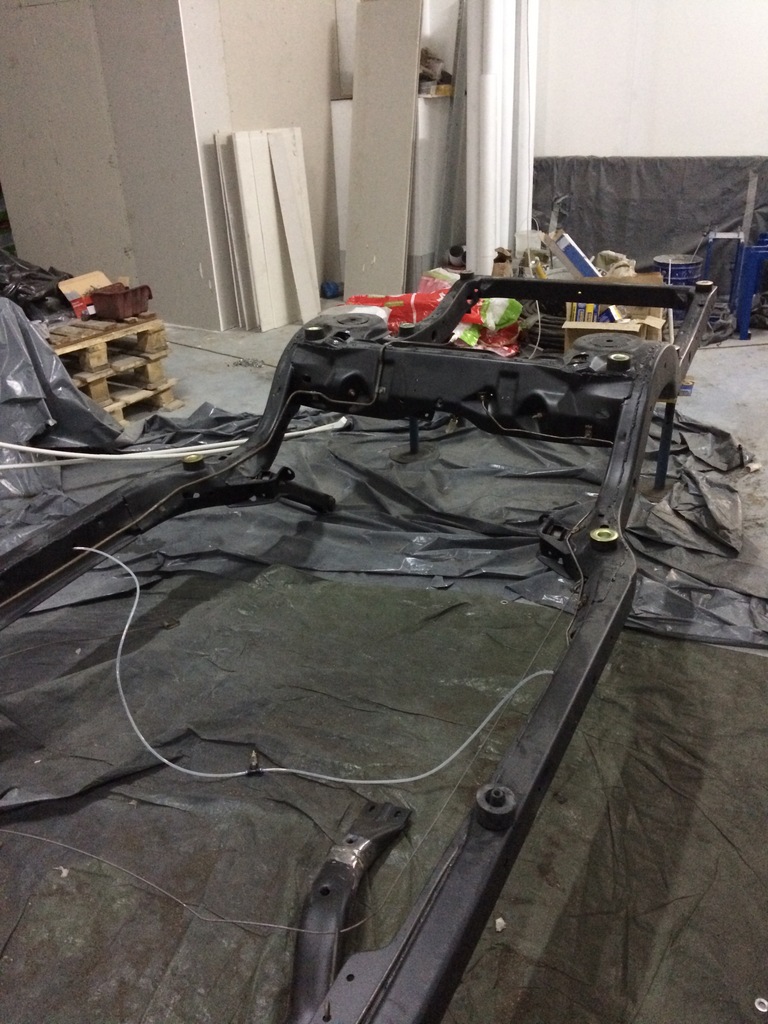
Rear suspension - done. Rear sleeves are not compressed in the right way because the frame is very light.

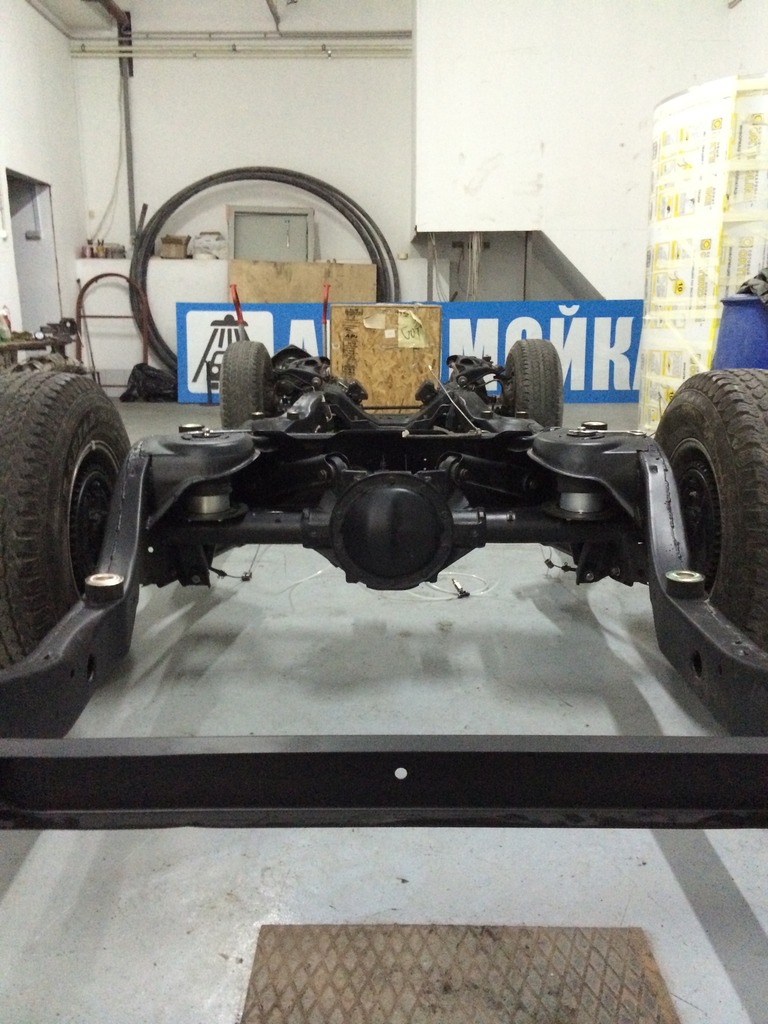

So the frame is ready and rolling again. Don't know what ride height will be so all bolts are not tighten for now.
to be continued...
builtnotbought- G3GM Member
- Street Cred : 3
tropdeprojet- Donating Member
- Street Cred : 5
Re: '74 El Camino "Project Badass"
![]() by DaveFury Wed Jan 06, 2016 4:50 pm
by DaveFury Wed Jan 06, 2016 4:50 pm
Dave W.
DaveFury- G3GM Member
- Street Cred : 5
builtnotbought- G3GM Member
- Street Cred : 3
Re: '74 El Camino "Project Badass"
![]() by Hs1973 Fri Jan 08, 2016 10:01 am
by Hs1973 Fri Jan 08, 2016 10:01 am
And the there should be a wire coming from your rear lightning wireharness that connects to the fuel sender. Right in the middle there should be a small tab with treads on it, on the wire is a Black plastic knob that presses Down over the tab. You can tjek to se If its the right wire by just grounding it, then your fuelgage should go from empty to full.
If not either its the Wrong wire or the gauge is faulty or the wiring is bad.
I hope that helps you.
Henrik.
Hs1973- G3GM Enthusiast
- Street Cred : 14
Re: '74 El Camino "Project Badass"
![]() by builtnotbought Fri Jan 08, 2016 6:30 pm
by builtnotbought Fri Jan 08, 2016 6:30 pm
Hs1973 wrote:Looks Real good. Regarding your fuel gauge wiring issues. The sending Unit in the tank is grounded with a Black wire to the rail in the body obove the tank, with a self tab bolt.
And the there should be a wire coming from your rear lightning wireharness that connects to the fuel sender. Right in the middle there should be a small tab with treads on it, on the wire is a Black plastic knob that presses Down over the tab. You can tjek to se If its the right wire by just grounding it, then your fuelgage should go from empty to full.
If not either its the Wrong wire or the gauge is faulty or the wiring is bad.
I hope that helps you.
Henrik.
Thank you for the info! May be there were all these wires sometimes ago, but I had only ground when disassembling. I ran new + wire right to the fuel gauge and checked fuel sender with voltmeter.
builtnotbought- G3GM Member
- Street Cred : 3
Re: '74 El Camino "Project Badass"
![]() by Hs1973 Sat Jan 09, 2016 7:25 am
by Hs1973 Sat Jan 09, 2016 7:25 am
Henrik
Hs1973- G3GM Enthusiast
- Street Cred : 14
Re: '74 El Camino "Project Badass"
![]() by builtnotbought Thu Jan 21, 2016 6:10 pm
by builtnotbought Thu Jan 21, 2016 6:10 pm
Thank you!Hs1973 wrote:If it works then no problem. I have all of the wiring scematics from 1973- 1979 so just ask If you need help. I also remember alot from my own builds.
Henrik
Let's continue the story.
As for the engine as I told before I tried to find service where I can rebuild it. After I knew the price and the fact my block was 2 bolt with very small opportunity for tuning or any performance I decided to start searching for a company in USA which could build a new 4 bolt long block for me.
I didn't know much about old caburetor v8's, only knew that the larger cid will be - the happier I will become =) The problem again was the budget and no opportunity for changing gearbox and rearend that will be smashed with large amount of Hm. Besides that one more problem was delivering 250kg of V8 steel over the ocean.
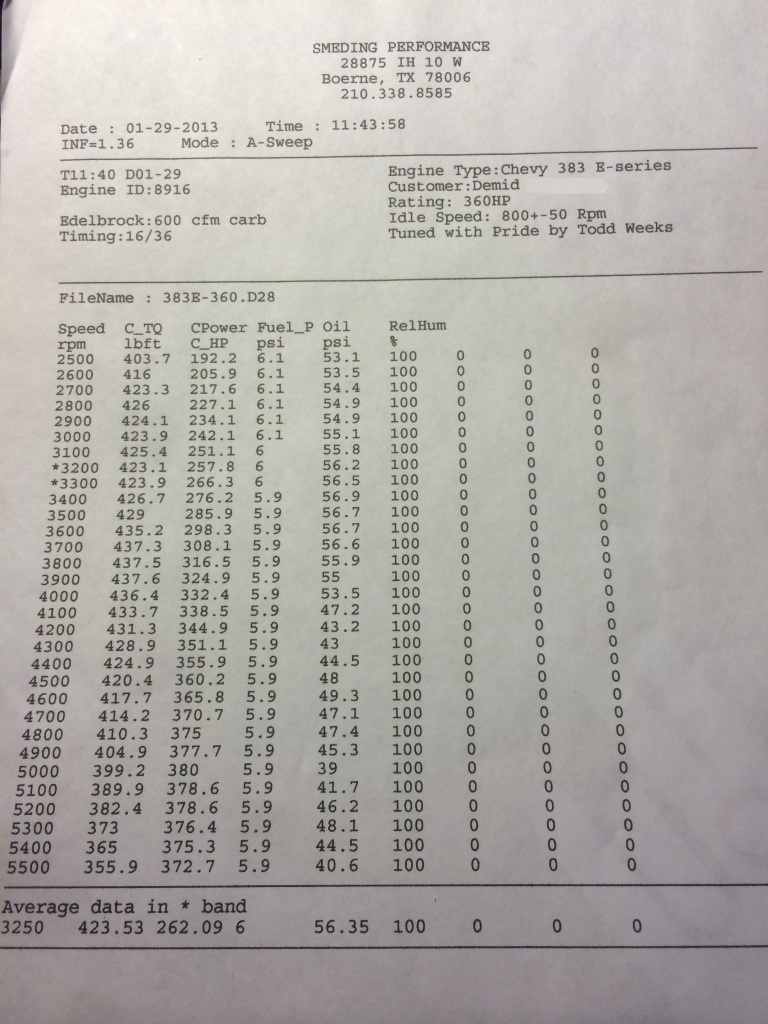
After sometime of searching for private companies, large aftermarket sellers/builders, reading opinions in web, comparing different engines characteristics, knowing a lot of new info about v8's my chose in the end was between an engine builder company from Texas - Smeding Performance with their 383 E-Series 360 hp stroker, and crate ZZ4 aftermarket longblock engine from Chevy.
Smeding's engine had a little better characteristics, bigger cid and Smeding sells all their engines broken in and with dyno-testing. Besides that they were ready to ship!, not directly to Russia but to Finland by sea, and even these fact was great. If buying chevy crate block I had to use my shipping company that was more expensive.
I found very little info and opinions about Smeding, half positive half negative but it were a great conditions generally for me because I had only one chance to buy and ship engine and it might have no problems at all and ready to go. I decided to try and ordered 383 in the end of november 2012.
Guys were working for about 2 months excluding holidays and on 29th of Jan 2013 I got an email with Dyno sheet. It was a surprize for me that engine made 380hp instead of 360 from description and 438Nm, more Nm too. The coolest thing is that it holds 400Nm from 2500 till the end ALL the time. I always used 4 cyl inline atmo/turbo engines and such characteristics are space for them.
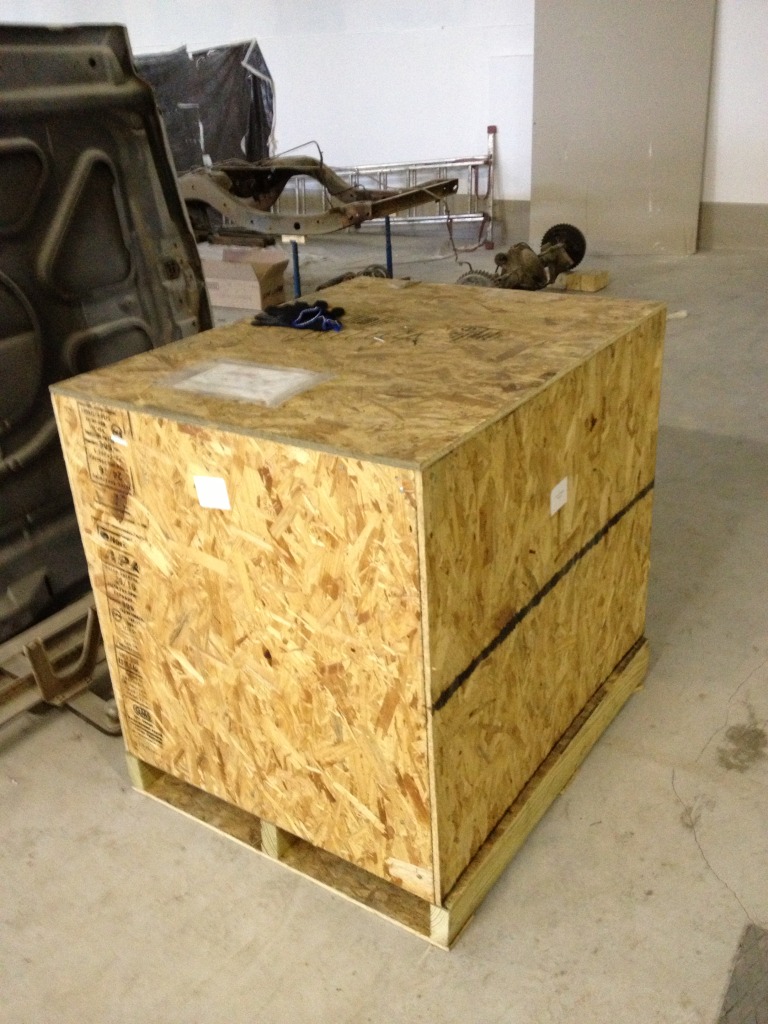
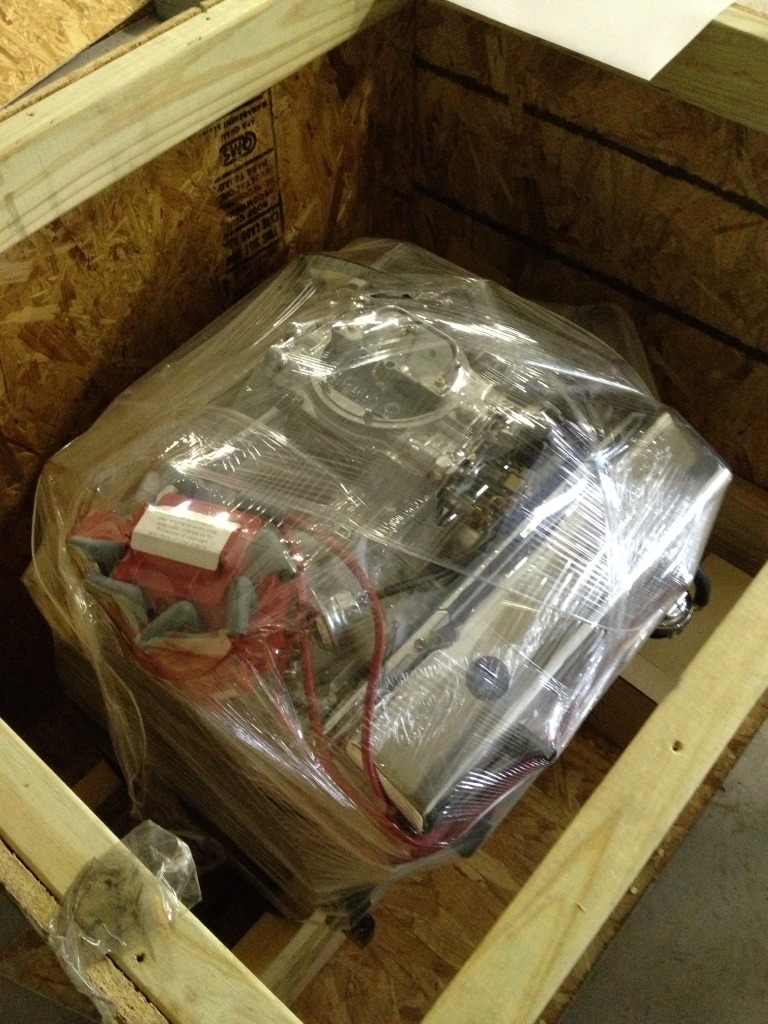
Plus I ordered some options such as new starter, water pump, fuel pump and carburator, not to order all these parts separately and tune without any knowledge. Soon my engine was shipped and as I remember sometime in March I received a wooden box with metal heart! I was happy!)
With shipping it costed me near the same price as I was told for rebulding an old engine. Old original engine was sold and may be is running now somewhere in Russia if still alive.


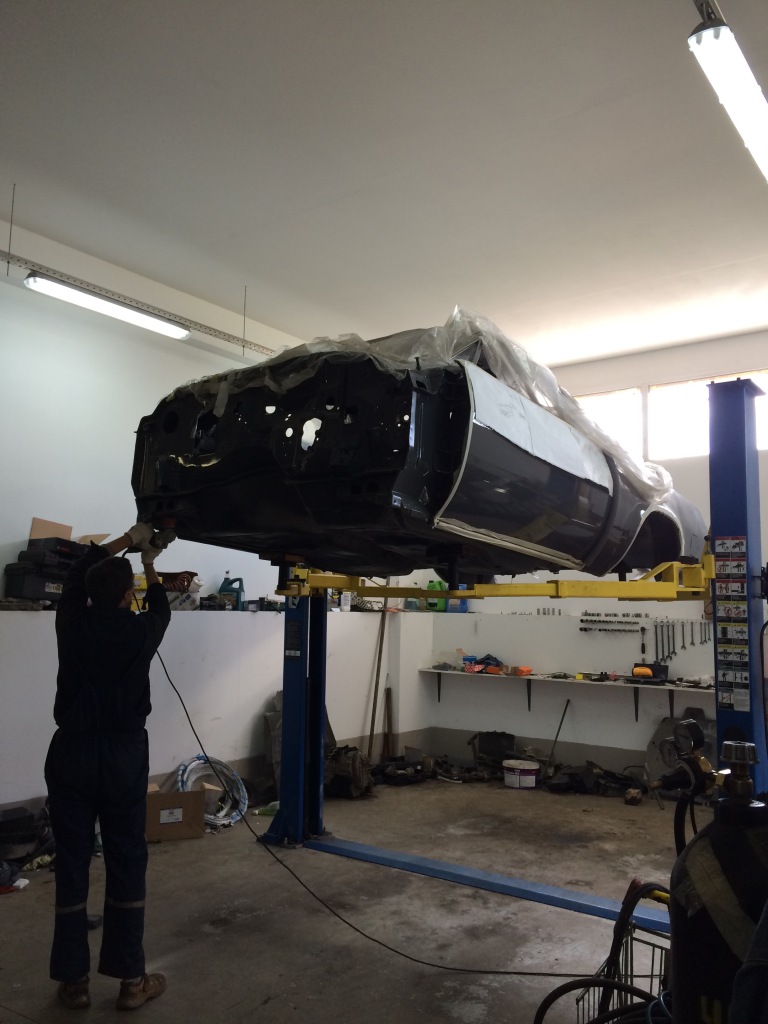
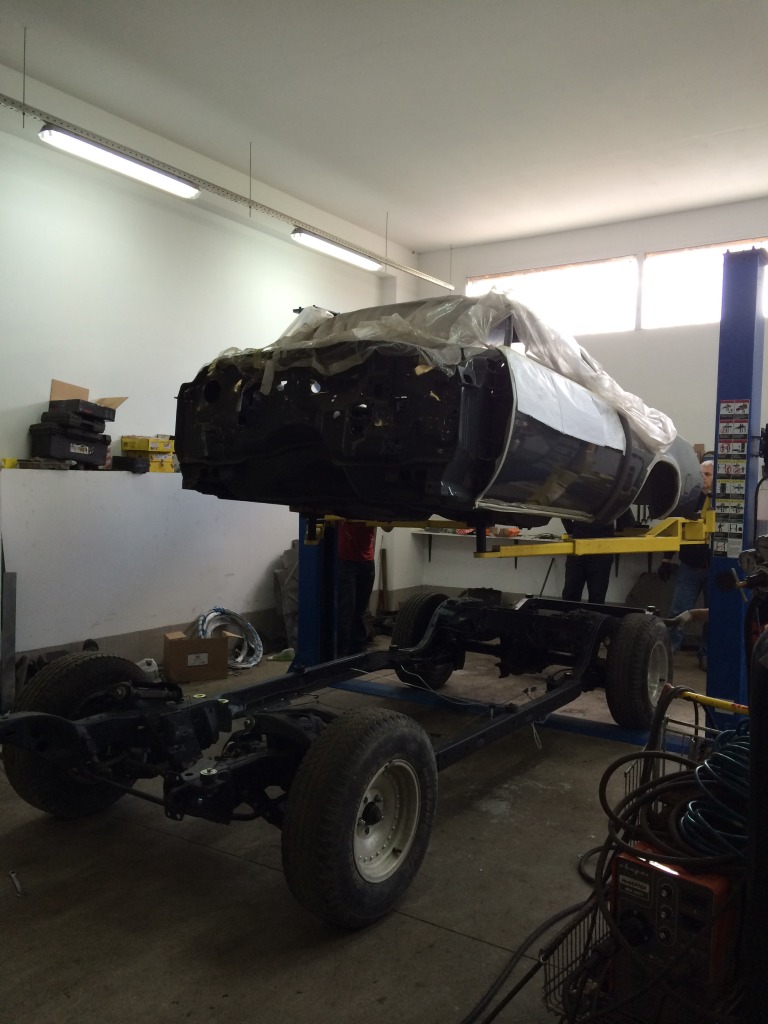
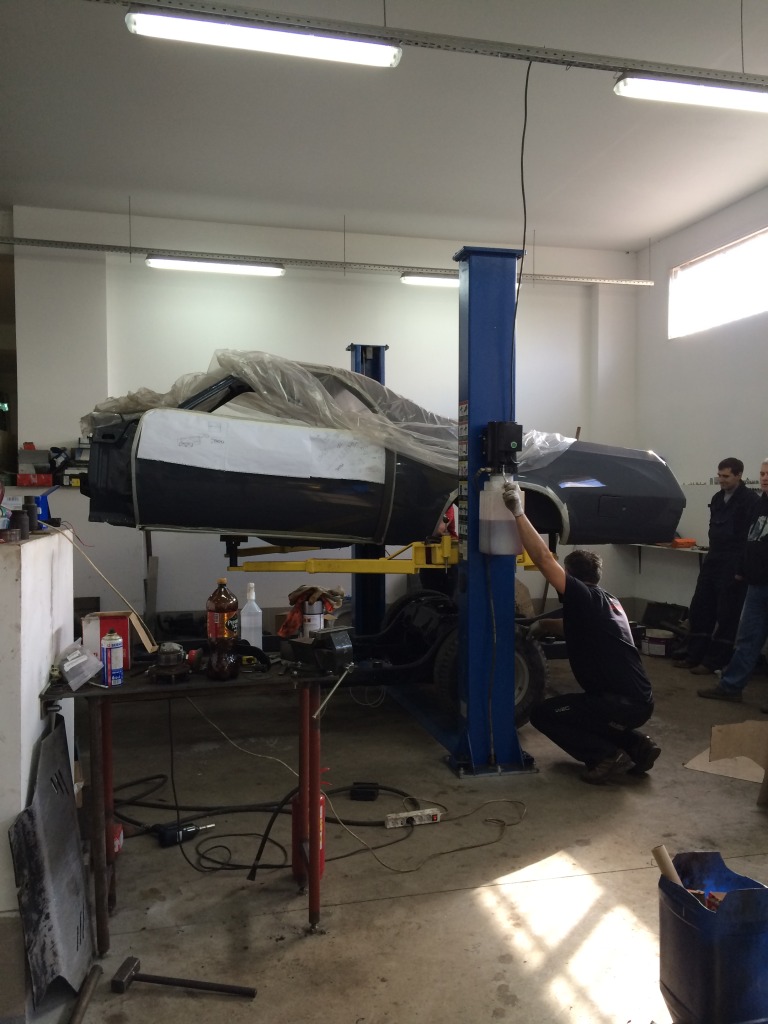
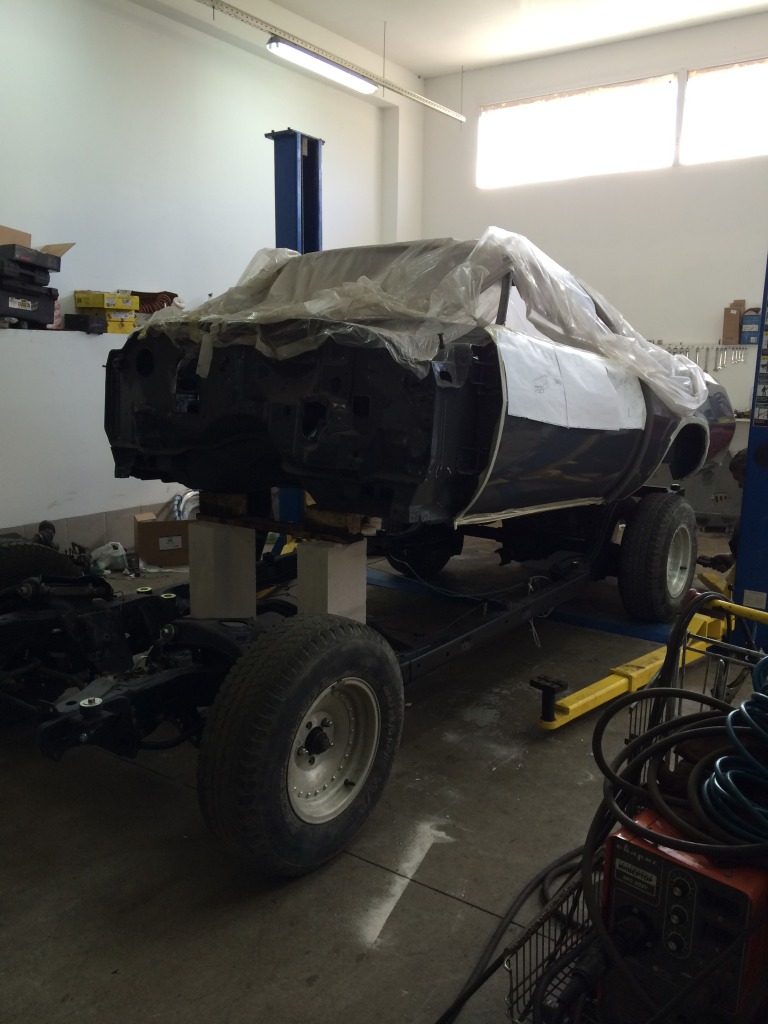
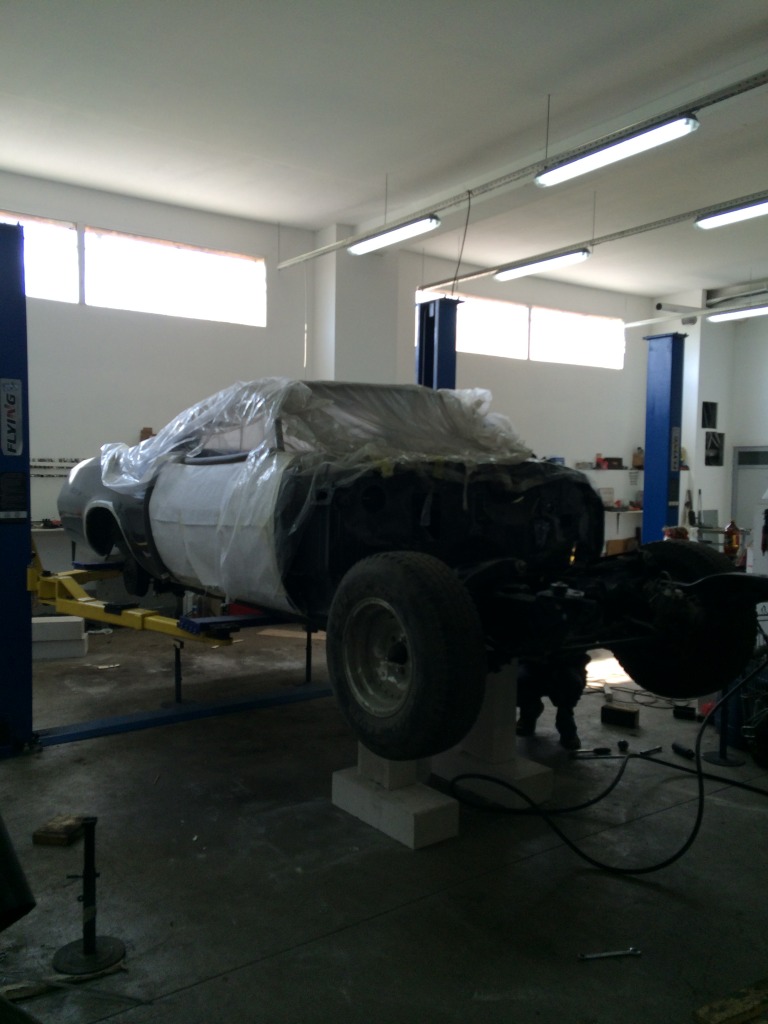
As for the frame it was ready to meet the body. It was great the car lifts appeared that time in the garage. All places on the car's floor under wood staff were cleaned and painted and after some measurments body and frame were connected. Car was looking like a car that moment, but still it was waiting for new longer bushing bolts from Partsplace.
I continued assembling of the car.
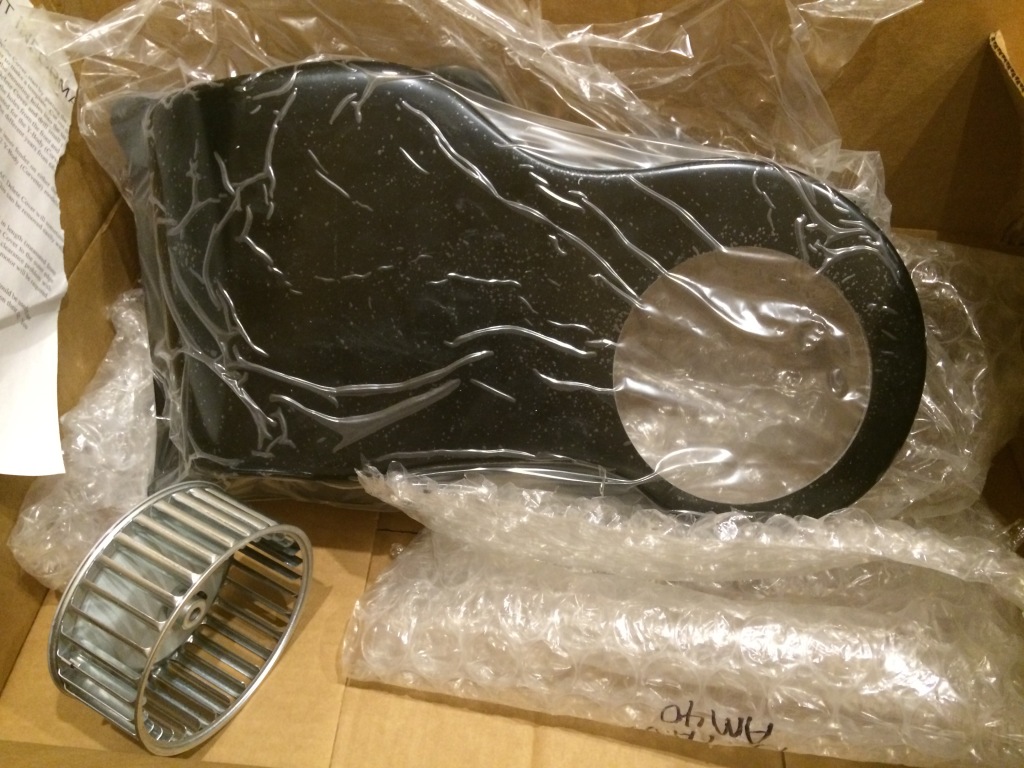
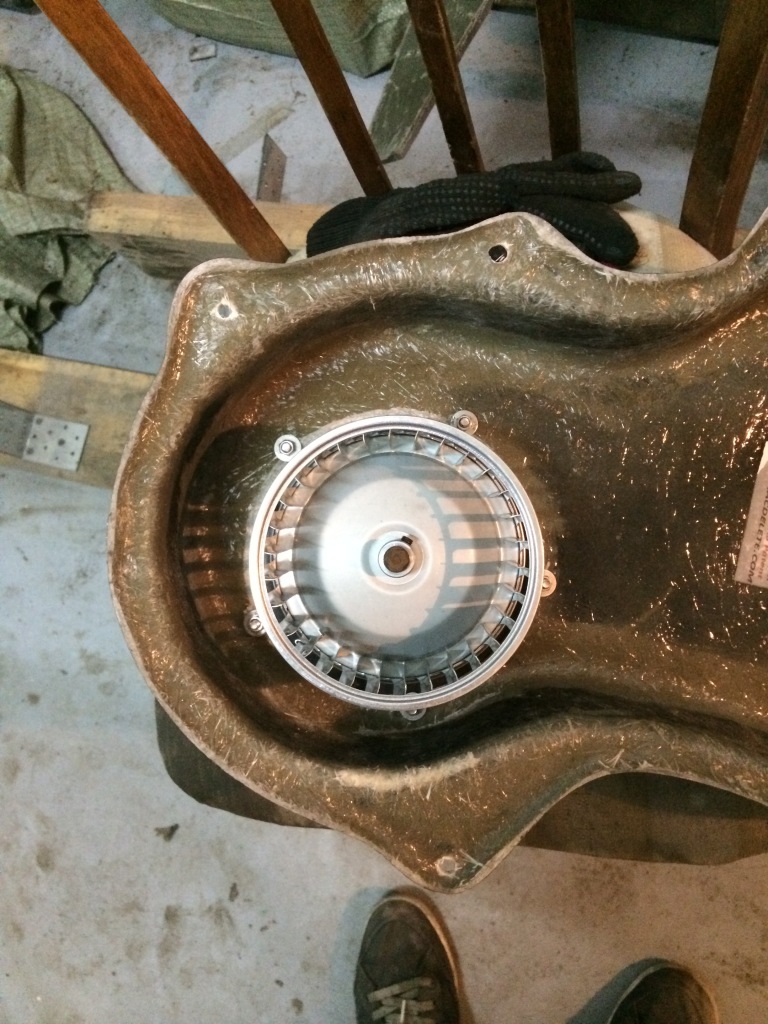
Elco had an AC box without compressor and with out hoses. I didn't have any wishes to restore it, it looked ugly in the engine bay and we here in Russia don't have a lot of hot days in summer. So I decided to order AC delete box with new blower fan to clear the firewall. Changed fan and colormatched everything. I think it came out pretty good, I like it.
Heater was cleaned inside, saw aftermarket heater cooler installed there already, so I only bought new heater hoses and ordered fittings to waterpump.


I wanted to colormatch steering column to body too so I needed to disassemble it to fully. No info in web at all, nothing, only one thread on Hotrod or High Perf chevy about disassembling.
When I started it was like a piece of rocket science, especially pulling out the first upper ring without any spec tool and pressing it back together the same way, it's non forgetable. Turn signals plastic frame was cracked, horn ring in pieces, shifter spring in 2 halfes. Not from disassembly - from 40 y.o. using. Besides that I lost a steering wheel nut somewhere. It was a long long long journey with ebay guys to find a matching spring and nut. After several months and a bunch of $ I had 2 springs and 2 nuts, of coarse only items from last parcels fitted directly. These things are hard to find like gold.
I didn't change the lower bearing in column as I didn't order it. Oh, and aftermarket lower crankshaft ball joint rubber duster - it was a nightmare to make it fit the shaft!
After all tortures and colormathcing to body column was assembled.
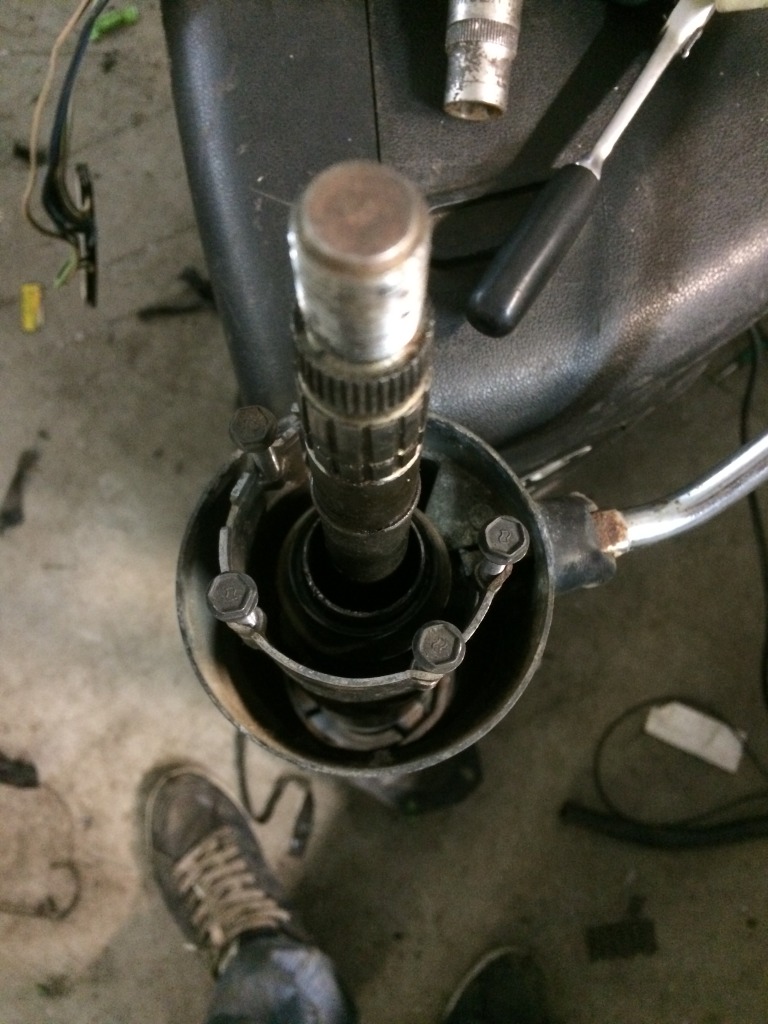

Now I have an important question to you. I found out it 2 days ago. Steering column is bolted now to the body inside (2 bolts), to firewall (5-6 bolts) and to shaft of the steering unit. Column is not parallel to car, it is turned to side. I don't remember how it was before tear down.
Can I move it/turn it some how to make it parallel the car? I guess it turnes/moves only with firewall bolts?
Thank you for help!
Let's continue.
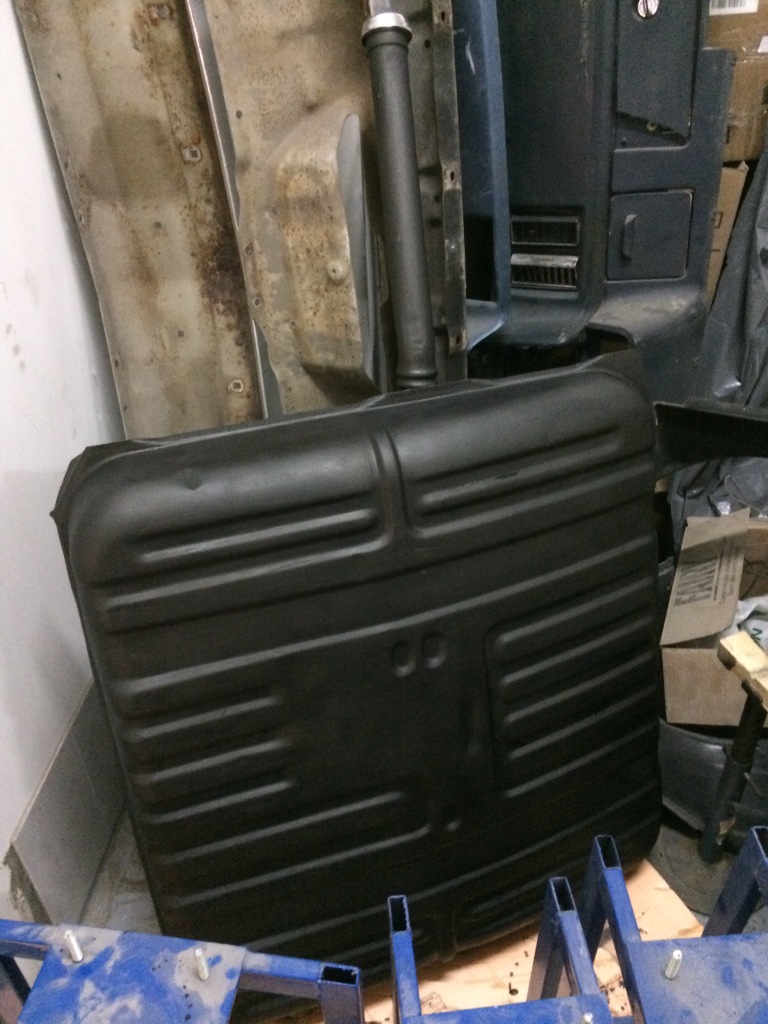
Fuel tank was in good condition, had one welding in the corner so I only painted it black with antirust primer.
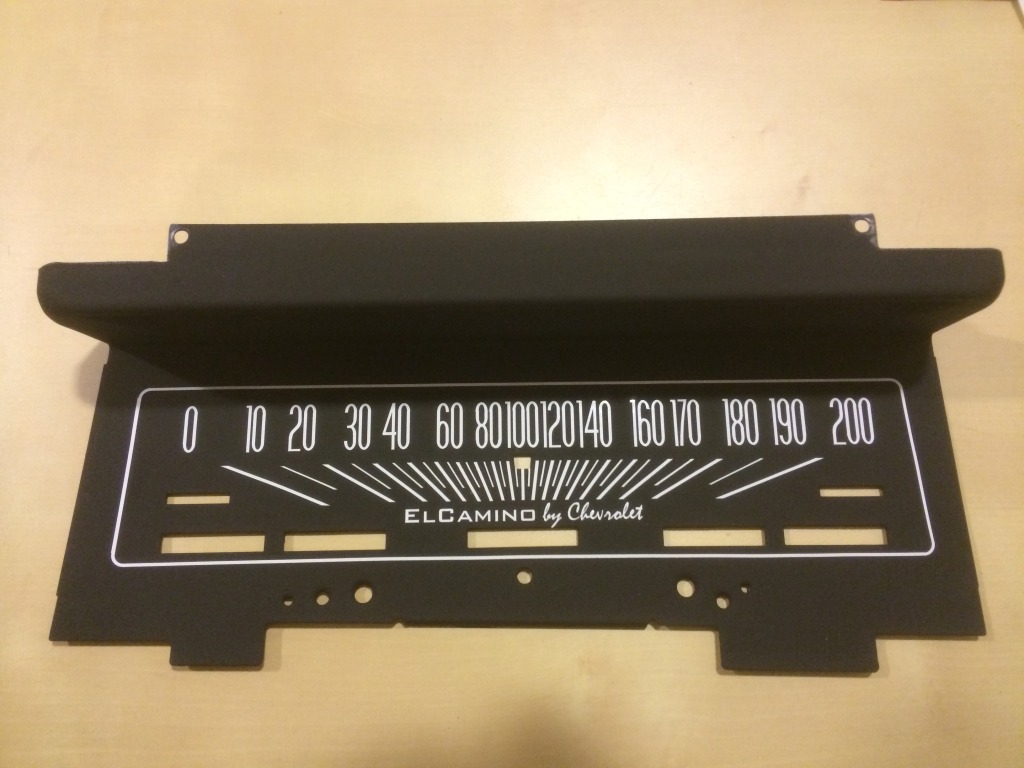
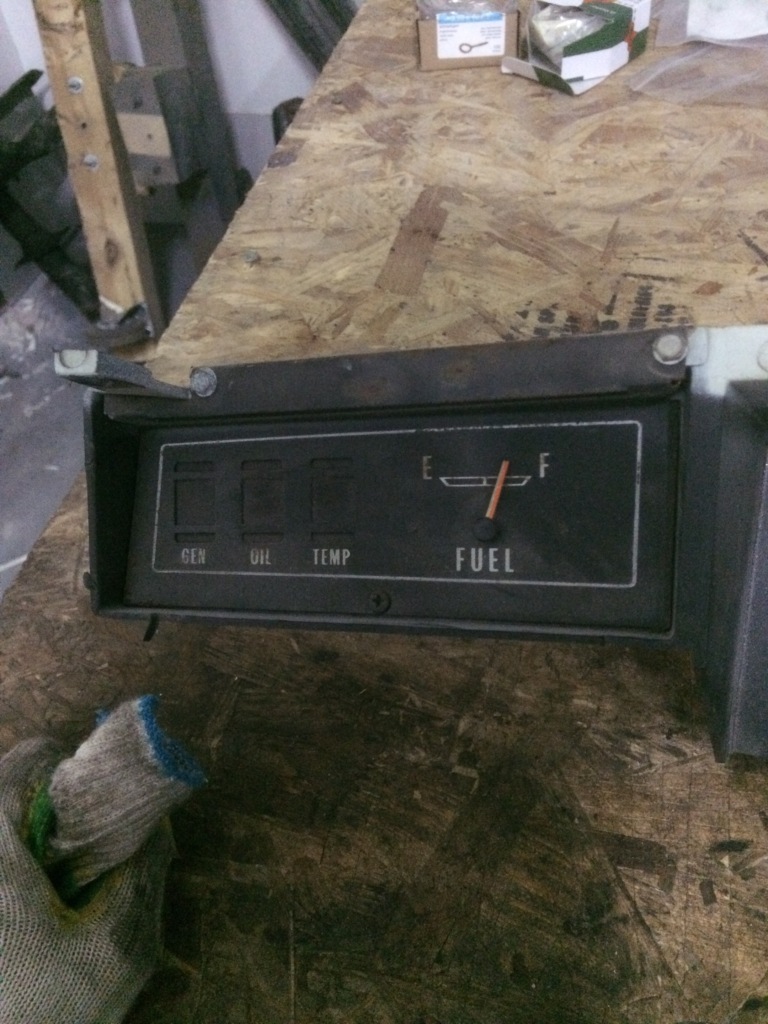
Cluster metal plate was in poor condition, rusty and fade. I decided to remake it a little and convert to km/h. I drew everything in Acad, cutted on plotter and I think it came out very cool. The same thing I need to do with fuel panel. Dash clock were broken so I decided to replace it with optional Sunpro 1-1/2" gauges. Still in progress.
My question to you on cluster is that when the car was running arrow didn't show exact speed.
Arrow was moving but not going even up to 90 degrees angle. I checked speed cable - ok. Checked teeth wheel in gearbox - ok. Where can be a problem place? Thank you

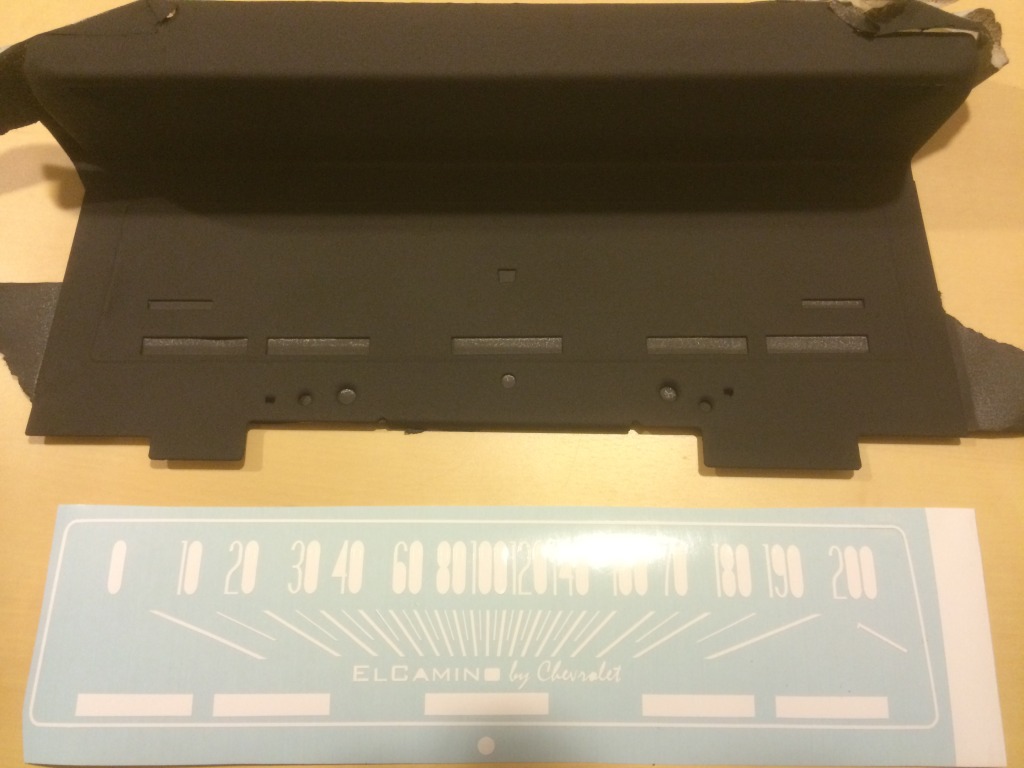

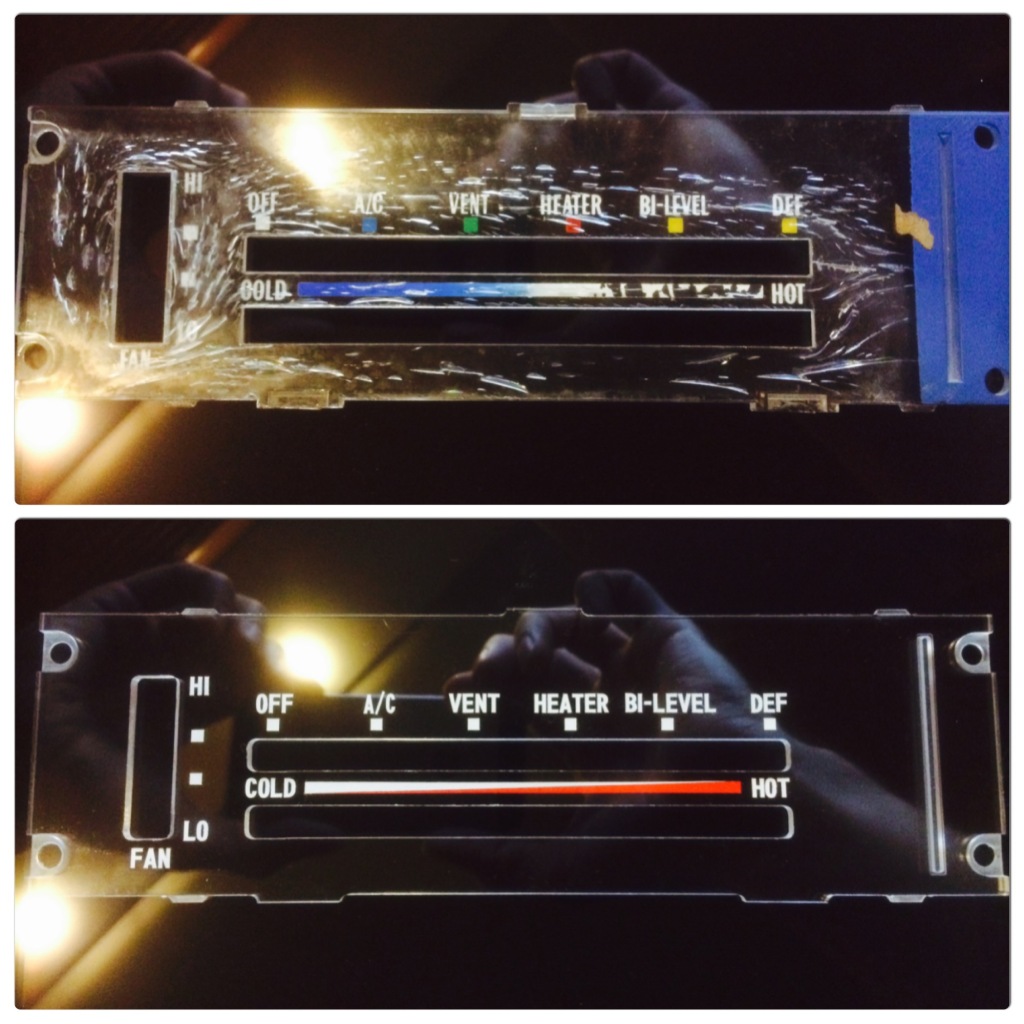
Climate panel had a lot of time cracks so I decided to facelift it a little. Drew new panel and inscriptions in Acad and give it to plexiglass cutting service. You can see the result. Thinking now how to do black backestage better so in progress too.
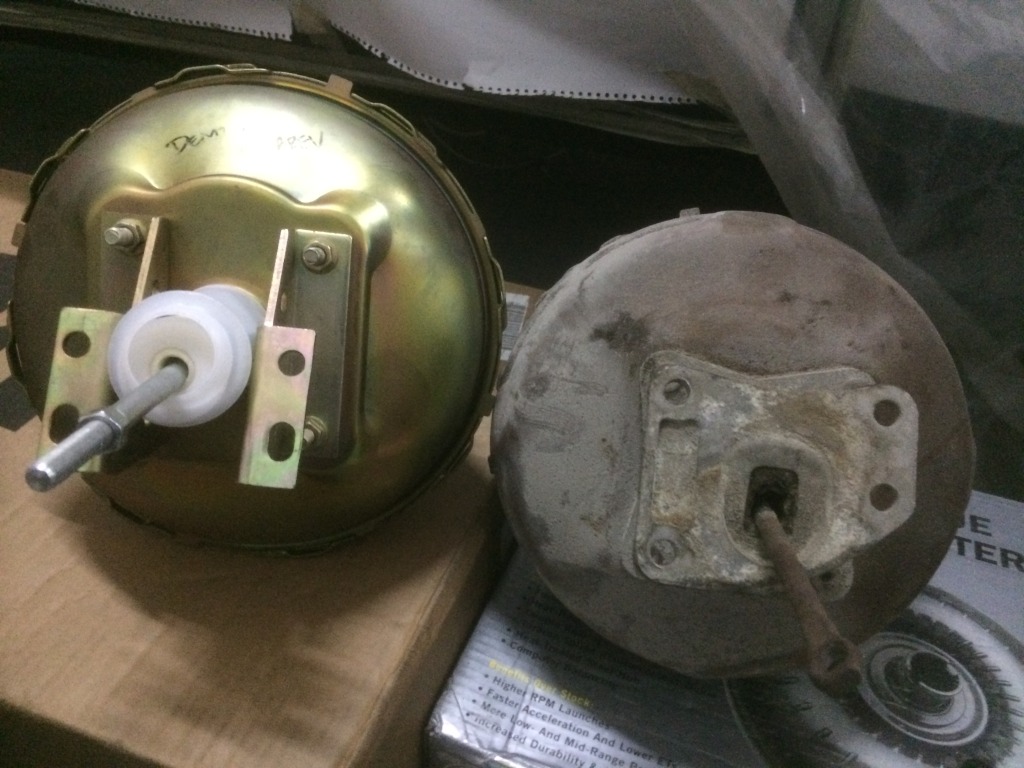
As for brakes I planned on going with 4 discs with new booster, master cyl and distribution box.
A year ago I ordered new 11" brake booster, the same as stock (didn't want to make experiments on size), new master cylinder with equal volumes F/R and new distribution box from Performance online - in my opinion one of the worst shop in my practice of buying from USA for communication and customer service. When first package came with Fedex it contained broken booster during shipping I think and wrong booster brackets. Everything was photographed and emailed back. Communication, Communication, Communication, I even managed to return all the money via Paypal till they send a replacement.
Besides that I asked several times to pack new booster properly to avoid damage. No, nothing changed. I think they have a bunch of free boosters in stock. New booster and brackets appeared after sometimes. Brackets - againg wrong, booster now ungamaged. After thinking of what to do a great idea came. Alloy bracket from stock booster was taken off, redrilled a little and fitted new with success! Now everything is waiting for colormatching and installation.
During I was thinking of what calipers and other parts to use the prices went twice higher exchanging to my currency and it was time to forget about BBK. Now I plan to service stock front calipers with new rubber parts and that's all for now.

After sometime engine with screwed on gear box was installed. Thanks my friends for helping me a lot!

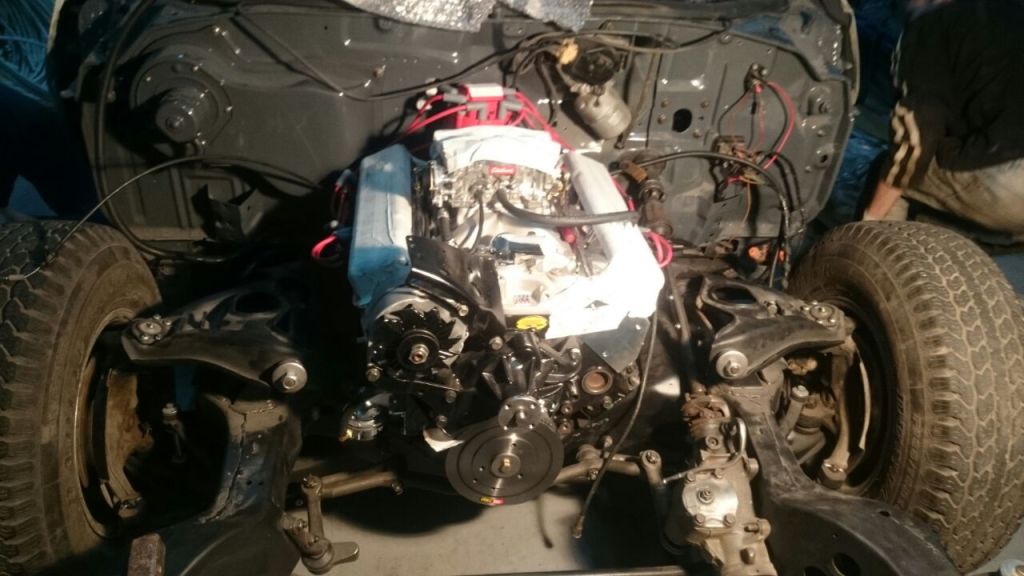
Besides that I ordered new TCI Break away torque converter with 2400-2600 stall speed. It was a real surprize later that this converter uses not the same bolts as stock one, tci's are smaller in diameter and of coarse tci didn't supply bolts with the converter, don't know why, and of coarse they didn't want to send me 3 little bolts to Russia for free as forgotten. So later I was screwing in them laying under car.
As for exhaust I wanted to go anyway with 3" till the end with electrical cutouts because the full car was bought only for it's sound =)
When I was choosing what headers to go I withheld a little that sold old metal headers with the engine because prices were very high.
Hooker was chosen. Didn't want to have rusty headers or polish each tube in future so not steel, not ceramic coated steel but stainless 2451-2HKR 3" were on their way to Russia. Hooker guy told me they were excellent fit to 73-77 el camino. Of coarse drivers side was excellent fit but not the passengers that badly hit the frame near the a-arm. I tried to contact Hooker after that but never got the answer back.
Passangers header tube was smashed a little with hammer but it was a mistake. In the end header fit in place with 5mm clearance but the end of the header went up and was hitting the crossmember. So now it's on the metal surgery of my metal guy.

As for the full system as I have airbags in the rear I don't know if I can run 3" pipes across the rearend far away from bags not to melt them. So for now I'm planning to run pipes till the rearend using old mufflers, buying some QTP cutouts in future and making X-pipe in the middle.
If anybody have any ideas about speedo arrow work and steering column fitment please write, everything will be helpful for me! Thank you!
builtnotbought- G3GM Member
- Street Cred : 3
Re: '74 El Camino "Project Badass"
![]() by Joe73 Thu Jan 21, 2016 6:24 pm
by Joe73 Thu Jan 21, 2016 6:24 pm
And for exhaust, go 2 1/2" unless your pushing more than 450 hp. 3" will hurt your bottom end. You could actually use 2 1/4" with your horsepowr numbers. Here's the HP to diameter chart to check it out.
http://www.exhaustvideos.com/faq/how-to-calculate-muffler-size-pipe-diameter/
Joe73- Donating Member
- Street Cred : 83
Re: '74 El Camino "Project Badass"
![]() by builtnotbought Fri Jan 22, 2016 9:27 am
by builtnotbought Fri Jan 22, 2016 9:27 am
Joe73 wrote:Awesome job so far. Nice to have the drop in, ready to go engine, but I wouldnt count the 2 bolt block out. They are good to 400hp. And if your worried about it then you could just order 4 bolt splayed caps which are much stronger than factory 4 bolt caps since the outer bolts face outward.
And for exhaust, go 2 1/2" unless your pushing more than 450 hp. 3" will hurt your bottom end. You could actually use 2 1/4" with your horsepowr numbers. Here's the HP to diameter chart to check it out.
http://www.exhaustvideos.com/faq/how-to-calculate-muffler-size-pipe-diameter/
Thank you for the info!
When ordering headers as I remember I consulted with Smeding only on the primary tubes diameter, they advised 1.625". I didn't ask anything about collector diameter. I looked through all Hooker headers now that fit 74, they all have 3" OD collector.
So do you mean I need to reduce the system diameter after headers, or the headers 3" collectors themselves are wrong too?
As for the 2 bolt block I believe you that it's great in some conditions but I didn't want to deal with already rebuilted somewhere and somehow 40 y.o. block in my country where there no specialists in rebuilding and building such type of engines at all and no availiable parts at all.
builtnotbought- G3GM Member
- Street Cred : 3
Re: '74 El Camino "Project Badass"
![]() by Joe73 Fri Jan 22, 2016 10:19 am
by Joe73 Fri Jan 22, 2016 10:19 am
Three inch collectors are fine, but in my opinion, 2 1/2" is optimum for the street. Like the chart shows. Id rather have a little more low end than a little more high end.on the street. Since your not screaming your motor light to light.
Joe73- Donating Member
- Street Cred : 83
Re: '74 El Camino "Project Badass"
![]() by builtnotbought Fri Jan 22, 2016 10:39 am
by builtnotbought Fri Jan 22, 2016 10:39 am
Thanks!Joe73 wrote:The headers you have are correct for your application. The inch and three quarter as well as the inch and seven eigths are for high rpm applications and pretty much useless on the street.
Three inch collectors are fine, but in my opinion, 2 1/2" is optimum for the street. Like the chart shows. Id rather have a little more low end than a little more high end.on the street. Since your not screaming your motor light to light.
The engine on paper has crazy torque for me from idle so I think I will not see difference
builtnotbought- G3GM Member
- Street Cred : 3
Re: '74 El Camino "Project Badass"
![]() by Showtime73 Fri Jan 22, 2016 6:15 pm
by Showtime73 Fri Jan 22, 2016 6:15 pm
Showtime73- Donating Member
- Street Cred : 1
Re: '74 El Camino "Project Badass"
![]() by Hs1973 Sat Jan 23, 2016 6:31 am
by Hs1973 Sat Jan 23, 2016 6:31 am
As for your steering column, it mounts as you say with 2 bolts under the dash, and 6 bolts at the firewall. Im not sure as how it can became crocked.
All i can see is that you somehow must have mounted something Wrong when you had the column apart.
I would take it out again and tjek to see where things go Wrong. But im sure that you will find a solution to the problem.
Regards Henrik.
Hs1973- G3GM Enthusiast
- Street Cred : 14
Re: '74 El Camino "Project Badass"
![]() by builtnotbought Mon Feb 01, 2016 4:40 pm
by builtnotbought Mon Feb 01, 2016 4:40 pm
Hs1973 wrote:Nice. Im sure Being in russia causes sevire problems with parts. And it is impressive that you keep going.
As for your steering column, it mounts as you say with 2 bolts under the dash, and 6 bolts at the firewall. Im not sure as how it can became crocked.
All i can see is that you somehow must have mounted something Wrong when you had the column apart.
I would take it out again and tjek to see where things go Wrong. But im sure that you will find a solution to the problem.
Regards Henrik.
I meant the whole steering column is rotated a little to the left. I will check if it can be moved with the lower bolts in firewall.
Showtime73 wrote:Demid, great work! I can't wait to see it all put together. I'm sure you will turn many heads in Russia.
Thank you! It got a lot of attention even before restoring
Let's continue.
Always wanted to try using noise insulation over stock one in any car, so this moment came
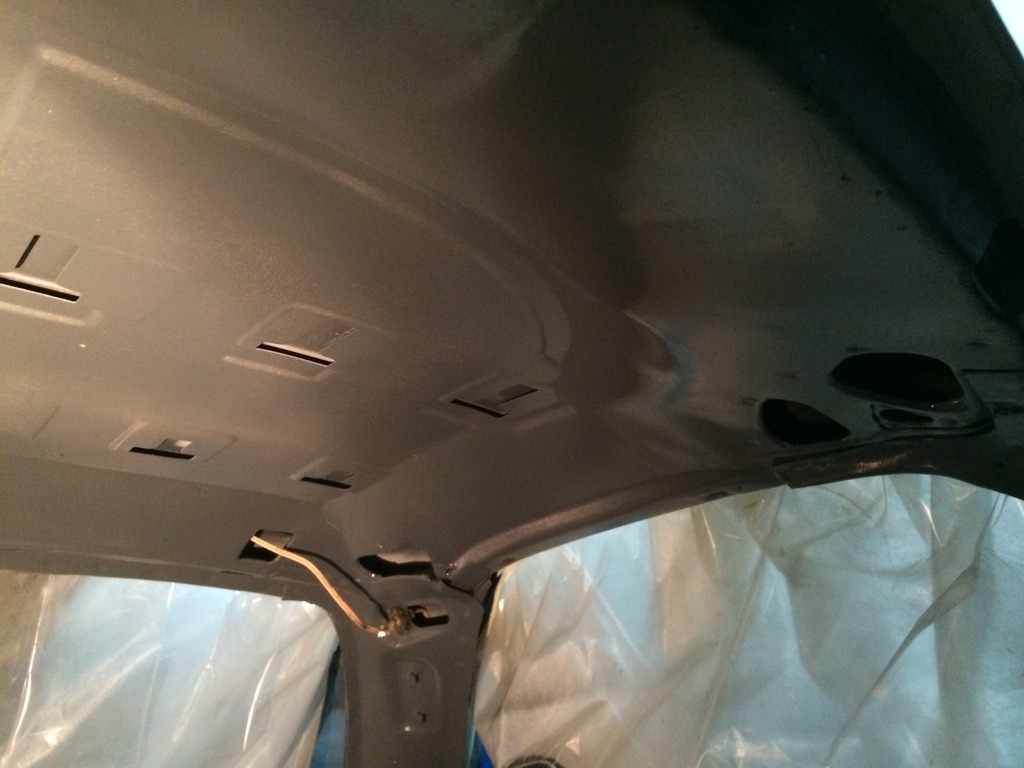


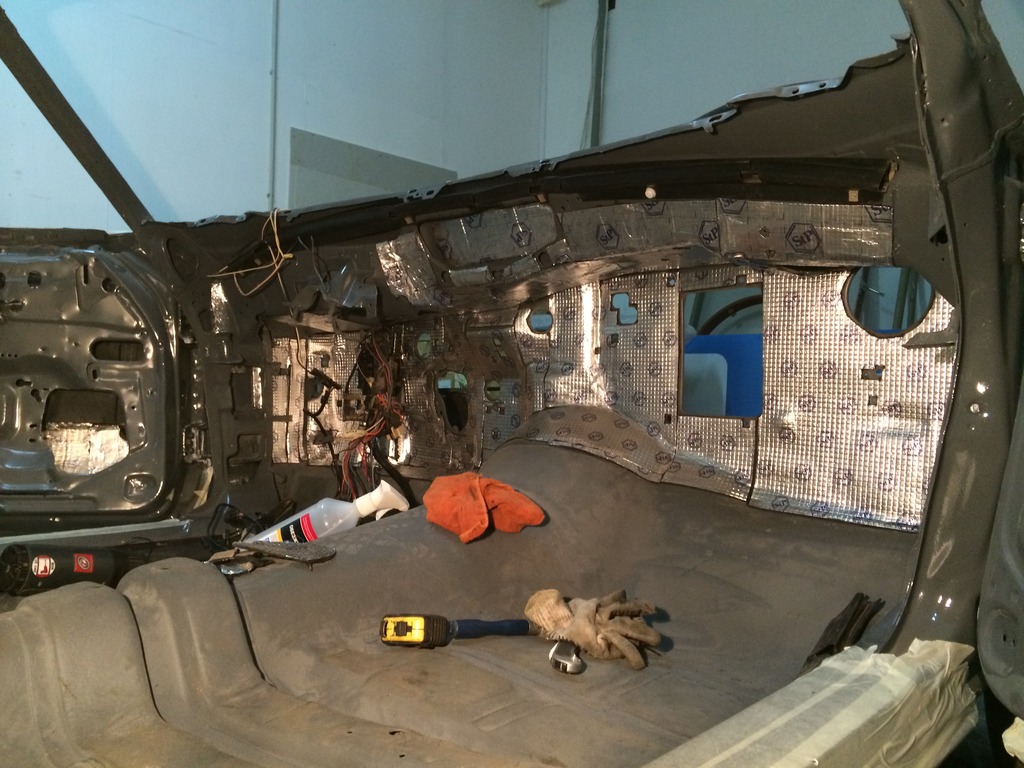
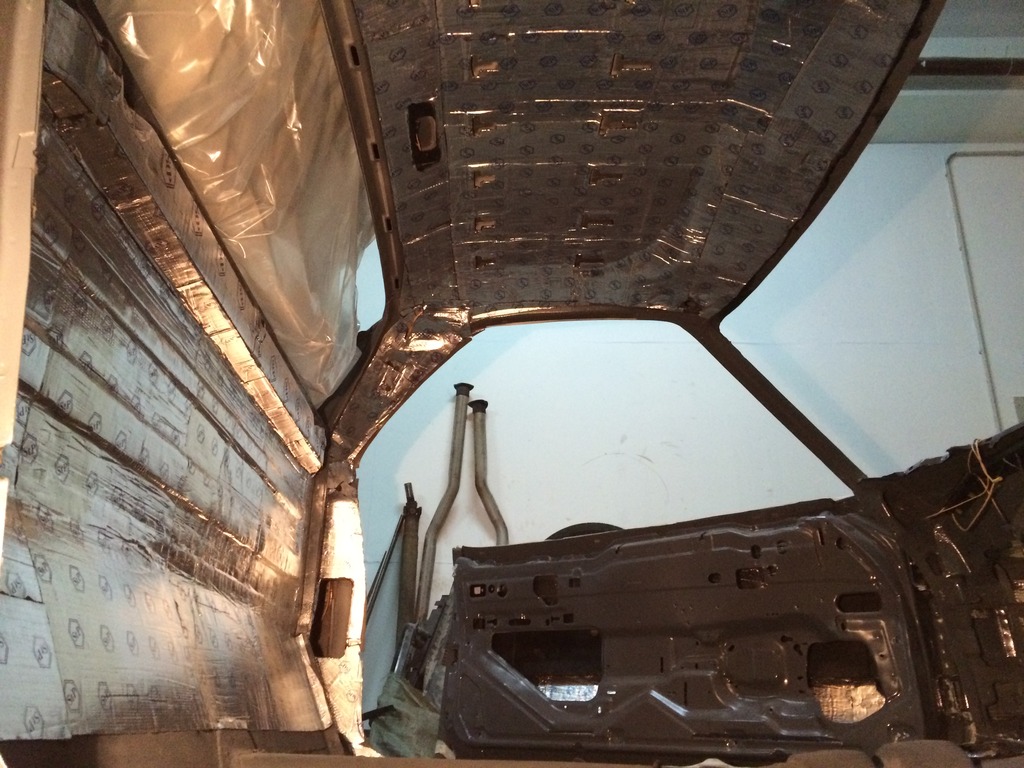
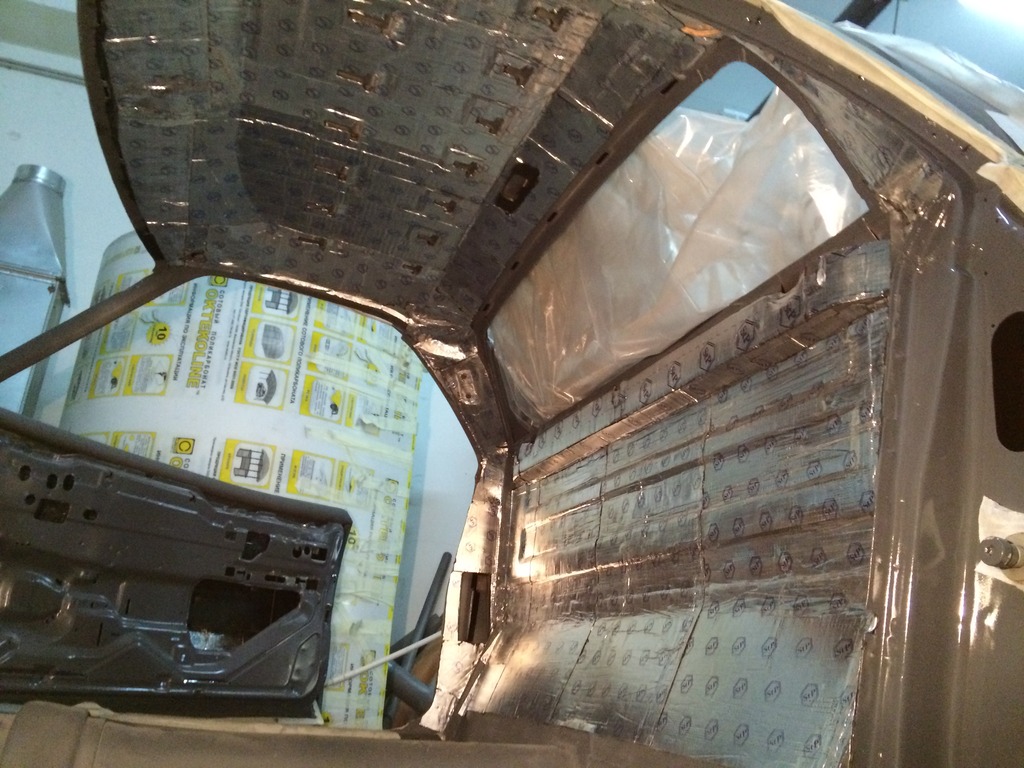
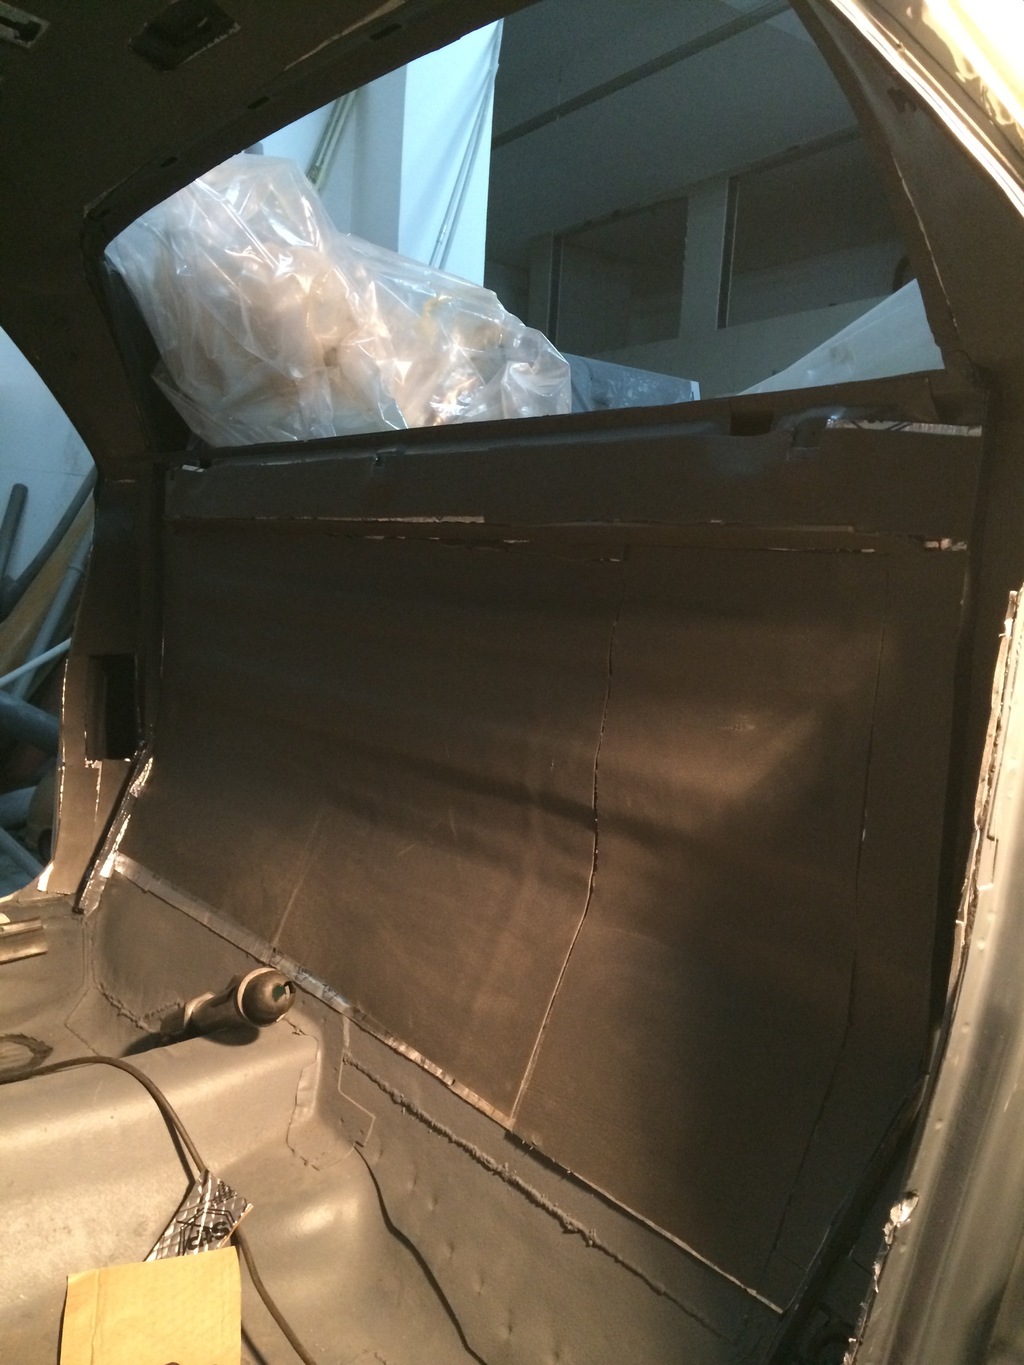
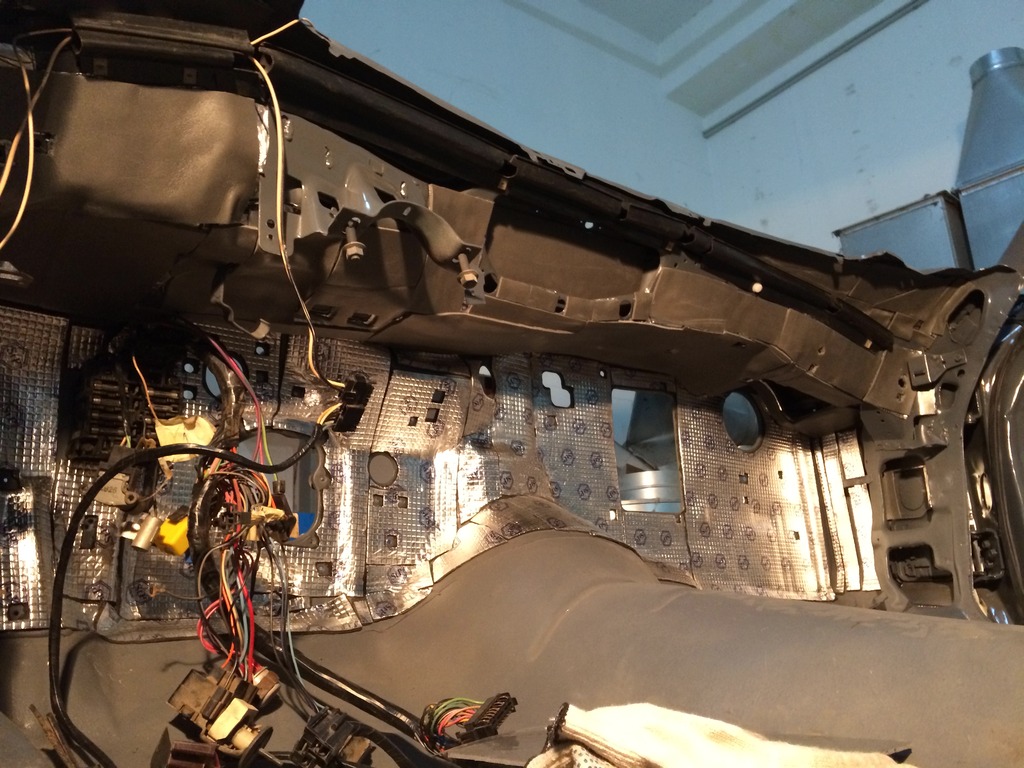
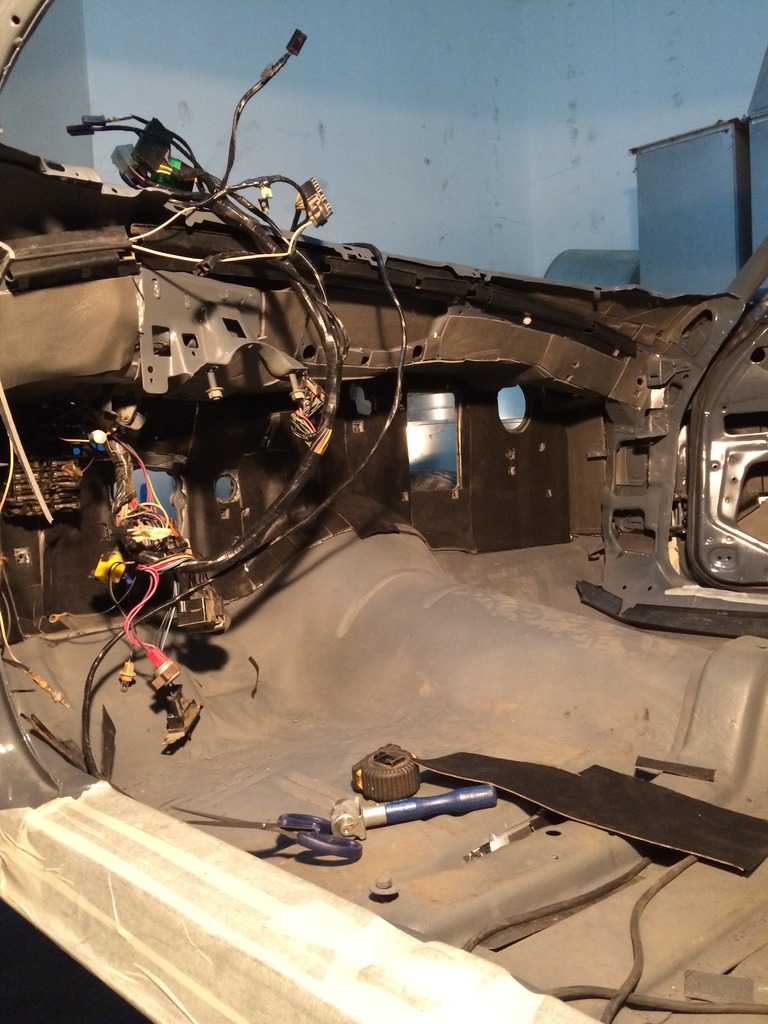

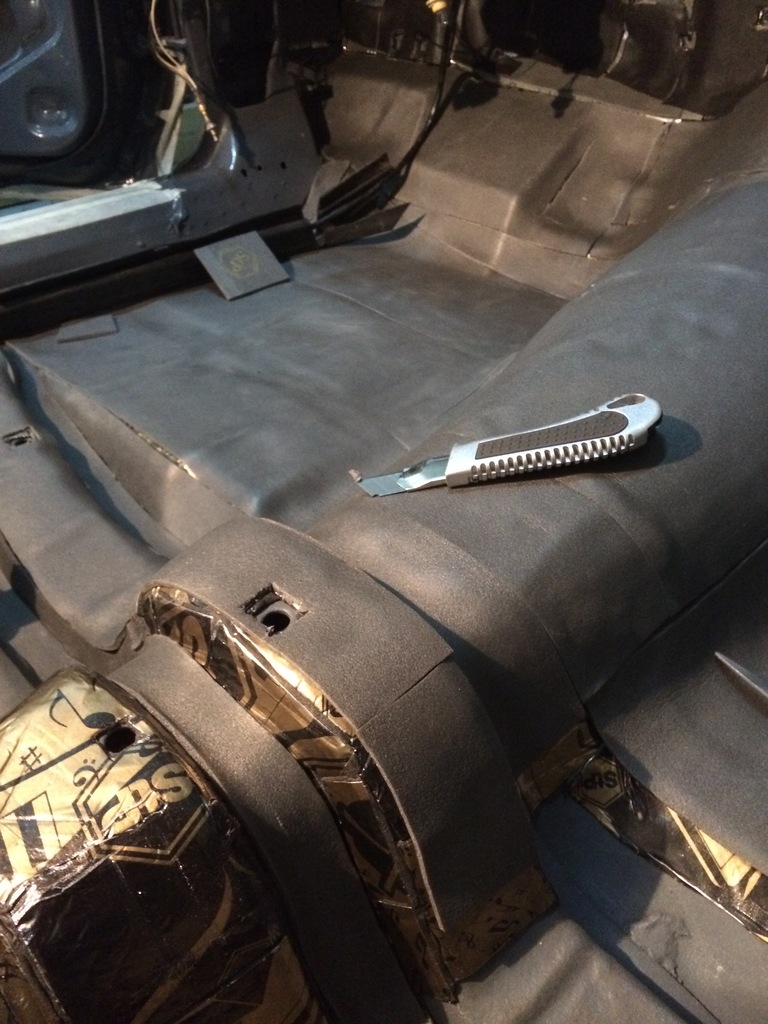
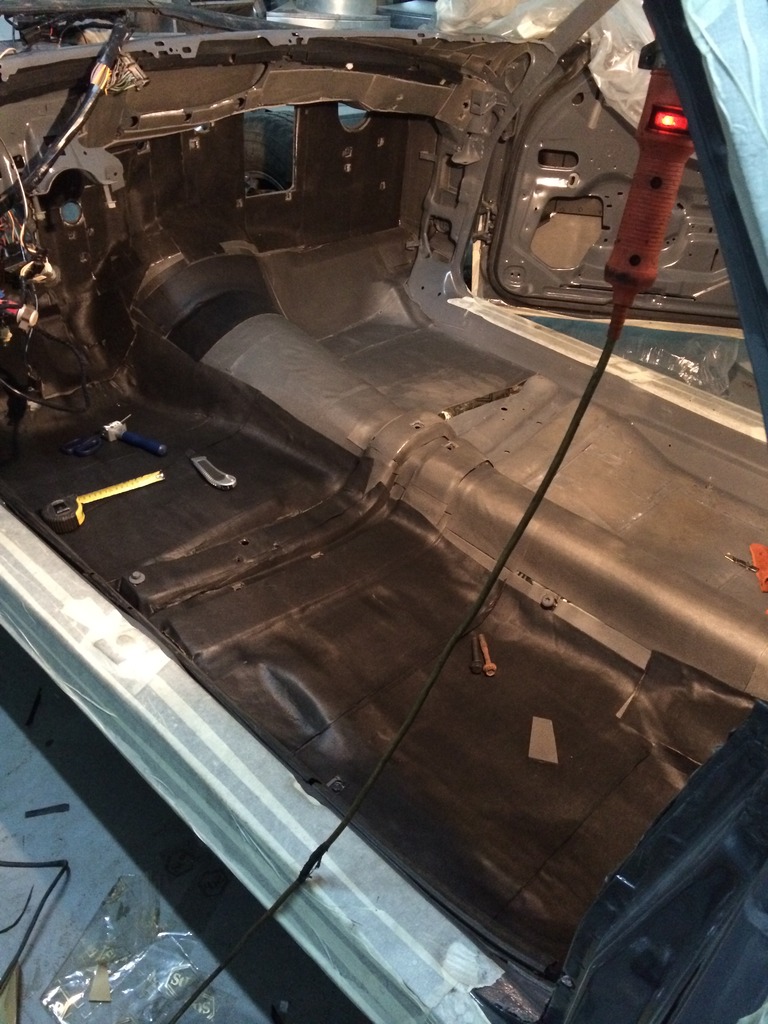
 .
.Last edited by builtnotbought on Tue Mar 22, 2016 2:58 am; edited 1 time in total
builtnotbought- G3GM Member
- Street Cred : 3
Re: '74 El Camino "Project Badass"
![]() by Limey SE Mon Feb 01, 2016 6:48 pm
by Limey SE Mon Feb 01, 2016 6:48 pm
___________________________________________
1977 Chevelle SE x2
One Mild original
one Wild NON original
Anthony

Limey SE- Management

- Street Cred : 97
Re: '74 El Camino "Project Badass"
![]() by builtnotbought Tue Feb 02, 2016 3:09 am
by builtnotbought Tue Feb 02, 2016 3:09 am
Besides that I wanted to ask a question about doors stock insulation. I bought reproduction insulation kit that consists of plastic sheet and shread sheet for each door. Found 0 pics and info in web.
What is the sequence of putting these layers on the door?
Metal door panel->plastic sheet->shread sheet->door inside interior panel?
Thank you for help
builtnotbought- G3GM Member
- Street Cred : 3
Re: '74 El Camino "Project Badass"
![]() by thatfnthing Tue Feb 02, 2016 11:54 am
by thatfnthing Tue Feb 02, 2016 11:54 am

thatfnthing- Donating Member
- Street Cred : 65
Re: '74 El Camino "Project Badass"
![]() by builtnotbought Tue Feb 02, 2016 5:16 pm
by builtnotbought Tue Feb 02, 2016 5:16 pm
thatfnthing wrote:IIRC the door panels had a waxed kraft paper layer over the metal door frame, then a padded jute (kind of like thick felt) layer over that, then the interior door panel. The first layer (paper or plastic) would be a moisture barrier to keep water out of the padding.
Thank you very much!
Gave all the interior panels, headliner, carpet and bench to trim shop. In a month I will have a brand new leather+alcantara interior
builtnotbought- G3GM Member
- Street Cred : 3
Page 2 of 7 • 1, 2, 3, 4, 5, 6, 7 ![]()

 Similar topics
» MY DAILY DRIVER/PROJECT 73 EL CAMINO SS
» Classic Car Restoration Club: 1977 El Camino Project Car-Overview
G3GM :: Media :: G3 Project Pictures
» Blue door jamb sticker
» Factory am/fm
» 1973 Chevelle SS, 350, 4spd. build
» Painting Interior Plastic
» 1973 Chevelle SS 1 Family
» Need driver side bucket seat 73 Laguna
» triangle stainless window trim
» door interior trim retainer clips
» Rusty's progress motor Parts arrived LOL Half are on