


'74 El Camino "Project Badass"
G3GM :: Media :: G3 Project Pictures
Page 5 of 7 •  1, 2, 3, 4, 5, 6, 7
 ![]()
Re: '74 El Camino "Project Badass"
![]() by builtnotbought Mon Aug 08, 2016 5:25 pm
by builtnotbought Mon Aug 08, 2016 5:25 pm
Thank you for advice!Hs1973 wrote:My bumpers where painted 2 years ago. I sanded the crome with 120 Grit first then 180 sprayed some etch primer and then filler. Then sanded vith 320, more filler then 600 800 and then paint. It has held up good so far. I know that a chip in the paint can make the paint slip. But since my car never see rain and only comes out in good wether. I have had no problems with it so far. I even Got a little scrabe on one corner, but the paint stays on fine.
Some updates for today.
Bumpers were given to another professional sanding company and as a result now I have two sanded and powder coated bumpers that are waiting for final paint preparing and painting to colormatch body. One problem is solved
Steering pump started to leak on it's axle. I ordered new gm seal, dissasembled pump to bolts, clean it, polished shaft a little and put it all back together with old rubbers, they looked ok. Didn't have time to check it on leaks as shaft has working mechanical damages in the seal area. Hope it will work well for sometime.
Installed the dashboard, then vent channels (thousands thanks to Steve Mcarlo77 for online consultations
Temp sender to gauge on the dash is p.i.t.a. so much that I've already hate it. It goes throught all the 3 pieces of the dash, front, middle and inside and then under the windshield vent channel to the hole in the firewall and only then to engine block. Sender doesn't dissconnect from gauge, what china manufacturer designed it?
So to remove dash from car or every of it 3 pieces you need to pour off coolant, unscrew the sender, run it through all the car back and you win. Need to do smth with this thing.
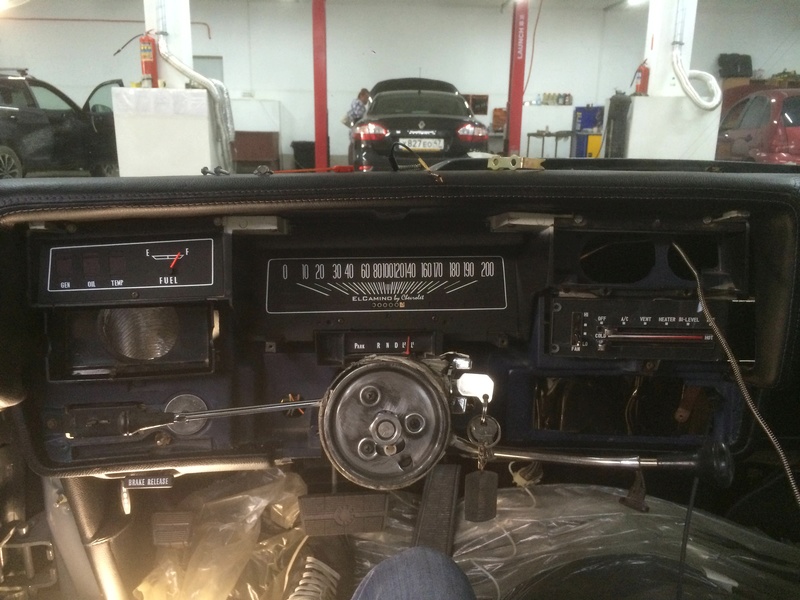

After install noticed some irregularities on the dash above the glove box from this angle of view. As for the dash, all old foam rubber is removed from it, new foundation is made from plastic, than aftermarket cap that I had is glued on to make a shape and then leather is glued. This is the result of this plastic cap deformation I think. Shop will remake everything, but I need to bring them dash back to the shop........not this year
 I won't stand it. I will describe everything about work on interior after I will have good photos.
Then to a good part of the story, I always dreamed of having Nardi steering wheel in any car, so here it is, Nardi 350mm Deep corn with 80mm offset. Yes it is red stiched because there was no option to make grey stiching as all interior now have.
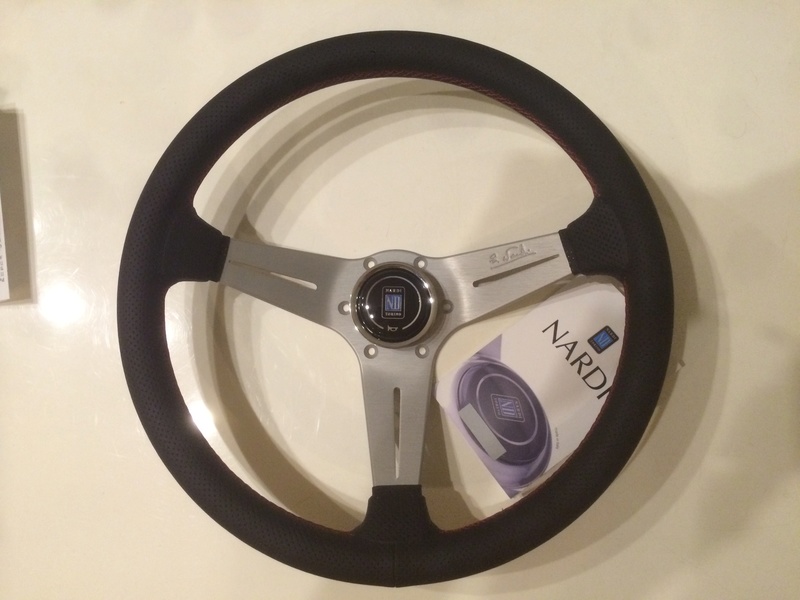
To make everything fit elco Forever Sharp US company sold me this pretty adapter (p/n A01-66P for chevy's).
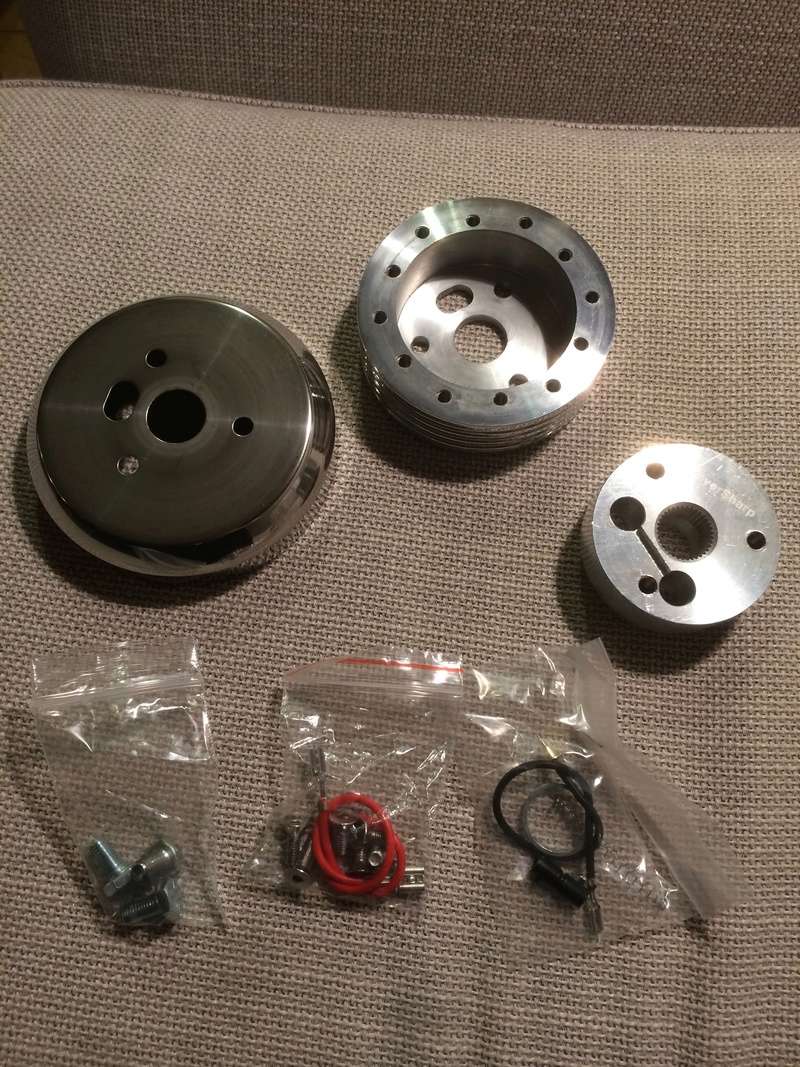

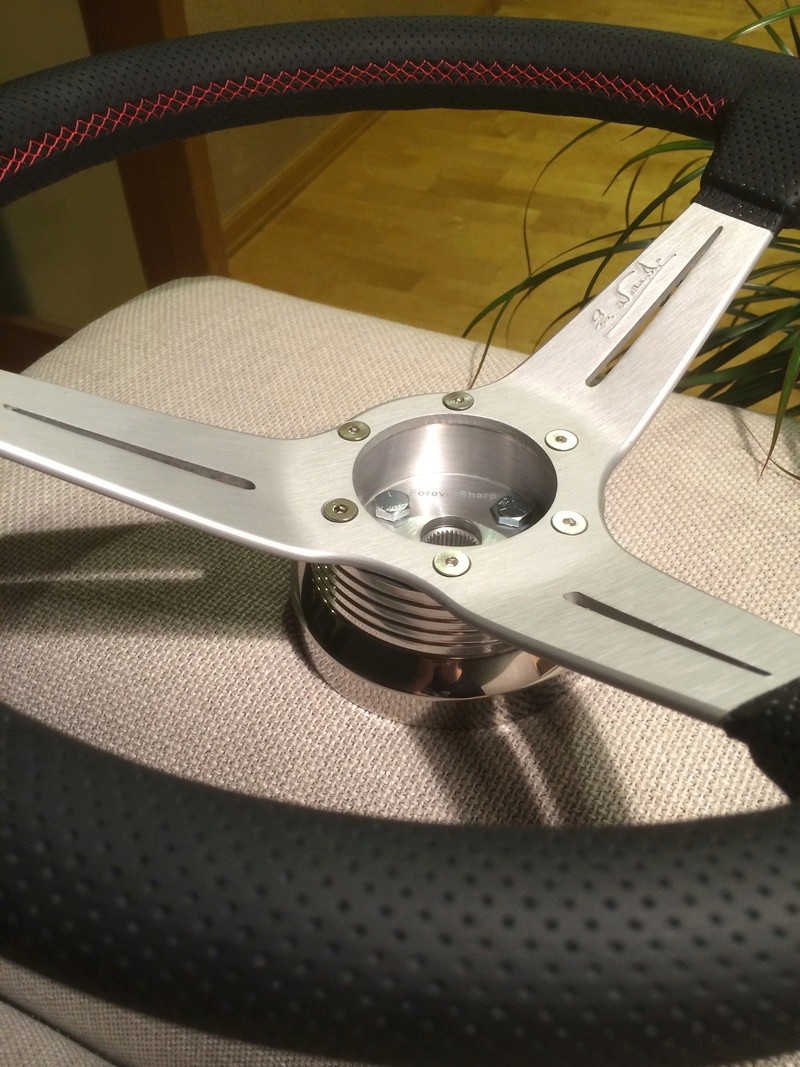
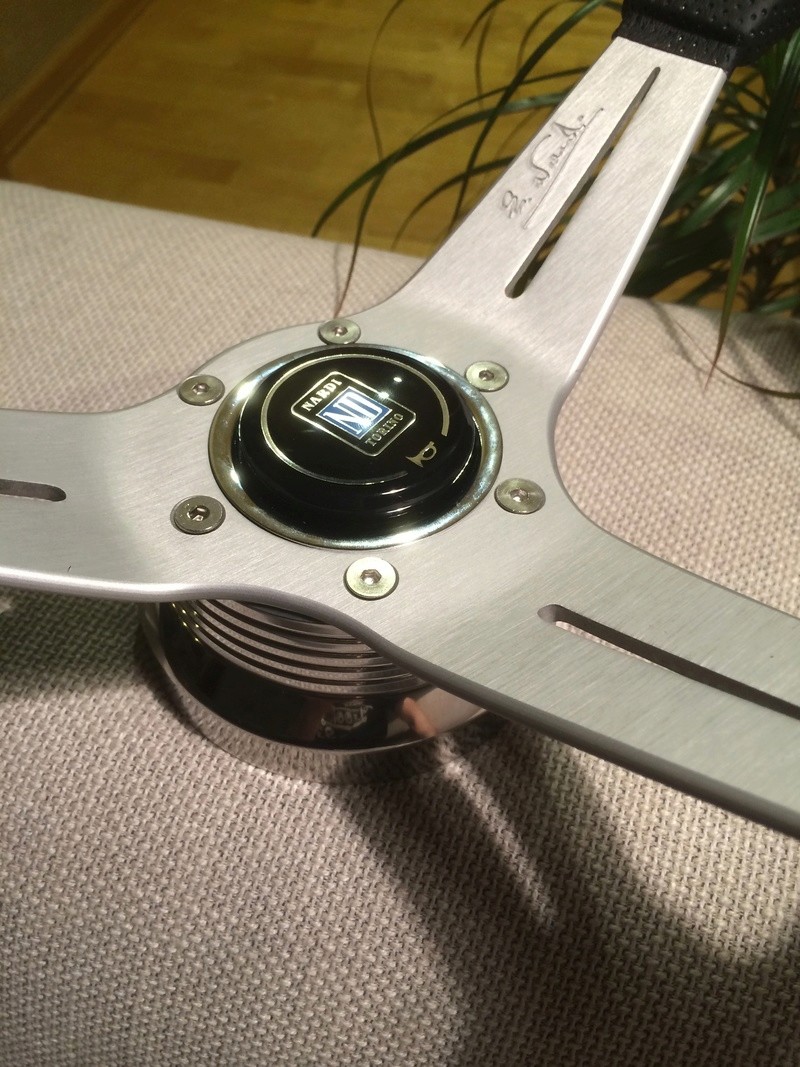
But nothing great can last long. Ring that holds nardi horn button in the adapter isn't supplied by nardi. It should be supplied by adapter company as nardi sellers told. But no ring and no p/n anywhere. So need to search and buy some p/n ring that hope will fit and fix the button. With all given dimensions new wheel must have nearly the same offset as stock one but smaller in diameter (385mm to 350mm)
Besides that I ordered some custom rear plate. I wanted plate with red California word as on plates that are legal now in US and because the car is from California. Found company that makes such plates in France with manufacturing in England
I think it came out pretty cool

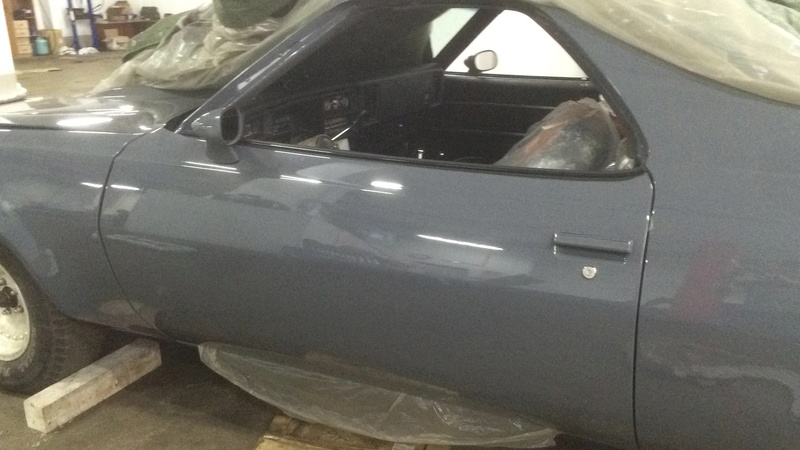
As for body painting, after 3 weeks of fighting and missunderstanding each other with my paint shop I got my door handles colormatched. Now I understand that unmovable part of keylock could be colormatched too, but I don't wan't to dissasemble everything again now, may be during winter. And I tried to hide chrome on window molding with some gloss black vinyl. So it will be all trim that was chrome - gloss black, other parts - colomathed to body. Will see how it come out in future.
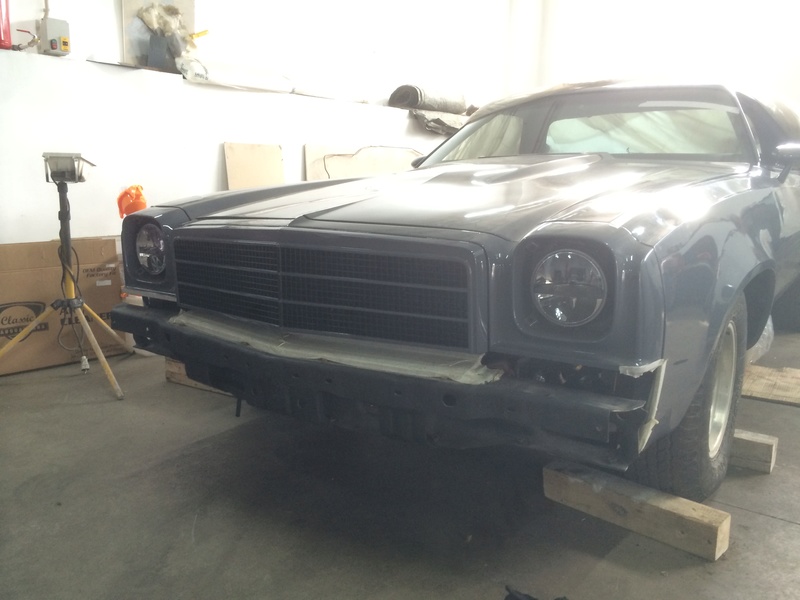
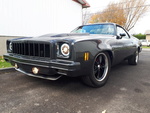
Grill at first was sanded and powdercoated gloss black and fitted to the car. Grill is too big and take all attention to itself from car, I don't like it.
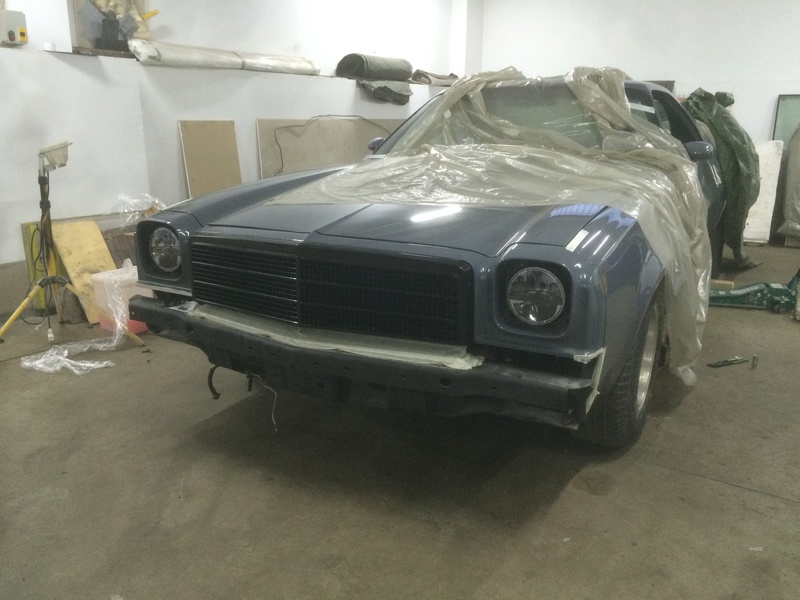
Of coarse the idea was to paint in 2 colors to keep it a little modern and to match the grill that 70 year has, so body paint was added to black powder coat.
I think it came out great. I didn't have any guesses of how it will be but I like it now. Grill continues the hood and don't take attention so much.
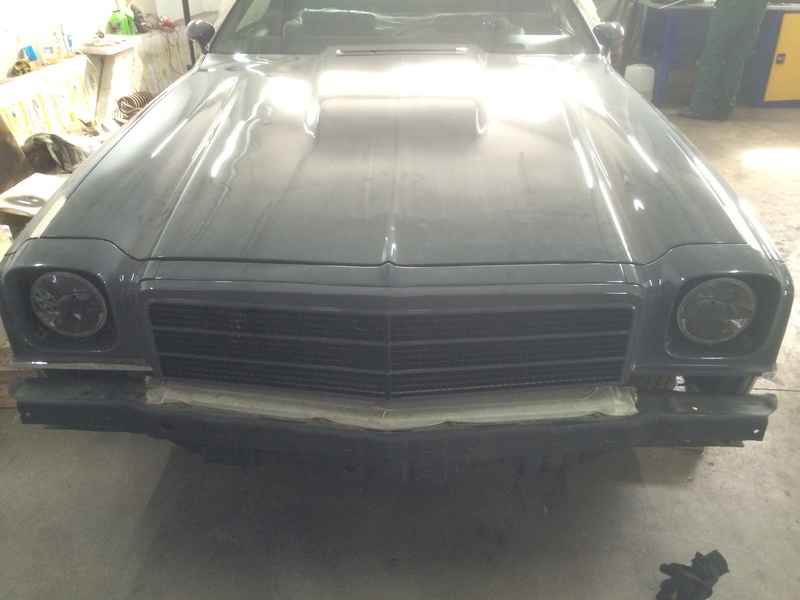
As for what I noticed now, right lo/hi beam lamp pocket or holder is caved near the hood. I thought it was hood but it's not
And interior mirror with bracket fell of my new china windshield...lol

builtnotbought- G3GM Member

- Street Cred : 3
Re: '74 El Camino "Project Badass"
![]() by bigredlaguna Tue Aug 09, 2016 11:52 pm
by bigredlaguna Tue Aug 09, 2016 11:52 pm
Here in the USA, this generation of vehicle from any brand has been looked down on by most in part because of the bumpers. Hot rodders hated the things the government was making the factory do for safety and emission standards.
Your car is going to be stunning. I can only imagine what the local people are going to think of it.
bigredlaguna- G3GM Senior Member

- Street Cred : 53
Re: '74 El Camino "Project Badass"
![]() by builtnotbought Wed Aug 10, 2016 3:22 am
by builtnotbought Wed Aug 10, 2016 3:22 am
bigredlaguna wrote:Don't worry about the grill overpowering the visual effect of the car, the bumper will take care of that!
Here in the USA, this generation of vehicle from any brand has been looked down on by most in part because of the bumpers. Hot rodders hated the things the government was making the factory do for safety and emission standards.
Your car is going to be stunning. I can only imagine what the local people are going to think of it.
Thank you
Hmm, safety in having 3mm thick bumper cover and 4mm thick metal reinfocement inside lol
Yes bumpers have a lot visual area to catch eye. So they will be colormatched to body to hide their massive shapes.
Hope it will be headturner anyway
builtnotbought- G3GM Member
- Street Cred : 3
Re: '74 El Camino "Project Badass"
![]() by impalamonte Fri Aug 12, 2016 9:20 am
by impalamonte Fri Aug 12, 2016 9:20 am
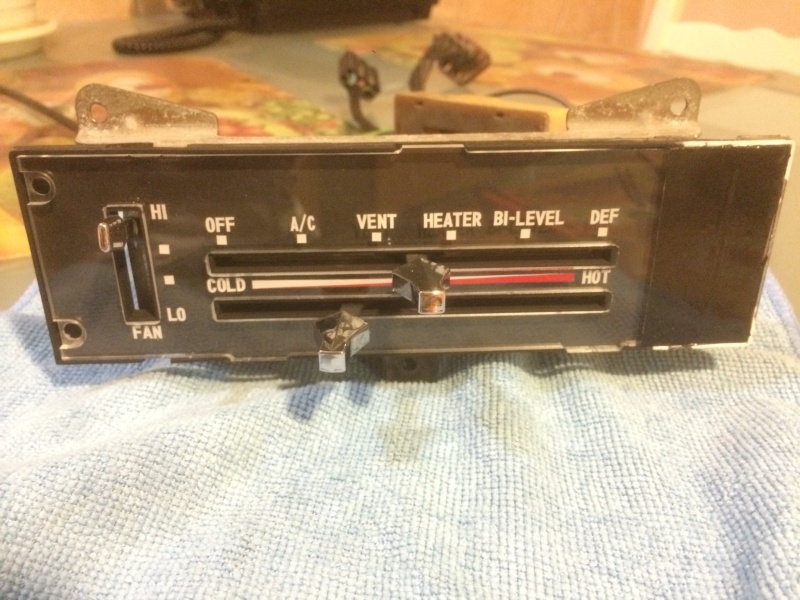
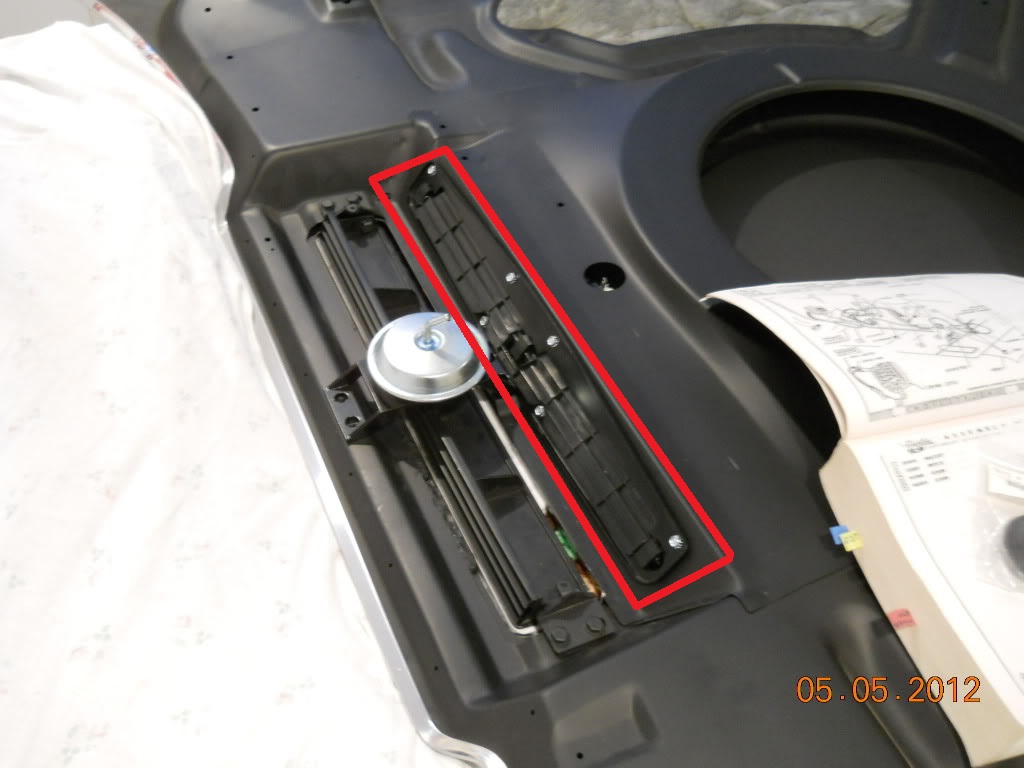
As for your heater controls update .....there is no source reproducing these Clear plastic covers.
We all see the catalogs for popular cars where these can be purchased new (i.e. , Camaros , Mustangs , pre 73 A- bodies) .
There are still thousands of our G3's on the road 73-77 ( Cutlass , Grand Prix , Chevelles, Montes, Regals) .
I think if you could produce these for sales....you would have buyers !!
impalamonte- G3GM Enthusiast

- Street Cred : 18
Re: '74 El Camino "Project Badass"
![]() by builtnotbought Fri Aug 12, 2016 10:24 am
by builtnotbought Fri Aug 12, 2016 10:24 am
impalamonte wrote:Hopefully , speaking for us all..... enjoying your updates and creativity , patience obtaining parts for your ride....keep um' coming.
As for your heater controls update .....there is no source reproducing these Clear plastic covers.
We all see the catalogs for popular cars where these can be purchased new (i.e. , Camaros , Mustangs , pre 73 A- bodies) .
There are still thousands of our G3's on the road 73-77 ( Cutlass , Grand Prix , Chevelles, Montes, Regals) .
I think if you could produce these for sales....you would have buyers !!
Thank you very much! I will try to keep head up!
As for heater control lense as i told before I can share 3d model for free with everyone, it just needs to be corected a little when I have free time. As for selling this item ready to install I never shipped anything over the ocean before and I think item producing price + shipping price will override anyway giving yourself 3d model to your cnc shop over the ocean.
builtnotbought- G3GM Member
- Street Cred : 3
Re: '74 El Camino "Project Badass"
![]() by builtnotbought Tue Aug 16, 2016 3:57 pm
by builtnotbought Tue Aug 16, 2016 3:57 pm
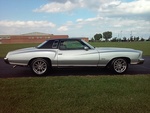
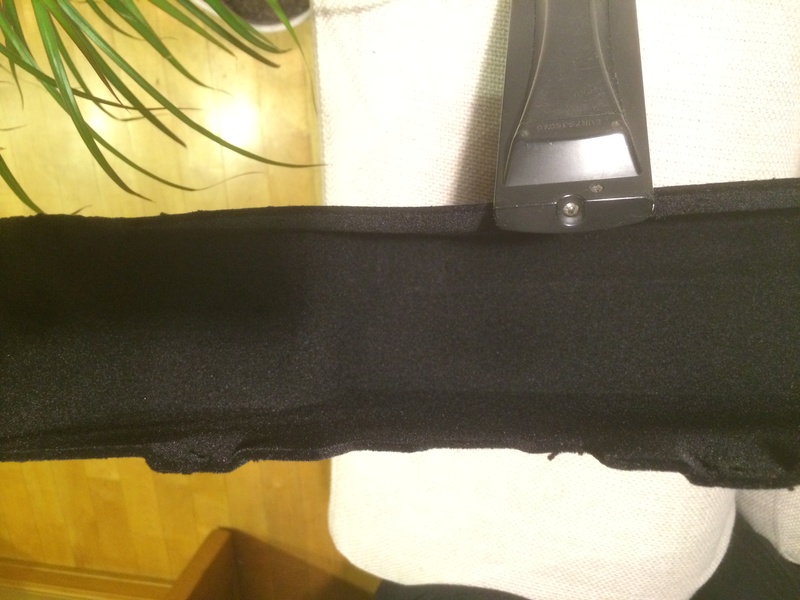
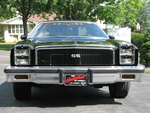
Everybody knows how it looks like stock
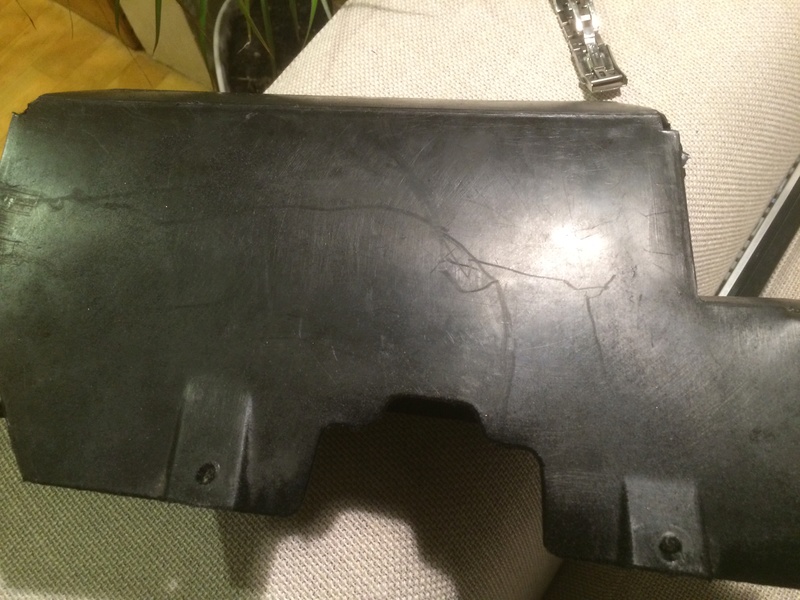
And that's how it looks like after modding inside


builtnotbought- G3GM Member
- Street Cred : 3
crice63- Donating Member

- Street Cred : 2
Re: '74 El Camino "Project Badass"
![]() by builtnotbought Sat Aug 20, 2016 4:52 pm
by builtnotbought Sat Aug 20, 2016 4:52 pm
Collant not leaking, it was my fault with screwing in temp gauge in left head without seal.
Atf leaks a little from somewhere between the th350 and torque convertor.
Adjusted e-brake.
Front brake hoses are still leaking I think from the banjo bolt washers. Don't know what will help them.
Brake pedal is strong with engine off. After engine is on pedal gets lighter a lot and car brakes only near the end of pedal's travel. Bleeded brakes several times - no air. Don't know how it should brake from factory because car has poor brakes from the beginning. But now it has only old front remanufactured calipers, rear drums, pads and lines. All other staff is new.
It stops, but not like I think it can.
I think i need to find somewhere new more powerful alternator to make my airride system works correctly.
So many things left to do...
builtnotbought- G3GM Member
- Street Cred : 3
Re: '74 El Camino "Project Badass"
![]() by crice63 Sat Aug 20, 2016 8:14 pm
by crice63 Sat Aug 20, 2016 8:14 pm
crice63- Donating Member
- Street Cred : 2
Re: '74 El Camino "Project Badass"
![]() by Hs1973 Sun Aug 21, 2016 1:34 pm
by Hs1973 Sun Aug 21, 2016 1:34 pm
However i have several times experienced to much brakepedal travel when you have uoriginal Master and brake booster combinations. Then i have taken the mastercylinder of and removed the steel rod in the brakebooster, sometimes they can be adjustet so they are a little longer = shorter travel. If non adjusteble i have made a new slightly longer rod from a steel bar. It should be long enough for the rod to just engage the mastercylinder, but not so long the brakes start to drag. That Way you get only a minimum of brake travel. Usually it takes some miles on the Road before the brakes really get bite. But they should feel almost as good as any normal car. Just keep going you will get there. Cant wait to see it finished.

Hs1973- G3GM Enthusiast
- Street Cred : 14
Re: '74 El Camino "Project Badass"
![]() by Hs1973 Sun Aug 21, 2016 1:37 pm
by Hs1973 Sun Aug 21, 2016 1:37 pm
Hs1973- G3GM Enthusiast
- Street Cred : 14
Re: '74 El Camino "Project Badass"
![]() by crice63 Mon Aug 22, 2016 3:53 am
by crice63 Mon Aug 22, 2016 3:53 am
crice63- Donating Member
- Street Cred : 2
Re: '74 El Camino "Project Badass"
![]() by builtnotbought Mon Aug 22, 2016 4:49 pm
by builtnotbought Mon Aug 22, 2016 4:49 pm
Yes of coarse I will make another photo a lil later. Now I'm fully submerged in work on car so didn't have enough time to take it to the day light.crice63 wrote:From this picture angle the cowl is invisible. Maybe just lower the camera a little to get the profile of the hood. I can't wait to see it all put together. The all black lines around the windows are intriguing.
Hs1973 wrote:If your caliper washers leak, its because they are compressed in the metal. When i asemble caliper si heat the washers with a torch til red hot. Let them cool of and they wont leak until next time they are taken out. You can then heat them again. As for pedal travel, i Think you first need to stop the leaks or air will come in the system. Then adjust the rear brake shoes, so everything is adjustet correct. Then bleed them again and the pedal should not travel far before the brakes engage.
However i have several times experienced to much brakepedal travel when you have uoriginal Master and brake booster combinations. Then i have taken the mastercylinder of and removed the steel rod in the brakebooster, sometimes they can be adjustet so they are a little longer = shorter travel. If non adjusteble i have made a new slightly longer rod from a steel bar. It should be long enough for the rod to just engage the mastercylinder, but not so long the brakes start to drag. That Way you get only a minimum of brake travel. Usually it takes some miles on the Road before the brakes really get bite. But they should feel almost as good as any normal car. Just keep going you will get there. Cant wait to see it finished.
Oh and by the Way there need to be a washer on both sides of the brake hose fitting on the caliper If im not mistaken. Please correct me If i remember Wrong.
Those brakes are crazy. I blame sandblasted and powdercoated old calipers.
We heated all washers to red color but didn't let them cool down thinking that they are more flexible when hot. I think may be this is a mistake. Another thing is that I'm working now with new metric washers (12mm hole diameter, and banjo bolt is 7/16 = 11,1mm so washer is playing on the bolt). This may be a mistake too. This is because we don't have inch washers here at all. I know they are cheap but they are too far away is US. I will try this week 10mm hole diameter washers and drill them to 11 somehow. If not I will do brakes next month or two after ordering new bolts and inch washers.
Rear brake shoes are adjusted.
Master cylinder and booster are new, but I didn't compare old/new rod lenght. If nothing help I will look at them
I keep on keep on keep on
Thank you!
crice63 wrote:Finally read through the whole thread. Incredible design work, creative solutions to sourcing parts and making new ones. I would love to get copies of your autocad files, I will pm you my email. This car is going to look great.
Answered, thank you!
builtnotbought- G3GM Member
- Street Cred : 3
Re: '74 El Camino "Project Badass"
![]() by Hs1973 Wed Aug 24, 2016 11:56 am
by Hs1973 Wed Aug 24, 2016 11:56 am
I must say you are wery patience and have a lot of energy. I know you just want to drive the damn thing asap. And you will just keep going and you will eventually get it done. It took me close to 6 months to get my chevelle all done so it runs and drives like i wanted. But even now i have a list of things i need to do or redo that im not happy with. Welcome to the wonderfull World of old cars.
Hs1973- G3GM Enthusiast
- Street Cred : 14
Re: '74 El Camino "Project Badass"
![]() by builtnotbought Wed Aug 24, 2016 5:46 pm
by builtnotbought Wed Aug 24, 2016 5:46 pm
Hs1973 wrote:Dude. Dont Worry you will get there. I did my chevelle frame of, i had alot of the same issues as you when completed. A car is never really done, there is always something that is not how you want it. It takes time before every little issue is sorted out. You have even harder conditions since you have to special order every little item. Or home made solutions.
I must say you are wery patience and have a lot of energy. I know you just want to drive the damn thing asap. And you will just keep going and you will eventually get it done. It took me close to 6 months to get my chevelle all done so it runs and drives like i wanted. But even now i have a list of things i need to do or redo that im not happy with. Welcome to the wonderfull World of old cars.
Thank you
Yea I know that car will be never finished and there is always smth to add. I made 2 project before this, but they were/are modern cars of this century. And I must say that it's much easier to mod modern car when for example bumper or skirt has only one right position. Comparing to elco where you can mount each bumper in million of positions and every position will be ok. It takes a lot of time to align bumpers for example but on the other hand it's very cool that many parts in elco has million of settings and that are loaded from factory and you can move parts like you want and screw it with the same bolt in place.
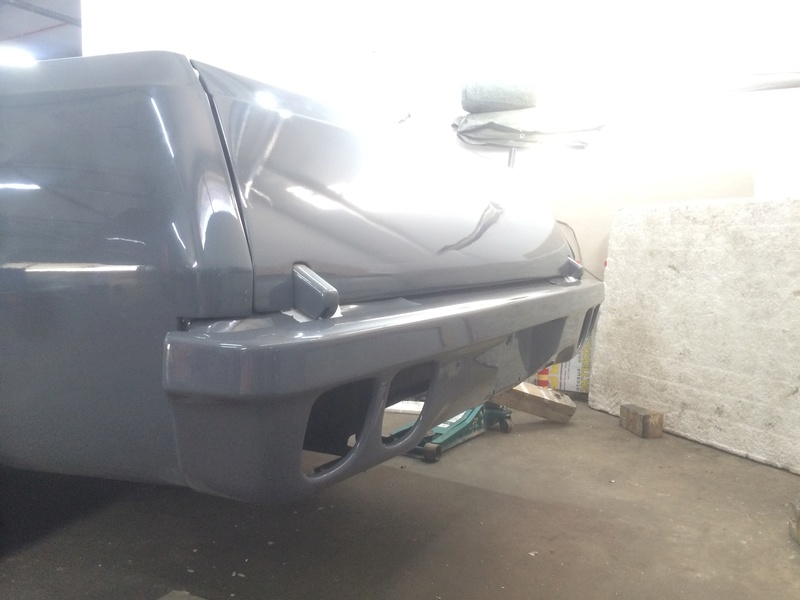
So bumpers. I was waiting I think about 2 years to come to this stage of bumpers install from the moment when I start modifying them.
Brought them from paint shop where they were welded again a little after sanding and powdercoating, plastered on the whole face surface (because even powdercoat didn't fill all dents and they were visible, the same thing with weld) and than color matched to body.
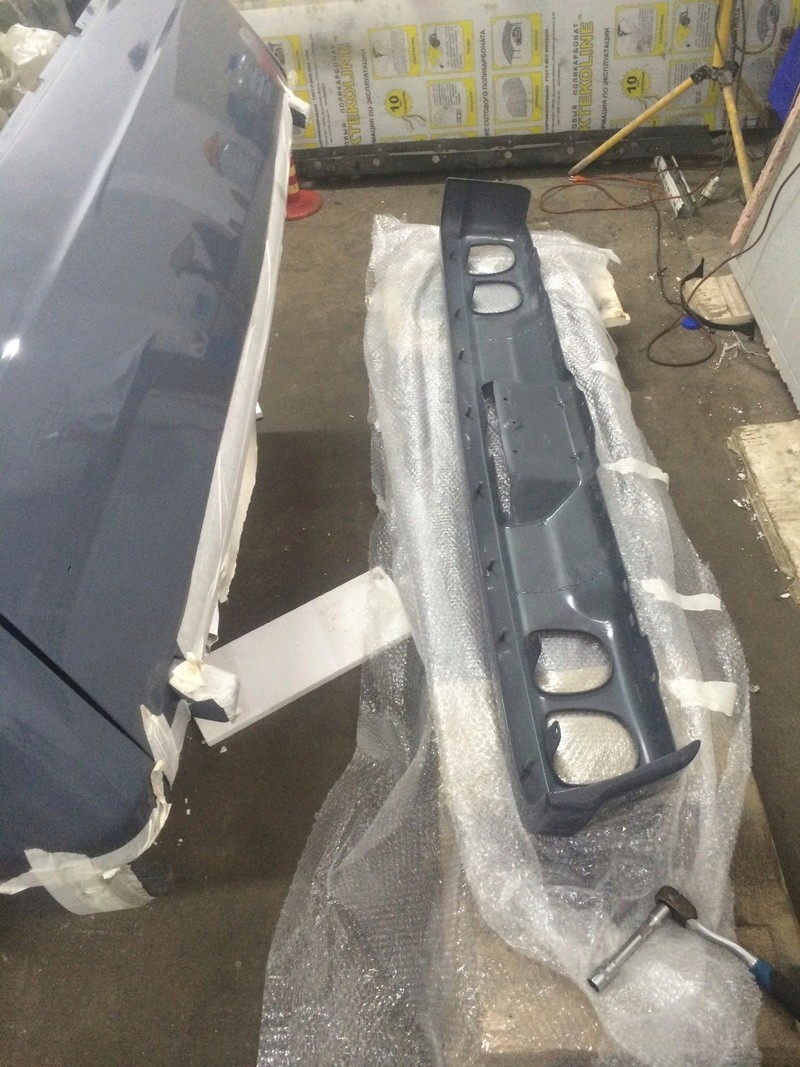
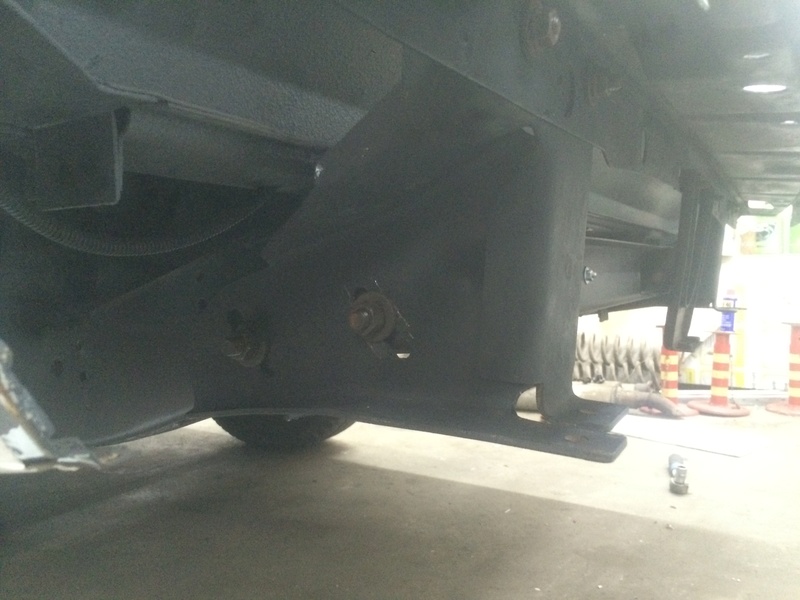
First of all goes rear reinforcement with million of mounting positions.
To tuck rear bumper as much as it can without any major body work - rubber bump stops were out of reinforcement brackets and oval holes in brackets were extended to rise them up and move back. Now in this position brackets are lightly touching the edge of the body. I know that body is moving on it's own bushings but that's the solution for now.
Bumper reinforcement was cutted on both sides as it can't fit inside bumper now. Even side's plastic fillers must be in place but unscrewed and moved to center of the car to let bumper goes on them. Don't remember how it was made from factory but I think first fillers are screwed to body and then bumper fitted. The general idea of this bumpers tuck was to save fillers in place not to have holes between the body and bumper. Side edges of all bumpers are aligned as they can with cutting in the fenders.
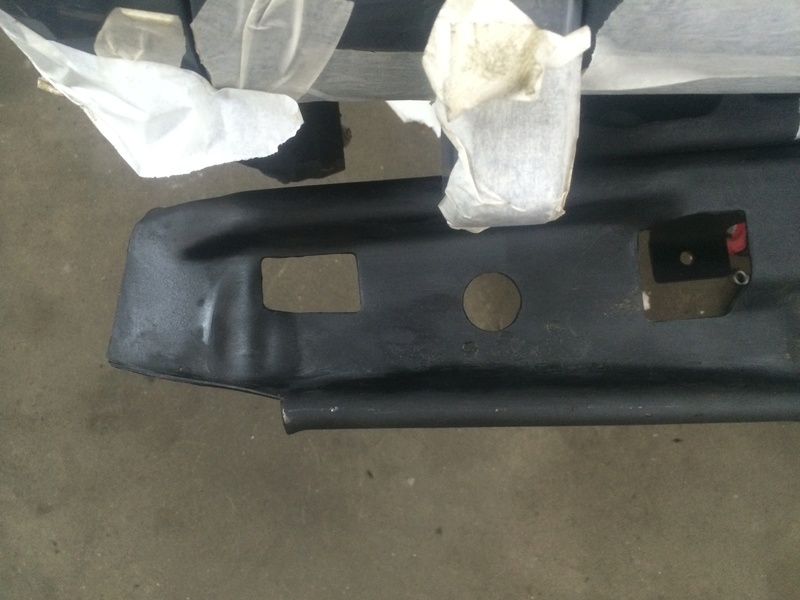
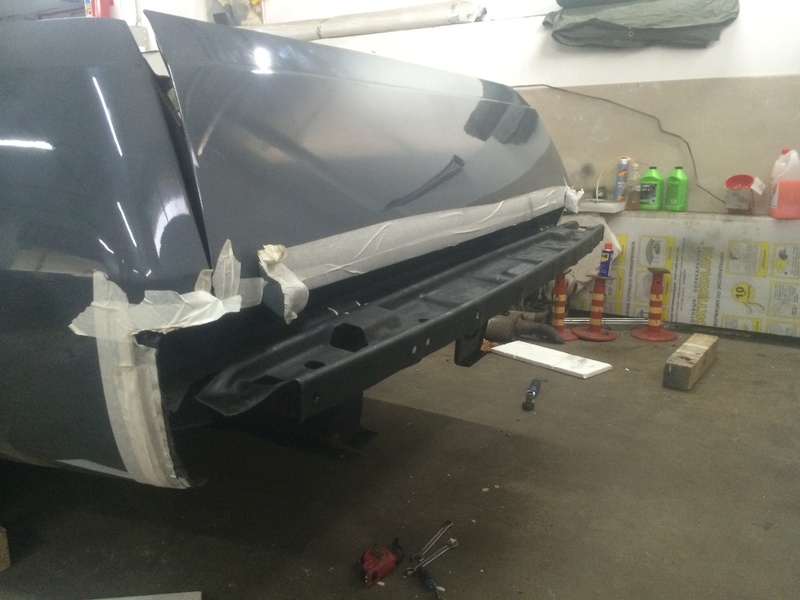
That is the result, bad quality photos but you will get an idea. Not ideal but way much better than factory huge bumper. Red lenses with maybe black edging, number plate and black tailgate molding will dilute grey color.
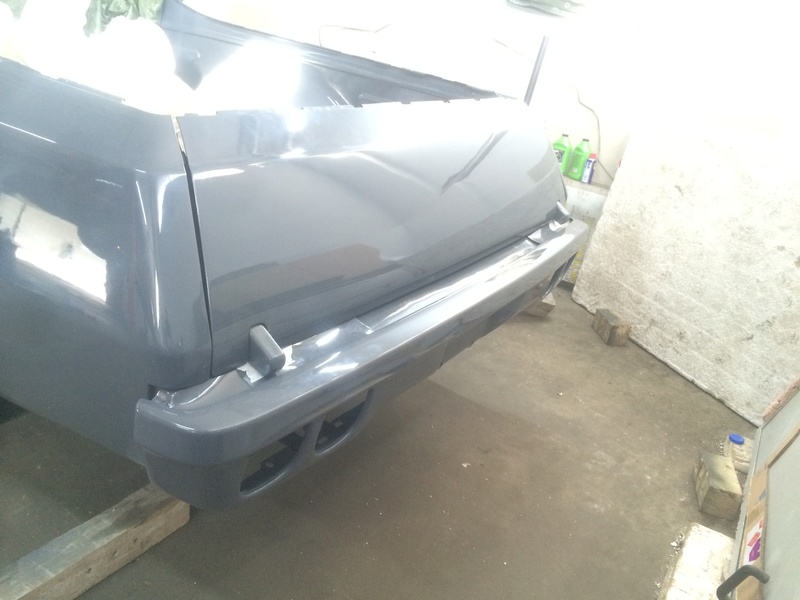
Front bumper's reinforcement too has million of positions and after I centered it and bumper to have equal gaps R/L to fenders I noticed that all bumper is moved to drivers side. And gaps between center metal filler ans side's plastic are different too, drivers is bigger. Don't know why but I think all my front end is looking to the left and not centered. Don't know now how to fix it because if I will move all front end I again will have problems with hood to fenders gaps...
Again reinfircement was cutted on both sides to make bumper fit on it and fillers must be in place but moved to center to make everything come on.

That's the way of alignment with no helpers, using 3 ton jack, lol. Bumpers all together are heavy as hell!

That is the result. I think it looks cool. Need some black lights bezels, turn lights with black edging, black Randy's spoiler and may be some classic black stripes on the hood.
Pic are making color of the car too light.
builtnotbought- G3GM Member
- Street Cred : 3
Re: '74 El Camino "Project Badass"
![]() by Hs1973 Thu Aug 25, 2016 12:12 pm
by Hs1973 Thu Aug 25, 2016 12:12 pm
Hs1973- G3GM Enthusiast
- Street Cred : 14
Re: '74 El Camino "Project Badass"
![]() by builtnotbought Tue Aug 30, 2016 5:42 pm
by builtnotbought Tue Aug 30, 2016 5:42 pm
Hs1973 wrote:I Think you have one unik elco. I to did tuck my bumpers. I took the reinforcements out though, because like you Said they are freaking heavy. I then drilled a hole in the bumper shocks. That Way you can Press the piston back until happy. I Cut the corners off and shaped them to the fender cutouts. Looks Way better. Yours look cool with the bumpers tucked and the Black lights. One more thing you can tjek of the to do list. You are almost there. I know the amount of work in a build like yours are gigantic. And that old us cars are Way different from modern cars in the Way they are build. But everything has it good and bad sides. In Many ways us cars are easier to work on. Down side is that they are not that easy to align bodyparts on, as they did not look good in the gaps even when new. What wheels are you going to put on? Cant wait to se it.
Thank you!
As for the wheels i don't have large budget for them.
Any cast/forged around 10" width wheel that looks cool is up to 400-500$ each plus i need to pay expensive shipping for heavy load of 4 rims plus 4 tires from US. Any custom 2/3 piece wheel that can be made with used euro 5x120 centers will be not much cheaper.
So for now i choosed cragar's soft 8 in 17x9 size, factory black. I will try to find them new in Finland not to pay for shipping.
Will try 17x9 with i think 285/40 on all 4 corners and then will try to calculate how much i can widen rear, i think to about 10,5" to put on 315/35 with minor fender work. But this is just a plan in my head and i don't know the result.
After re-drilling 10mm copper banjo washers to 11mm and putting them into flames leaks are gone for now. Hope they are gone forever.
Moved car on parking 3 levels up, so drove it a little. Has hybrid feelings about how it drives. Of coarse it goes but not how i imagined. Of coarse i don't have tach so i don't know if converter reached it stall speed.
Th350 is full with atf, warm. Torque converter has 2400-2600 stall speed as engine manufacturer said to buy.
Yes It goes, but too slow i think. I can't feel those 400Hm. It looks like all power get lost in trans. Extremely hard was climbing to the next parking levels, always needed to rev up engine to make the car move.
Is this ok that car under stall speed is sooo slow? More engine noise than moving.
builtnotbought- G3GM Member
- Street Cred : 3
Re: '74 El Camino "Project Badass"
![]() by tropdeprojet Tue Aug 30, 2016 7:46 pm
by tropdeprojet Tue Aug 30, 2016 7:46 pm
tropdeprojet- Donating Member
- Street Cred : 5
Re: '74 El Camino "Project Badass"
![]() by 77ElClassic Wed Aug 31, 2016 12:15 am
by 77ElClassic Wed Aug 31, 2016 12:15 am
With a 2400 stall converter, your car probably does make more noise than motion if your just putting around a parking garage. If your engine builder recommended that converter, then they're claiming that your engine starts building power and torque at around that rpm. This allows the engine to reach that powerband before fully engaging to the tranny. Any movement below that rpm is going to have a "slushy" feel. Assuming you have faith that your transmission is operating correctly, don't get discouraged. What you're getting sounds normal. Additionally, it doesn't sound like you've had the opportunity to get the car out on the road to see what it's got yet. With the type of performance equipment that it sounds like you have, you can time and tune it all you want at the workbench, but it's not until you get it out there and run it (after break-in of course) that you'll be able to tweak the timing and carburation.
On the wheels and tires, you may want to consider a narrower setup on the front. If my math is correct, a 285-40X17 will rub the wells pretty hard on sharp corners and possibly on high speed cornering. That wide of a tire also tends to degrade handling on these cars as the softer steering and suspension that's inherent to them causes the tire to track or "follow" soft spots and other flaws in road surfaces.
The 285-40X17 on a 9" rim should work well on the rear with both a 4.5" or 5" BS. However the 315-35X17 on a 10" rim may require the 4.5" BS to clear the frame and would definitely require some fender mods. Again, this is assuming my math is correct and all of it means nothing if you have or are planning to modify the vehicle to compensate. And it's just food for thought.
77ElClassic- Donating Member
- Street Cred : 5
Re: '74 El Camino "Project Badass"
![]() by Joe73 Wed Aug 31, 2016 2:29 pm
by Joe73 Wed Aug 31, 2016 2:29 pm

Joe73- Donating Member
- Street Cred : 83
Re: '74 El Camino "Project Badass"
![]() by builtnotbought Mon Sep 05, 2016 3:40 pm
by builtnotbought Mon Sep 05, 2016 3:40 pm
77ElClassic wrote:Hs1973 is right, you truly have a unique EC. Makes me want to start over on mine so I can follow your lead. I'd love to have your speedometer and convert it to mph. It be more than 50% unused though.
With a 2400 stall converter, your car probably does make more noise than motion if your just putting around a parking garage. If your engine builder recommended that converter, then they're claiming that your engine starts building power and torque at around that rpm. This allows the engine to reach that powerband before fully engaging to the tranny. Any movement below that rpm is going to have a "slushy" feel. Assuming you have faith that your transmission is operating correctly, don't get discouraged. What you're getting sounds normal. Additionally, it doesn't sound like you've had the opportunity to get the car out on the road to see what it's got yet. With the type of performance equipment that it sounds like you have, you can time and tune it all you want at the workbench, but it's not until you get it out there and run it (after break-in of course) that you'll be able to tweak the timing and carburation.
On the wheels and tires, you may want to consider a narrower setup on the front. If my math is correct, a 285-40X17 will rub the wells pretty hard on sharp corners and possibly on high speed cornering. That wide of a tire also tends to degrade handling on these cars as the softer steering and suspension that's inherent to them causes the tire to track or "follow" soft spots and other flaws in road surfaces.
The 285-40X17 on a 9" rim should work well on the rear with both a 4.5" or 5" BS. However the 315-35X17 on a 10" rim may require the 4.5" BS to clear the frame and would definitely require some fender mods. Again, this is assuming my math is correct and all of it means nothing if you have or are planning to modify the vehicle to compensate. And it's just food for thought.
Read a lot of info about trq converters, another unknown chapter for me. A lot of different positive and negative info starting from brands ending with price.
Read again all my messaging.
Engine builder told to put 2200 stall. I requested TCI for right converter for my application including 2200 advice from builder. They sold me 240900 p/n converter with web description of stall 2400-2600 but saying that with my engine this p/n will stall at 2000-2400. This week I read that same converters will make different stall with different engines.
Sooo, I think at first I need to check what stall speed I have now and then think further.
Engine is broke in from the box, and dyno sheet starts from 2500rpm (it's attached a few pages before) having smooth line of Nm till the end.
Timing is set too and carb is tuned by the builder but I read somewhere in web as in every country air has its own temperature, humidity etc - carb needs to be tuned to each specific place. Don't know if it's true but if yes I guess hp and Hm don't change much.
Thank you for tire food) grey 73 chevelle in first post has this setup on front end and doing speed cornering ok. As for rear yes I need to measure a lot.
Target is to look cool as possible so it will take some time and patience again and again
Joe73 wrote:Also, with the 2400-2600 stall speed. Make sure that when your crusing in your final gear of the trans that your rpm is more than your stall speed. Otherwise your convertor will be slipping constantly and causing excessive heat. And heat kills an automatic.
Thank you for info! I will check someday. Need to buy a tach that will fit my interior.
The car is not so simple as it seems to be.
Never liked auto gearboxes, lol
builtnotbought- G3GM Member
- Street Cred : 3
Re: '74 El Camino "Project Badass"
![]() by bigredlaguna Tue Sep 06, 2016 5:30 am
by bigredlaguna Tue Sep 06, 2016 5:30 am
The convertor stall speed is dependent mostly on how much torque the engine produces. Imagine a convertor that allows a V6 to stall at 2k RPM. Now put the same convertor behind a 5.7l V8 and it will stall at 2400-2600 simply because the torque of the larger engine is greater.
I'm not sure about the heat generation during cruising that Joe73 is referring to because during cruise, it doesn't require a lot of power to maintain momentum. The heat buildup would be mainly during times of mid to heavy throttle such as acceleration, climbing a hill, or simply carrying a lot of weight. It is always a good idea to add an oil cooler to take care of those times that you put the transmission under stress.
As far as the carburetor tuning, you may want to find out what altitude it was calibrated at. If you are at very much different altitude, you could optimize the tune from the setting the builder made. You wouldn't really have to worry about it much until you get into higher altitudes like 6000 ft to 7000 ft above sea level.
bigredlaguna- G3GM Senior Member
- Street Cred : 53
Re: '74 El Camino "Project Badass"
![]() by builtnotbought Sat Oct 01, 2016 6:00 pm
by builtnotbought Sat Oct 01, 2016 6:00 pm
Got it, thank you!bigredlaguna wrote:It is true about the stall speed being different between different engines using the same converter. It is an old trick to use a convertor from a V6 car in a V8 car to get a higher stall speed.
The convertor stall speed is dependent mostly on how much torque the engine produces. Imagine a convertor that allows a V6 to stall at 2k RPM. Now put the same convertor behind a 5.7l V8 and it will stall at 2400-2600 simply because the torque of the larger engine is greater.
I'm not sure about the heat generation during cruising that Joe73 is referring to because during cruise, it doesn't require a lot of power to maintain momentum. The heat buildup would be mainly during times of mid to heavy throttle such as acceleration, climbing a hill, or simply carrying a lot of weight. It is always a good idea to add an oil cooler to take care of those times that you put the transmission under stress.
As far as the carburetor tuning, you may want to find out what altitude it was calibrated at. If you are at very much different altitude, you could optimize the tune from the setting the builder made. You wouldn't really have to worry about it much until you get into higher altitudes like 6000 ft to 7000 ft above sea level.
A little update...
Interior is fully assembled except horn button (Nardi didn't answer at all to give me right part number of button retaining ring), rear headliner molding (because I still didn't buy new seat belts and don't want to break molding's clips pulling them out several times). As option installed map light, added underdash foot lights using warm white leds.
Assembled everything in underhood space. Added colormatched windshield water bottle as my car didn't have it.
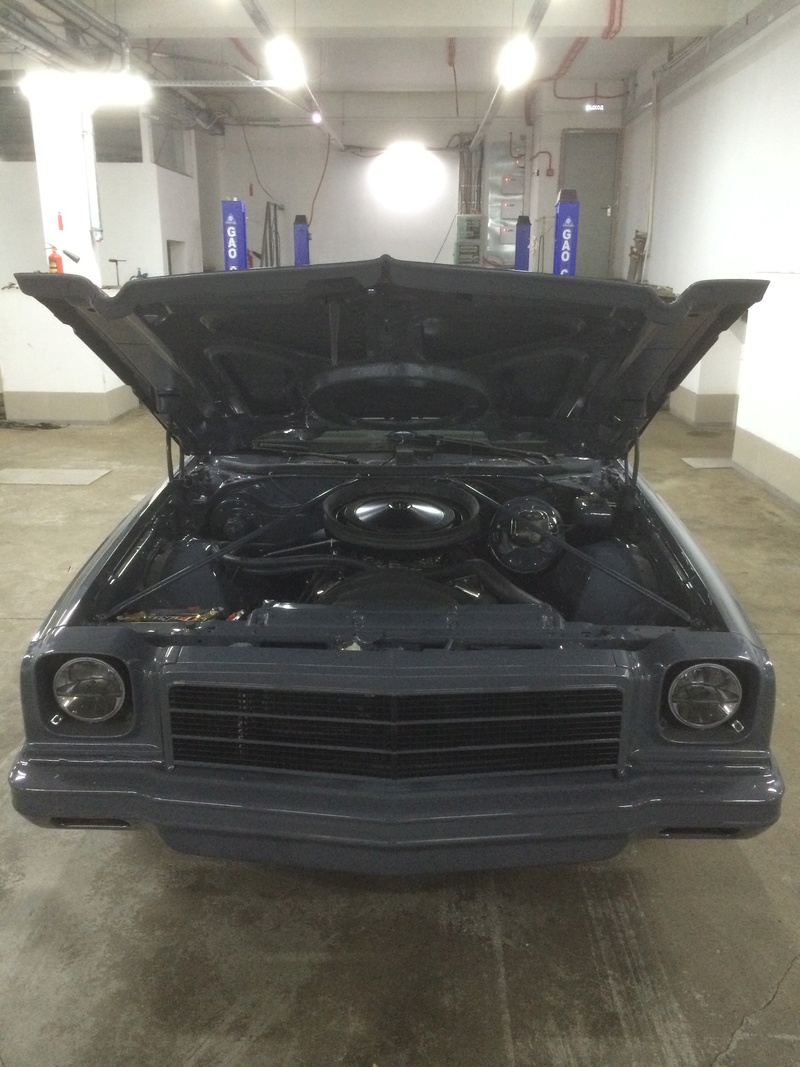
As for the cowl induction, we cutted, pushed it and welded back together right corner of the cowl section to let passanger wiper move freely.
Installed aftermarket vacuum canister (just bent it's intake tube from 45 to 90 degree as it was hitting the body when hood was closed), attached it to flapper, put in vacuum valve inline and connected to carb vacuum port. When hood is closed vacuum canister is lightly touching the windshield antenna plastic cover. I don't think it's a great problem, so will solve it later somehow. It was a luck that canister appeared to be enough high above the tray cover

I was surprized but it worked ok from first attempt. Very cool thing
Besides that I didn't have a chance to install cowl mesh cover near the windshield because it will hit pass wiper too. And underhood rods from body to fenders hit the cowl induction section. Need to do smth with them because hood isn't closing in the rear part.
Restored front turn lights. Cleaned inside with soap and water, polished the glass,
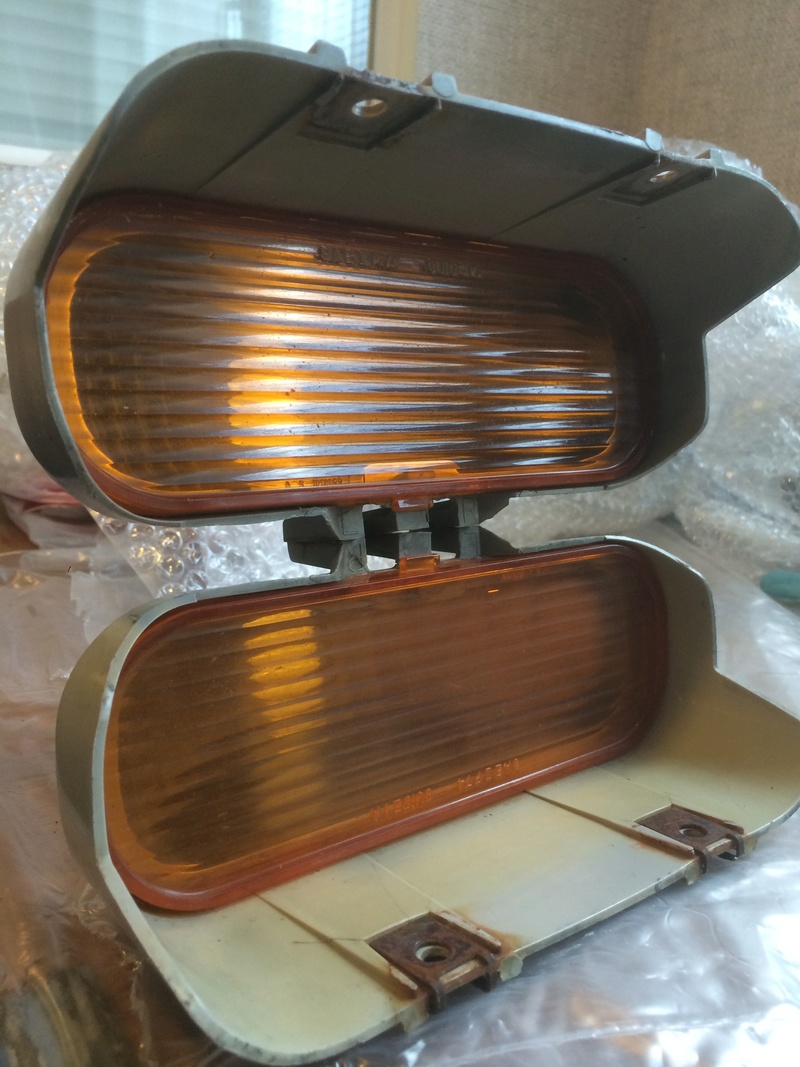
painted visible parts of the housings

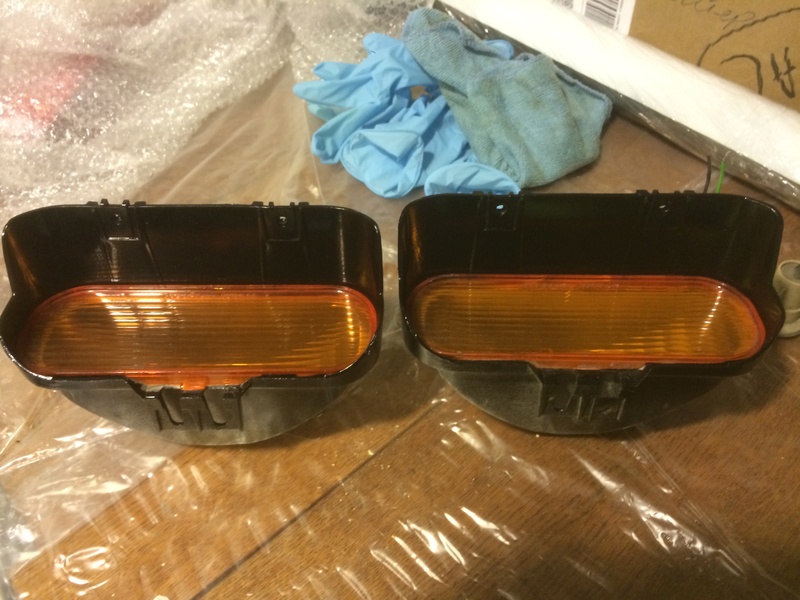
and tinted with light grey film.
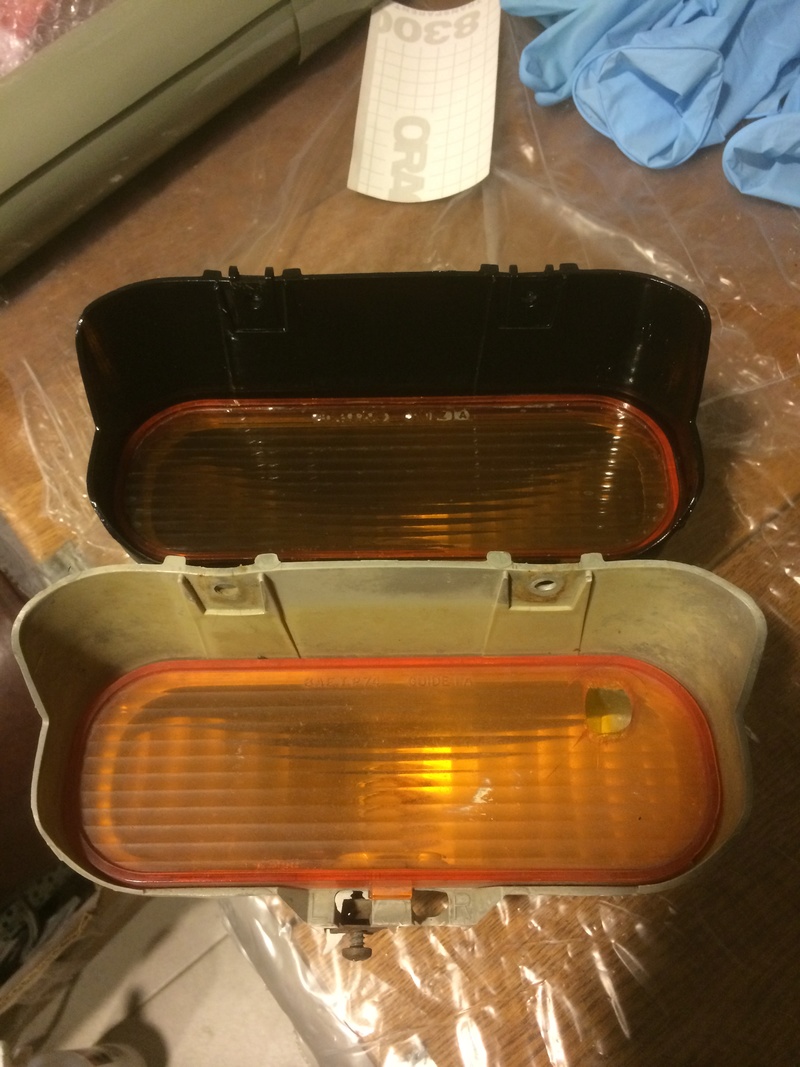
Came out pretty cool. Later need to restore reflective coating inside the housing because years do their work.
Besides that made a scratch of exhaust and it's flanges. Exhaust shop where I will do work don't have such flanges and I guess no one have them here. So they will be cutted from stainless steel.
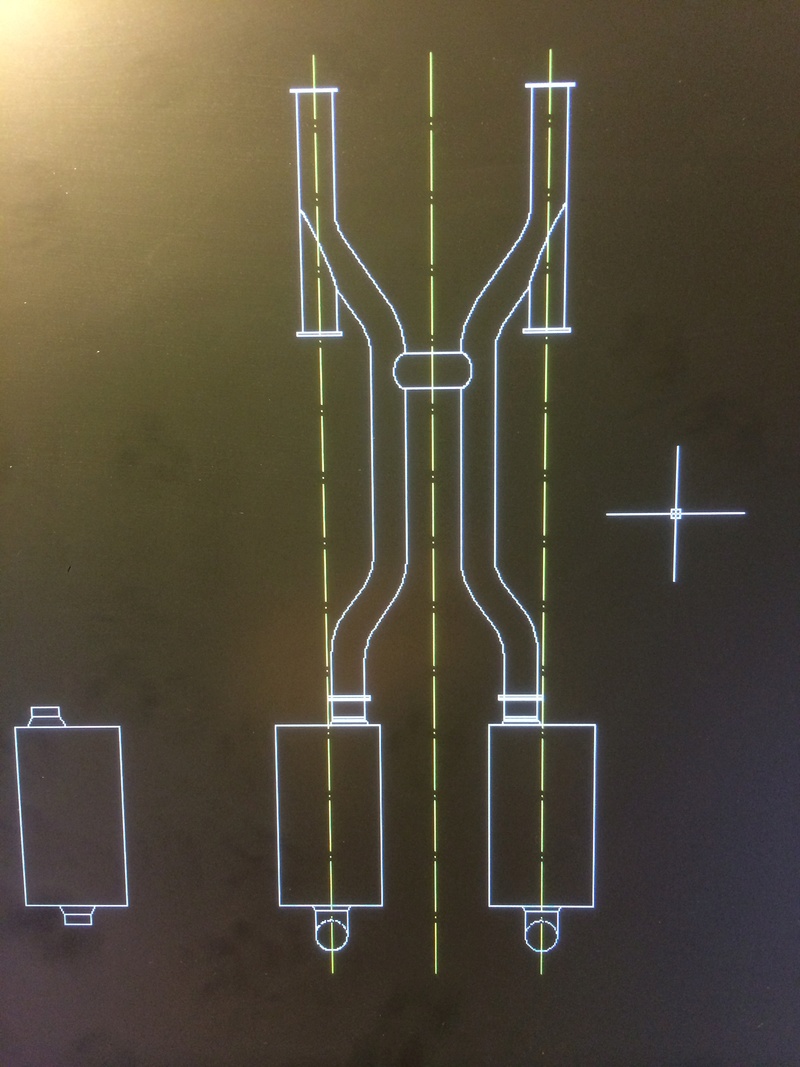
Read a lot of threads about cutouts and decided to buy someday Badlanzhpe ones. Don't know who's best and who's worst. These are middle priced and well designed I think.
Glued in over airride box plexiglass. Paint needs to be polished on cover.
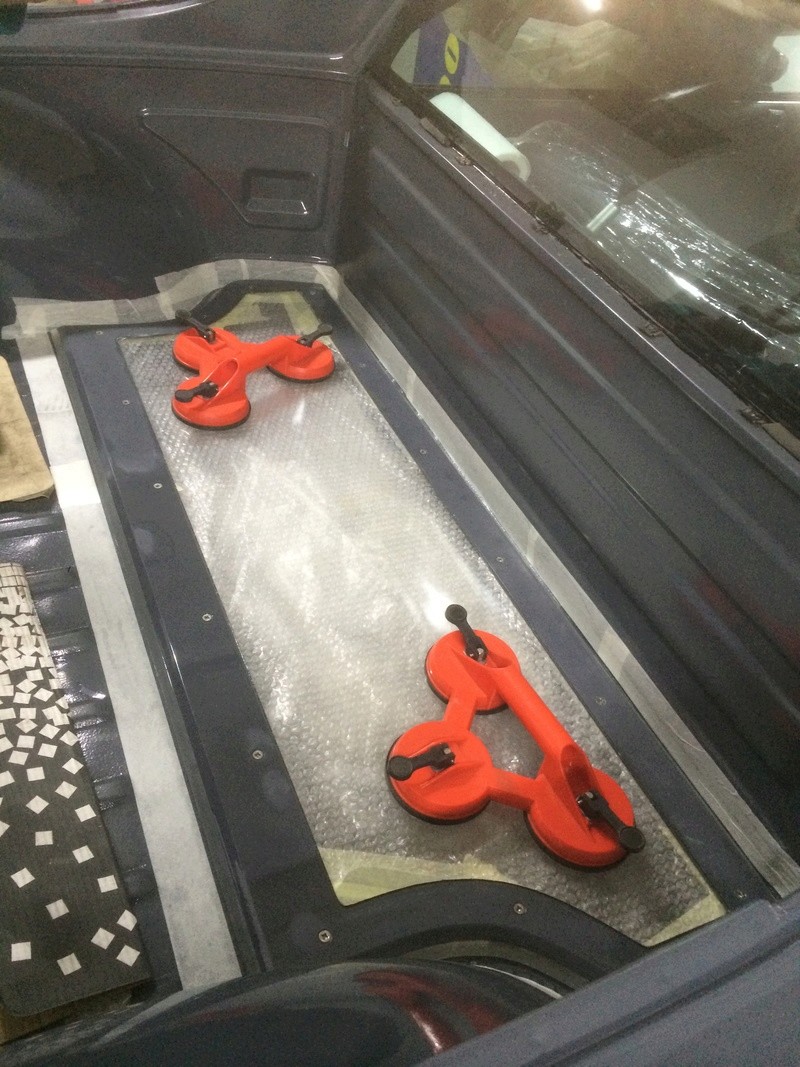
Very cool looking imho, very proud of designing it and bringing from idea to life several years after

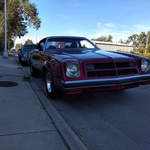
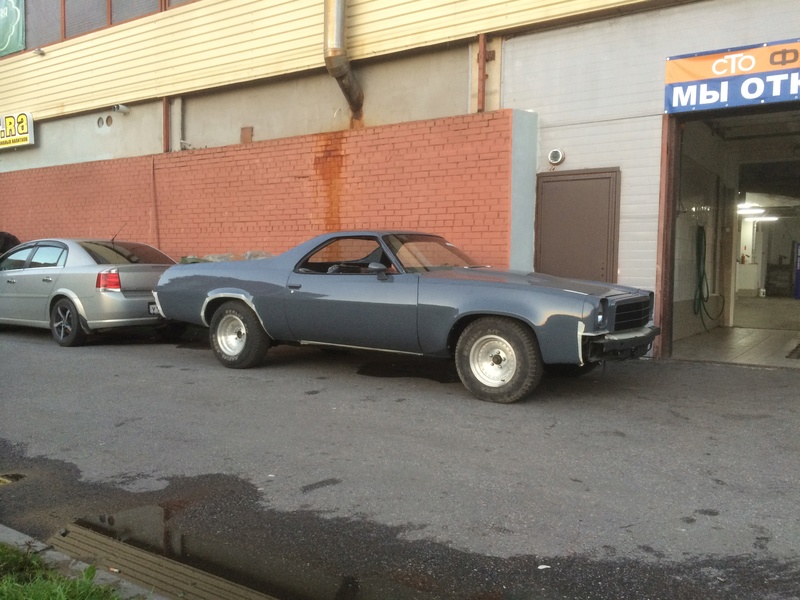
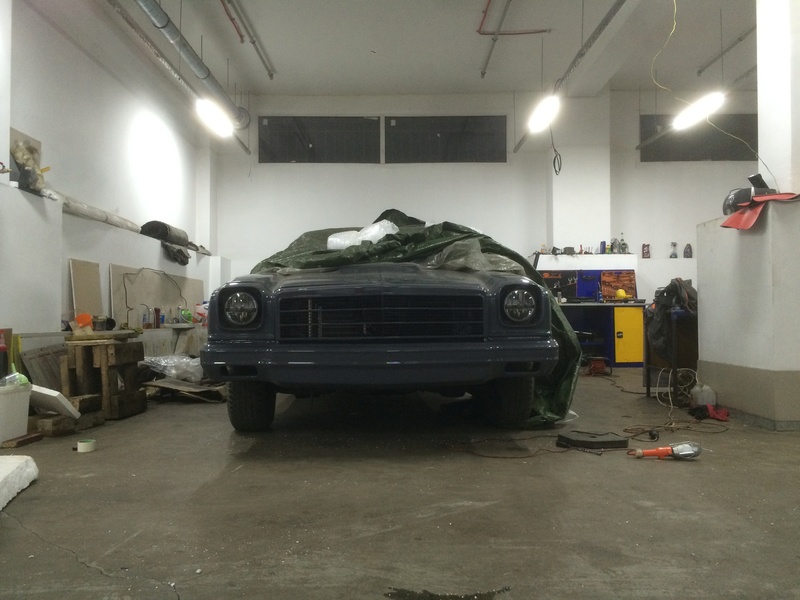
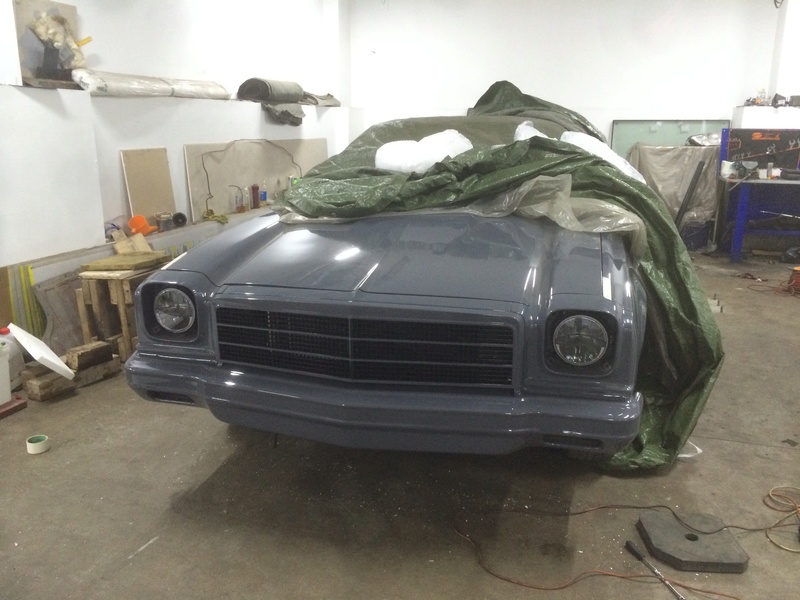
And some photos of my slow dragster
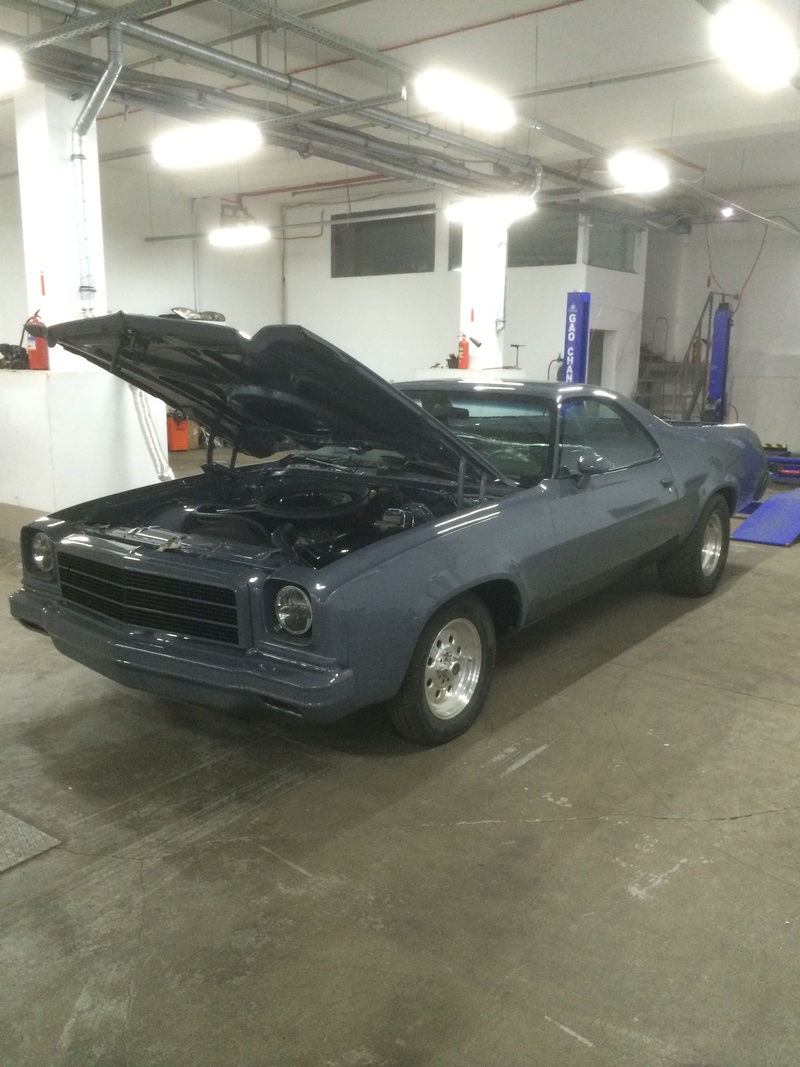

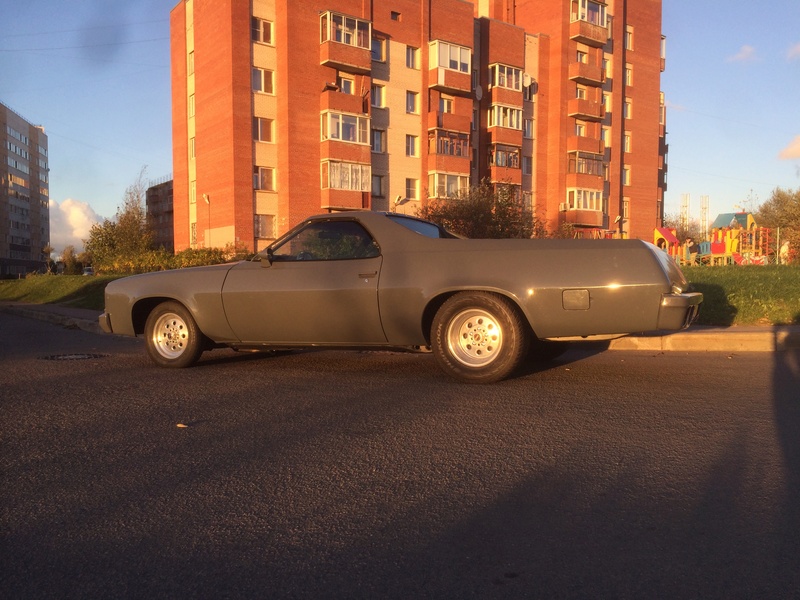
It's a temporary set of wheels that my friend loaned me. That's how it must looked on the us car show but I didn't succeed to assemble it.
Need to do something with front suspension as on the last 2 photos front is aired out fully and rear is in it's middle height.
builtnotbought- G3GM Member
- Street Cred : 3
Re: '74 El Camino "Project Badass"
![]() by builtnotbought Sat Jan 21, 2017 5:47 pm
by builtnotbought Sat Jan 21, 2017 5:47 pm
I found some inconsistencies in made mods.
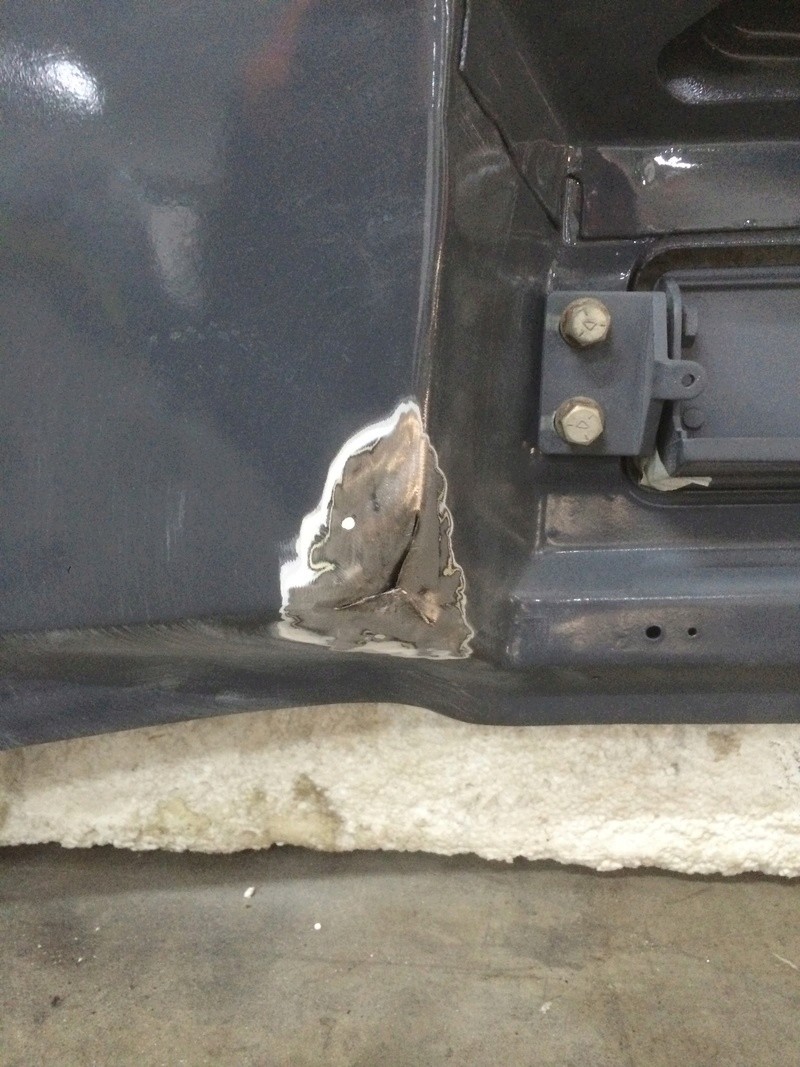
Hood didn't close properly because fender rods hitted cowl hood bowl. Now rods are cutted, bent on 8mm down, welded back together and painted. The only thing that is unsolved about cowl hood - water entering the air filter, because I don't have electro flapper inside the hood that is controlled with throttle pedal and is closed when engine is off. Don't learn much about this but I think it can cause some problems.
Tailgate hitted rear bumper full opened, so rear bumper need to be moved down a little.
Rewired rear lights wiring to get 4 park lights and throw away back lights at all for now.
Ordered new rear lights housings, new lenses, gaskets, they are on the way to RU. Will try to install 4 red lenses, I know they must be cutted a little to fit. Don't know how they will look inside the bumper but will see.
Ordered a lot of banjo bolt washers, bleeders, new upper a-arm mounting bolts.
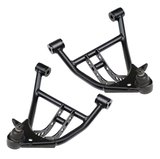
Needed to go lower in the front anyway so decision was made not to buy expensive aftermarket Ridetech arms with unknown result of lowering but to make my own lower arms from used stock ones.
Tried to find used lower a-arms here in RU but with no luck, nothing availiable.
Got used lower a-arms from riddick75 camino. Thank you very much for help!
We will make a combination of stock arms and aftermarket tubular with lower shock mount point moved down as much as I need.

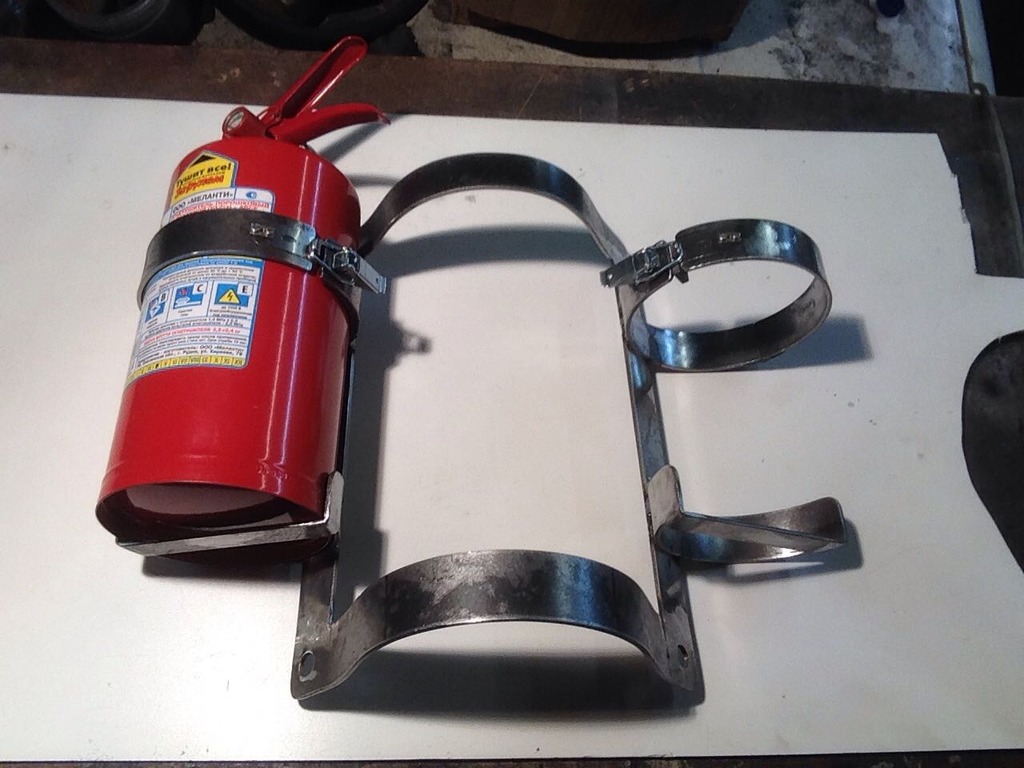
Needed to put somewhere fire extinguishers as I removed storage case behind the bench.
Designed and started welding a bracket for 2 middle size fire extinguishers that will be situated behind the bench on the central tunnel. Bracket will be painted black to become invisible. May be I will make some leather or alcantara cases for extinguishers. It's just a test fit.


As for interior I installed oem map light and glued oem 12" mirror in great condition, thanks Mcarlo77 for parts, installed foot lights using some warm white leds.
The only thing left to install to complete interior is the molding above the rear window. It waits new seat belts. I emailed three different companies. Got clear answer about fitting their kits in 74 elco only from retrobeltcom. I think I will purchase belt kit from them. They has the lower price and nice buckles on ends, tha same as GM but without logo.
Others have ugly buckles/higher price and don't know if belts will fit for sure.

Windshield and bed moldings are wrapped in black film by myself to match grey/black scheme of the car.
Installed new weatherstrip around side windows. Good quality rubber and weatherstrip channel fit but after several times of adjusting glass position I got extremely hard door closing and poor contact in some places of glass/rubber. Need to fix this somehow because I will have waterpool inside after every wash.
Bought new tyres, 275/40/17 square on all 4 corners. It's the widest I could find here in RU, new and not extremely expensive.
Now the hunt for Soft 8's began. Found a way to order them in Finland. Cheaper than directly from US with sea shipping. Hope everything will be Ok and I will got them in march and will close wheel/tyre question on this summer.
builtnotbought- G3GM Member
- Street Cred : 3
Re: '74 El Camino "Project Badass"
![]() by pila Sat Jan 21, 2017 11:04 pm
by pila Sat Jan 21, 2017 11:04 pm
pila- Donating Member
- Street Cred : 43
Page 5 of 7 • 1, 2, 3, 4, 5, 6, 7 ![]()

 Similar topics
» MY DAILY DRIVER/PROJECT 73 EL CAMINO SS
» Classic Car Restoration Club: 1977 El Camino Project Car-Overview
G3GM :: Media :: G3 Project Pictures
» Factory am/fm
» 1973 Chevelle SS, 350, 4spd. build
» Painting Interior Plastic
» 1973 Chevelle SS 1 Family
» Need driver side bucket seat 73 Laguna
» triangle stainless window trim
» door interior trim retainer clips
» Rusty's progress motor Parts arrived LOL Half are on
» Anyone good at photoshop?