


Interior removal / update.
Page 3 of 5 •  1, 2, 3, 4, 5
 ![]()
Re: Interior removal / update.
![]() by Dinomyte Sun Jan 18, 2015 9:02 pm
by Dinomyte Sun Jan 18, 2015 9:02 pm
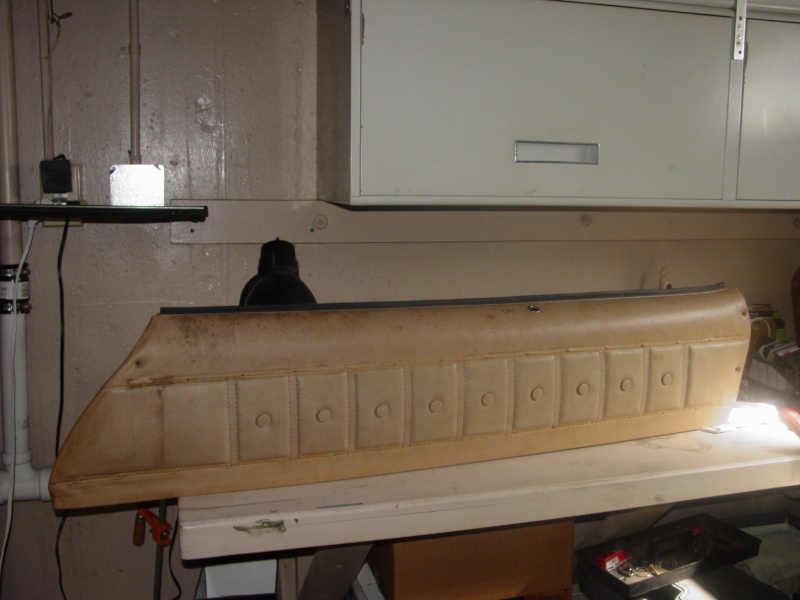
I've painted the bulk of the plastic panels and they all look just fine, but they all have a sandy feeling to them. Not as bad as a black board, but not as smooth as they were. Any ideas what I need to do differently? I don't want to spray the vinyl panels if this is what they will feel like.
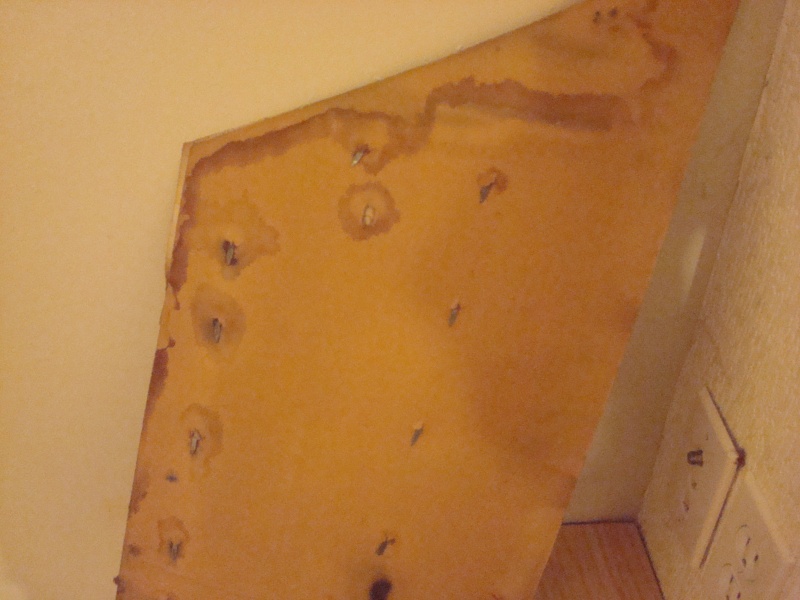
Also has anyone ever removed the chrome trim and buttons from the vinyl panels and got them back on? The tabs on the back look like they won't take much bending back and forth.
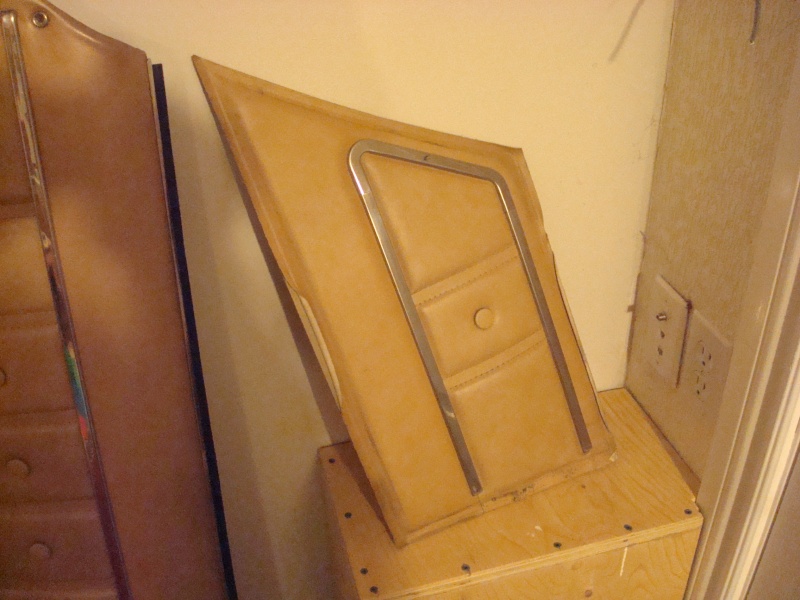 " />
" />I think the buttons are stitched, on the other side of the hard board, like sofa cushions.
 " />
" />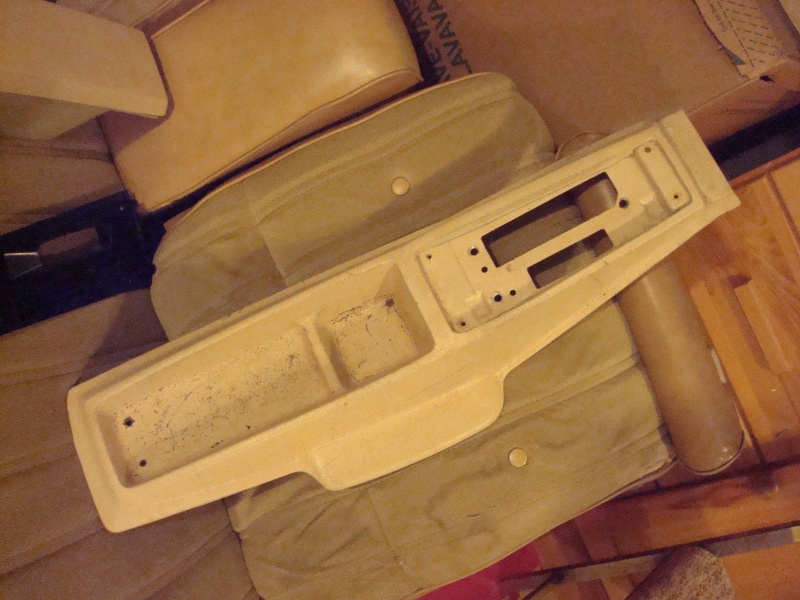 " />
" />This part of the console is a soft spongy material, how does it handle SEM paint? Do I need to do something different with it?
thanks
Dinomyte- Donating Member

- Street Cred : 11
Re: Interior removal / update.
![]() by dynchel Sun Jan 18, 2015 9:09 pm
by dynchel Sun Jan 18, 2015 9:09 pm

dynchel- Donating Member
- Street Cred : 40
Re: Interior removal / update.
![]() by 77mali Mon Jan 19, 2015 9:05 pm
by 77mali Mon Jan 19, 2015 9:05 pm
77mali- Donating Member
- Street Cred : 62
Re: Interior removal / update.
![]() by Roadcaptain S3 Mon Jan 19, 2015 9:39 pm
by Roadcaptain S3 Mon Jan 19, 2015 9:39 pm

Roadcaptain S3- Donating Member
- Street Cred : 26
Re: Interior removal / update.
![]() by Mcarlo77 Tue Jan 20, 2015 12:54 am
by Mcarlo77 Tue Jan 20, 2015 12:54 am
Mcarlo77- Donating Member
- Street Cred : 77
Re: Interior removal / update.
![]() by Dinomyte Tue Jan 20, 2015 10:28 am
by Dinomyte Tue Jan 20, 2015 10:28 am
77mali - thanks for the picture. I've always thought the two screws with the silver rings were an upholsterer's fix for panels that didn't fit just right. I see you've got them too, in the exact same spots.
Dinomyte- Donating Member
- Street Cred : 11
Re: Interior removal / update.
![]() by Roadcaptain S3 Tue Jan 20, 2015 10:37 am
by Roadcaptain S3 Tue Jan 20, 2015 10:37 am
Roadcaptain S3- Donating Member
- Street Cred : 26
Re: Interior removal / update.
![]() by 77mali Tue Jan 20, 2015 12:32 pm
by 77mali Tue Jan 20, 2015 12:32 pm
Dinomyte wrote:Thanks guys. It seems that it's a combination of cooler temperatures and spraying from too far back. I guess I'll have to just prep and wait till it's nice and warm outside to put another coat on.
77mali - thanks for the picture. I've always thought the two screws with the silver rings were an upholsterer's fix for panels that didn't fit just right. I see you've got them too, in the exact same spots.
No problem. Those are stock screws, lol. Theres a couple of similar ones on the dash pad as well, where the top front of the doors meet it by the pillar.
Kinda neat how they separate the upper & lower panels. I had to make a couple repairs on the upper near the top but it was in mostly good shape, just a little water or humidity damage over it's life. Are you going to seal the doors with a vapor (Vapour for you) barrier under all that stuff? I plan to use like a 40 mil thick peel & stick after everything is ready to go back on & the door is painted (yes I am planning to repaint the inside of the doors when I do the jambs).
77mali- Donating Member
- Street Cred : 62
Re: Interior removal / update.
![]() by Dinomyte Tue Jan 20, 2015 1:19 pm
by Dinomyte Tue Jan 20, 2015 1:19 pm
Roadcaptain S3 wrote:I have painted stuff when it was 40 ish, when the can recommended 60 degree minimum. I kept the paint and the part in the house, then ran outside for a quick coat, then back in to dry. Worked well.
I did about the same, but left things outside for about four hours with a space heater. Obviously not warm enough.
Dinomyte- Donating Member
- Street Cred : 11
Re: Interior removal / update.
![]() by Dinomyte Tue Jan 20, 2015 1:21 pm
by Dinomyte Tue Jan 20, 2015 1:21 pm
77mali wrote:Dinomyte wrote:Thanks guys. It seems that it's a combination of cooler temperatures and spraying from too far back. I guess I'll have to just prep and wait till it's nice and warm outside to put another coat on.
77mali - thanks for the picture. I've always thought the two screws with the silver rings were an upholsterer's fix for panels that didn't fit just right. I see you've got them too, in the exact same spots.
No problem. Those are stock screws, lol. Theres a couple of similar ones on the dash pad as well, where the top front of the doors meet it by the pillar.
Kinda neat how they separate the upper & lower panels. I had to make a couple repairs on the upper near the top but it was in mostly good shape, just a little water or humidity damage over it's life. Are you going to seal the doors with a vapor (Vapour for you) barrier under all that stuff? I plan to use like a 40 mil thick peel & stick after everything is ready to go back on & the door is painted (yes I am planning to repaint the inside of the doors when I do the jambs).
Yes plan the same things. Need to wait for warmer weather. It's hovering around 0C, (that's 32F for you
Dinomyte- Donating Member
- Street Cred : 11
Re: Interior removal / update.
![]() by Mcarlo77 Tue Jan 20, 2015 4:15 pm
by Mcarlo77 Tue Jan 20, 2015 4:15 pm
Mcarlo77- Donating Member
- Street Cred : 77
Re: Interior removal / update.
![]() by Wallyuph Wed Jan 21, 2015 11:57 am
by Wallyuph Wed Jan 21, 2015 11:57 am
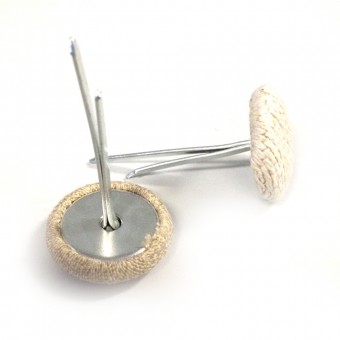 " />
" />We (Upholstery guys) make them up from vinyl or fabric. They can be bent back straight and pushed out. Unless its really rusty you can take them on and off a few times with out breaking the prongs off. If worse thing happens and its breaks just go to a Upholstery shop and have them make you a new one. you need a 50 cent size piece of vinyl to make up the button. I cut chunks out of my old sample books that are a close match for people if they are missing one and don't have a scrap piece of vinyl.
Now you are in the know.
Wally

Wallyuph- Donating Member
- Street Cred : 31
Re: Interior removal / update.
![]() by Dinomyte Wed Jan 21, 2015 4:43 pm
by Dinomyte Wed Jan 21, 2015 4:43 pm
Thanks
Dinomyte- Donating Member
- Street Cred : 11
Re: Interior removal / update.
![]() by Wallyuph Fri Jan 23, 2015 11:13 am
by Wallyuph Fri Jan 23, 2015 11:13 am
Dinomyte wrote:Wally - you are awesome. That's perfect. Now I can take the panel completely apart and and not worry about getting good coverage around the buttons, when I dye them.
Thanks
Any time Glad I was able to help.
Wallyuph- Donating Member
- Street Cred : 31
Re: Interior removal / update.
![]() by Dinomyte Sun Feb 01, 2015 4:09 pm
by Dinomyte Sun Feb 01, 2015 4:09 pm
Dinomyte- Donating Member
- Street Cred : 11
Re: Interior removal / update.
![]() by Mcarlo77 Sun Feb 01, 2015 4:32 pm
by Mcarlo77 Sun Feb 01, 2015 4:32 pm
Can I ask a favor since you have the track off it? Can you take some measurements exactly as it's laying on the table to give me an idea what size box it might take to ship one of these (without the track)?
Mcarlo77- Donating Member
- Street Cred : 77
Re: Interior removal / update.
![]() by Limey SE Sun Feb 01, 2015 5:41 pm
by Limey SE Sun Feb 01, 2015 5:41 pm
16 wide , 12 front to back and 2 1/2 deep but arm mechanism for swivel goes 1 inch past the bottom.


Limey SE- Management

- Street Cred : 97
Re: Interior removal / update.
![]() by Mcarlo77 Sun Feb 01, 2015 5:57 pm
by Mcarlo77 Sun Feb 01, 2015 5:57 pm
Mcarlo77- Donating Member
- Street Cred : 77
Re: Interior removal / update.
![]() by Limey SE Sun Feb 01, 2015 6:09 pm
by Limey SE Sun Feb 01, 2015 6:09 pm
Each seat took 2 boxes
Limey SE- Management
- Street Cred : 97
Mcarlo77- Donating Member
- Street Cred : 77
Re: Interior removal / update.
![]() by Limey SE Sun Feb 01, 2015 6:34 pm
by Limey SE Sun Feb 01, 2015 6:34 pm
Limey SE- Management
- Street Cred : 97
Re: Interior removal / update.
![]() by Dinomyte Sun Feb 01, 2015 7:25 pm
by Dinomyte Sun Feb 01, 2015 7:25 pm
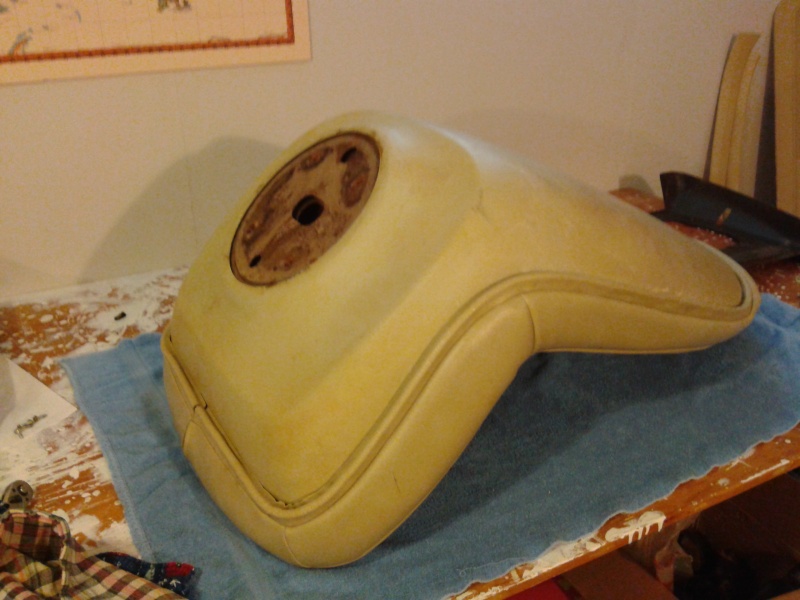
Mcarlo77 wrote:I took one of those apart a couple yrs ago to dispose of it and seems to me it wasn't an easy task removing the seat back...but, can't remember exactly why. Think that pinch welt trim just locks over a lip on the seat back.
Can I ask a favor since you have the track off it? Can you take some measurements exactly as it's laying on the table to give me an idea what size box it might take to ship one of these (without the track)?
Here you go
17" high x 23" deep x 40" wide as it sits in the picture, seat cushion down /\ .
Yes the molding around the lip locks onto the frame and is part of the upholstery, but the seat back (the plastic piece) actually goes on last, so I'm betting it comes off first. The re-upholstery video that says these are the hardest thing in the world to re-cover because the cover is one piece specifically says the plastic back cover goes on last.
Dinomyte- Donating Member
- Street Cred : 11
Re: Interior removal / update.
![]() by Mcarlo77 Sun Feb 01, 2015 9:11 pm
by Mcarlo77 Sun Feb 01, 2015 9:11 pm
Too bad I didn't know about this yesterday, or else I could have pulled another one apart out at the yard. There is a nasty one sitting in a '73 Cutlass that would have been a great candidate as a learning tool.
Mcarlo77- Donating Member
- Street Cred : 77
Re: Interior removal / update.
![]() by Dinomyte Sun Feb 01, 2015 9:21 pm
by Dinomyte Sun Feb 01, 2015 9:21 pm
Mcarlo77 wrote:Thanks, Dino.
Too bad I didn't know about this yesterday, or else I could have pulled another one apart out at the yard. There is a nasty one sitting in a '73 Cutlass that would have been a great candidate as a learning tool.
Steve - you know the snow is coming down sideways here for the last two days, and you had weather nice enough to go to the scrapyard. . .
Maybe somebody else are already done it and will comment later on.
Dinomyte- Donating Member
- Street Cred : 11
Re: Interior removal / update.
![]() by Mcarlo77 Sun Feb 01, 2015 10:07 pm
by Mcarlo77 Sun Feb 01, 2015 10:07 pm
Mcarlo77- Donating Member
- Street Cred : 77
Page 3 of 5 • 1, 2, 3, 4, 5 ![]()


|
|
|
» Pate Swap Meet - Texas Motor Speedway - G3 Parts Goldmine
» '73 Laguna coupe - factory 454- SoCal $2500
» Dash Solutions
» Rusty's progress Done stuff again LOL
» 1973 4 door laguna frame same as 1973 2 door chevelle
» Anyone good at photoshop?
» '77 Monte Carlo Landau - Parting out - 61k miles on car
» Dash assembly for 73-77 Malibu/Monte/El Camino,etc.
» Window louvers