


Rear sway bar measurements and adaptation.
Page 2 of 3 •  1, 2, 3
 ![]()
Re: Rear sway bar measurements and adaptation.
![]() by SonOfTheGrim Thu May 11, 2017 2:07 am
by SonOfTheGrim Thu May 11, 2017 2:07 am
Now as for the backing plate trick, I'm doing that. Great idea since all my brake stuff is brand new and the new axle's brake stuff is pretty much trash; cut rubber line, crushed hard line, and leaking slave cylinder. I never would have thought of that if you hadn't said it.
The only thing I'll need to get done is having the axles redrilled or get adapters. My dad's got a friend that can probably do the axles.

SonOfTheGrim- G3GM Member

- Street Cred : 6
Re: Rear sway bar measurements and adaptation.
![]() by SonOfTheGrim Sat May 20, 2017 2:01 am
by SonOfTheGrim Sat May 20, 2017 2:01 am
SonOfTheGrim- G3GM Member
- Street Cred : 6
Re: Rear sway bar measurements and adaptation.
![]() by SonOfTheGrim Sat May 20, 2017 2:22 am
by SonOfTheGrim Sat May 20, 2017 2:22 am
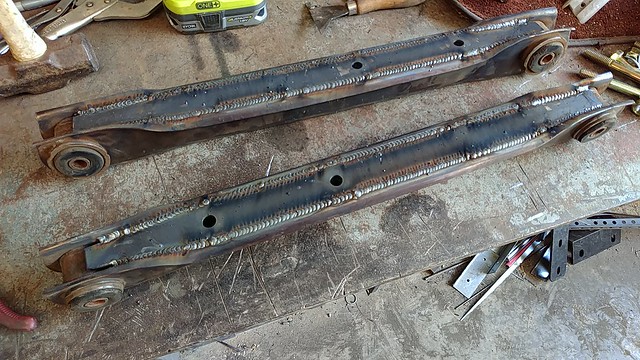
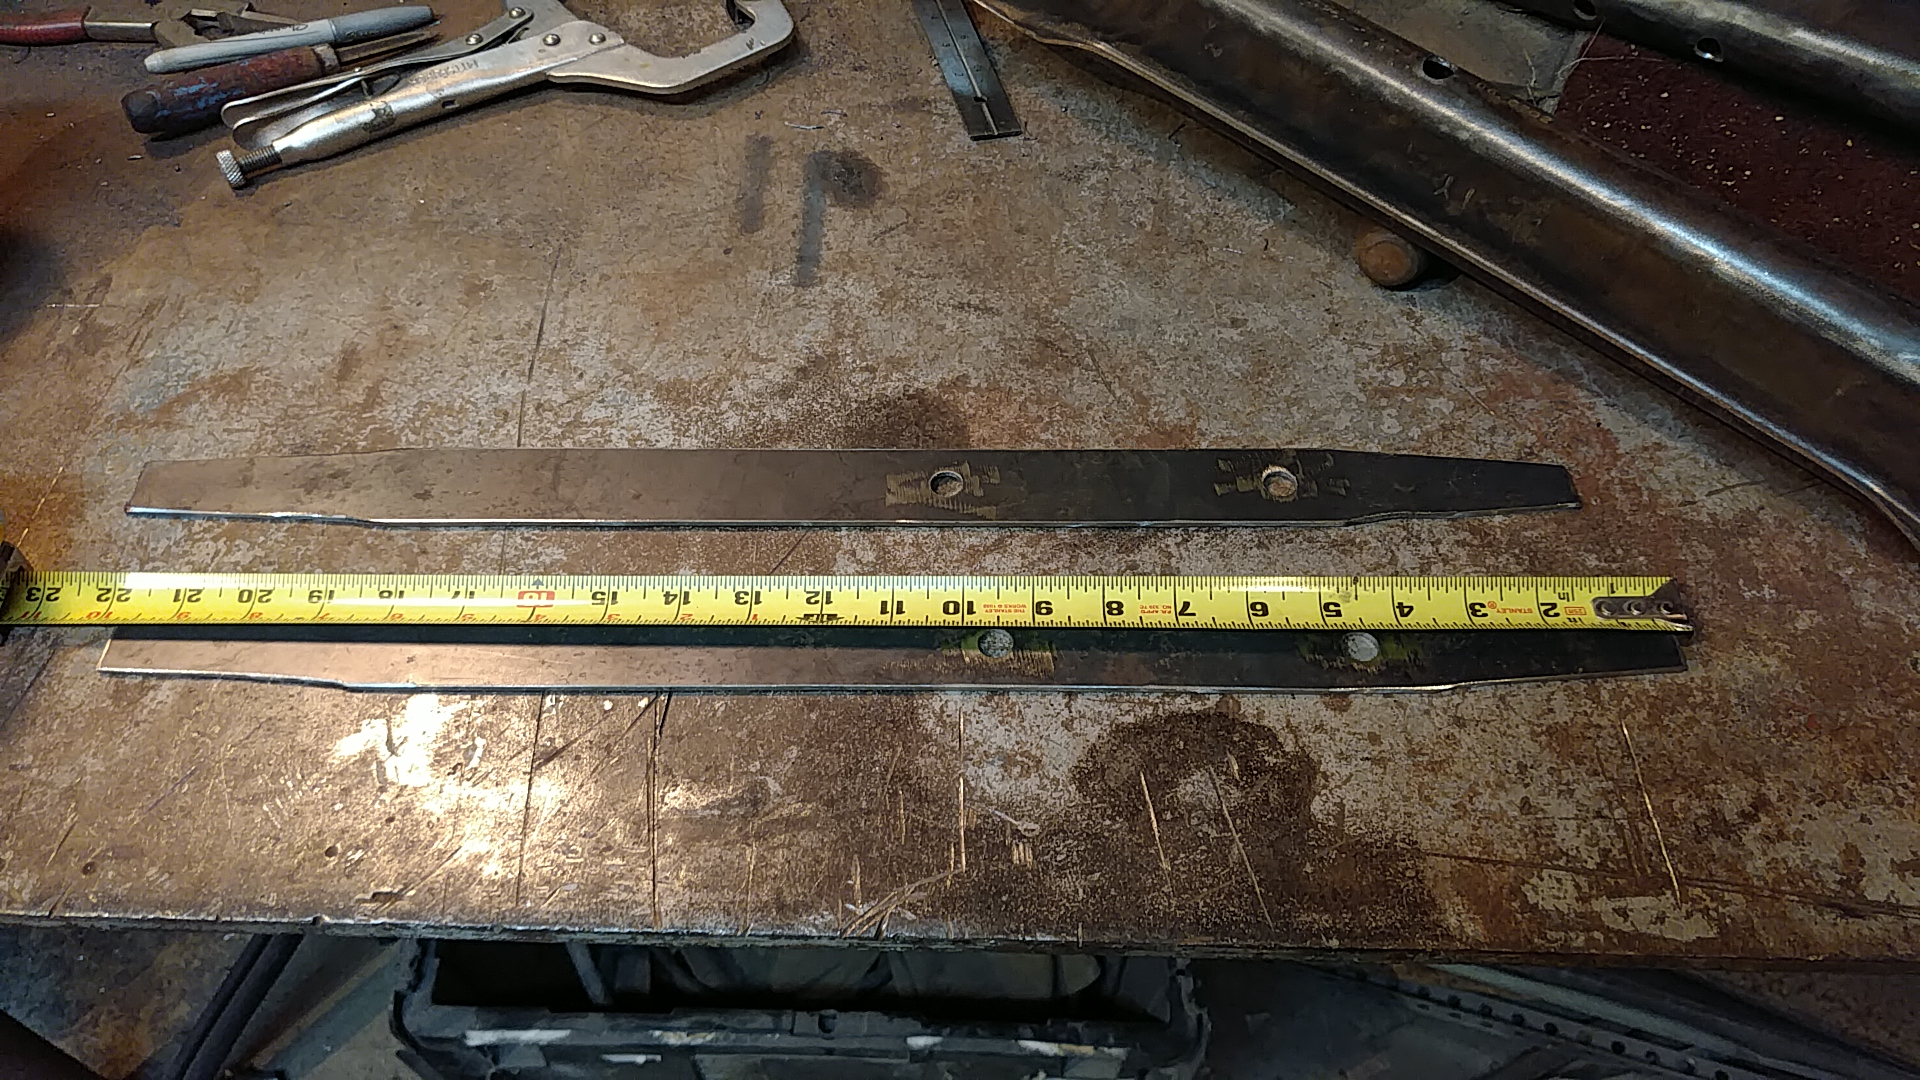
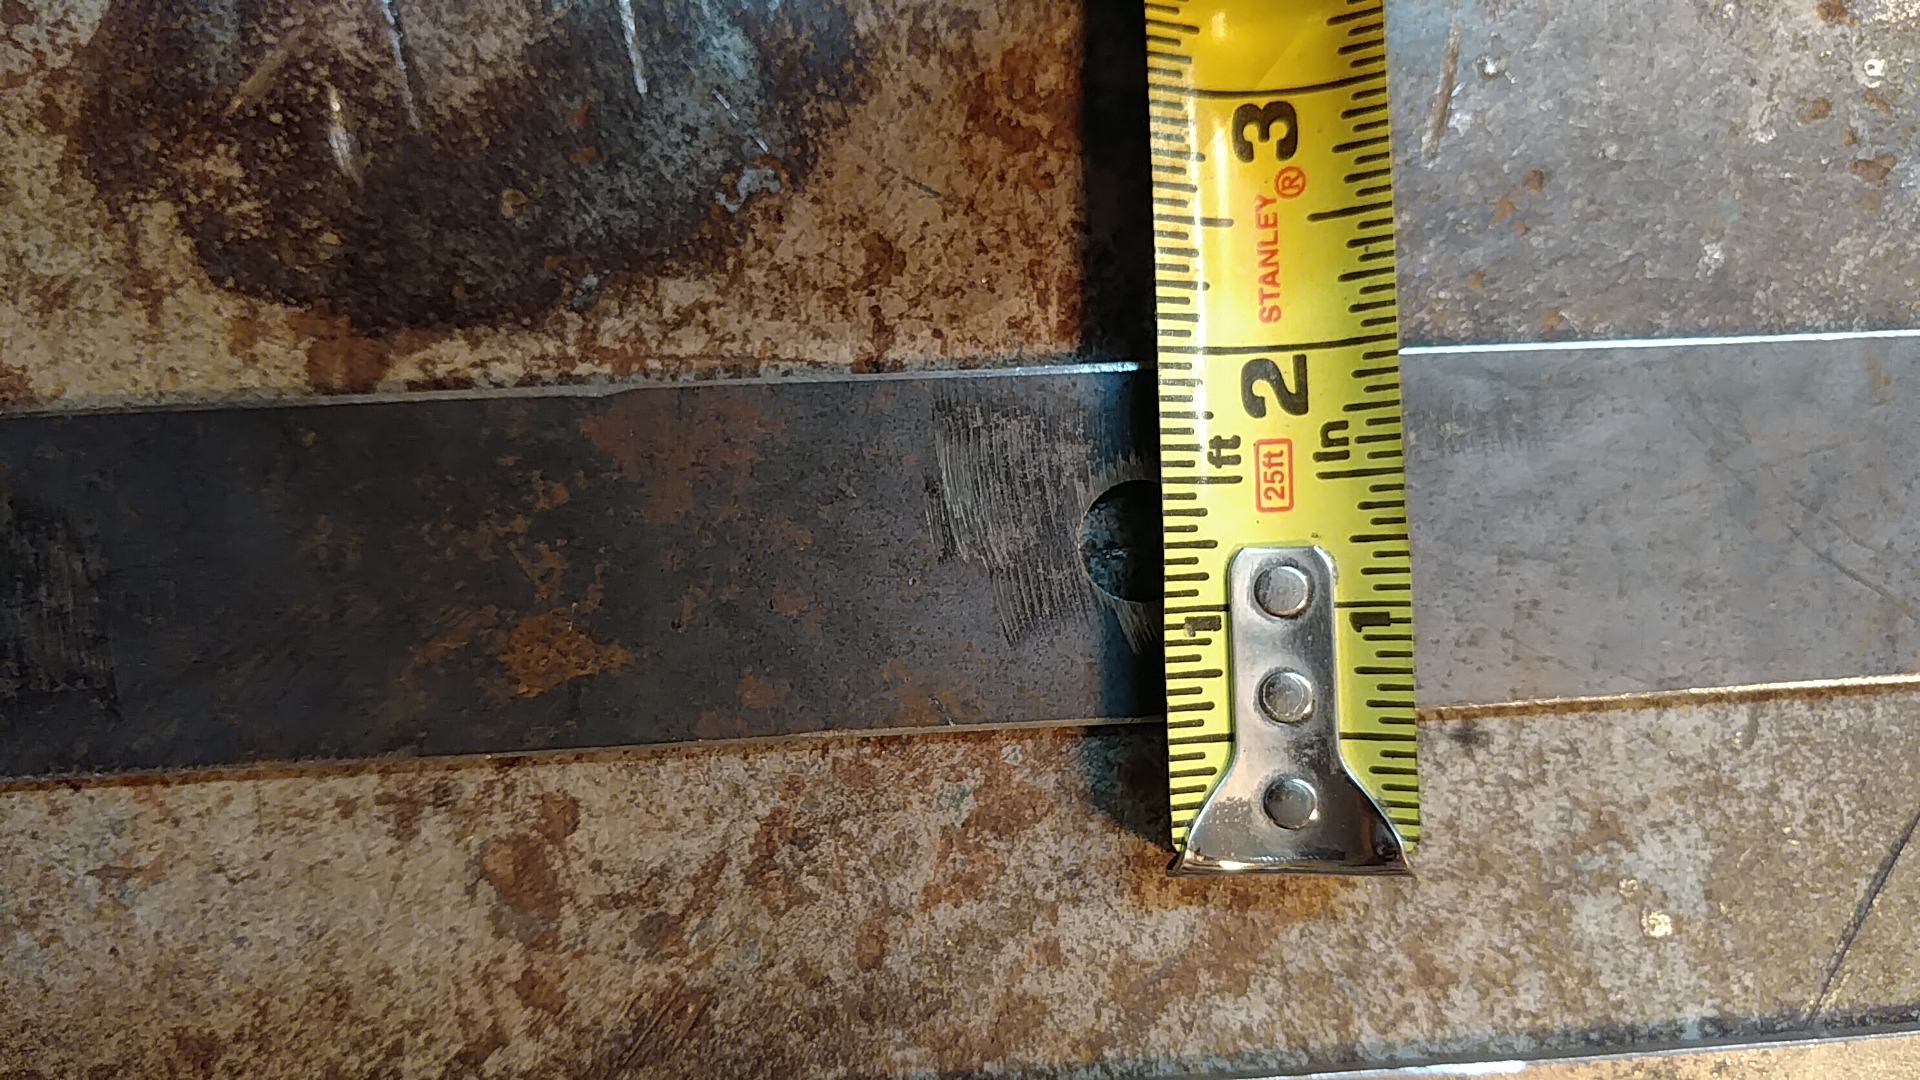
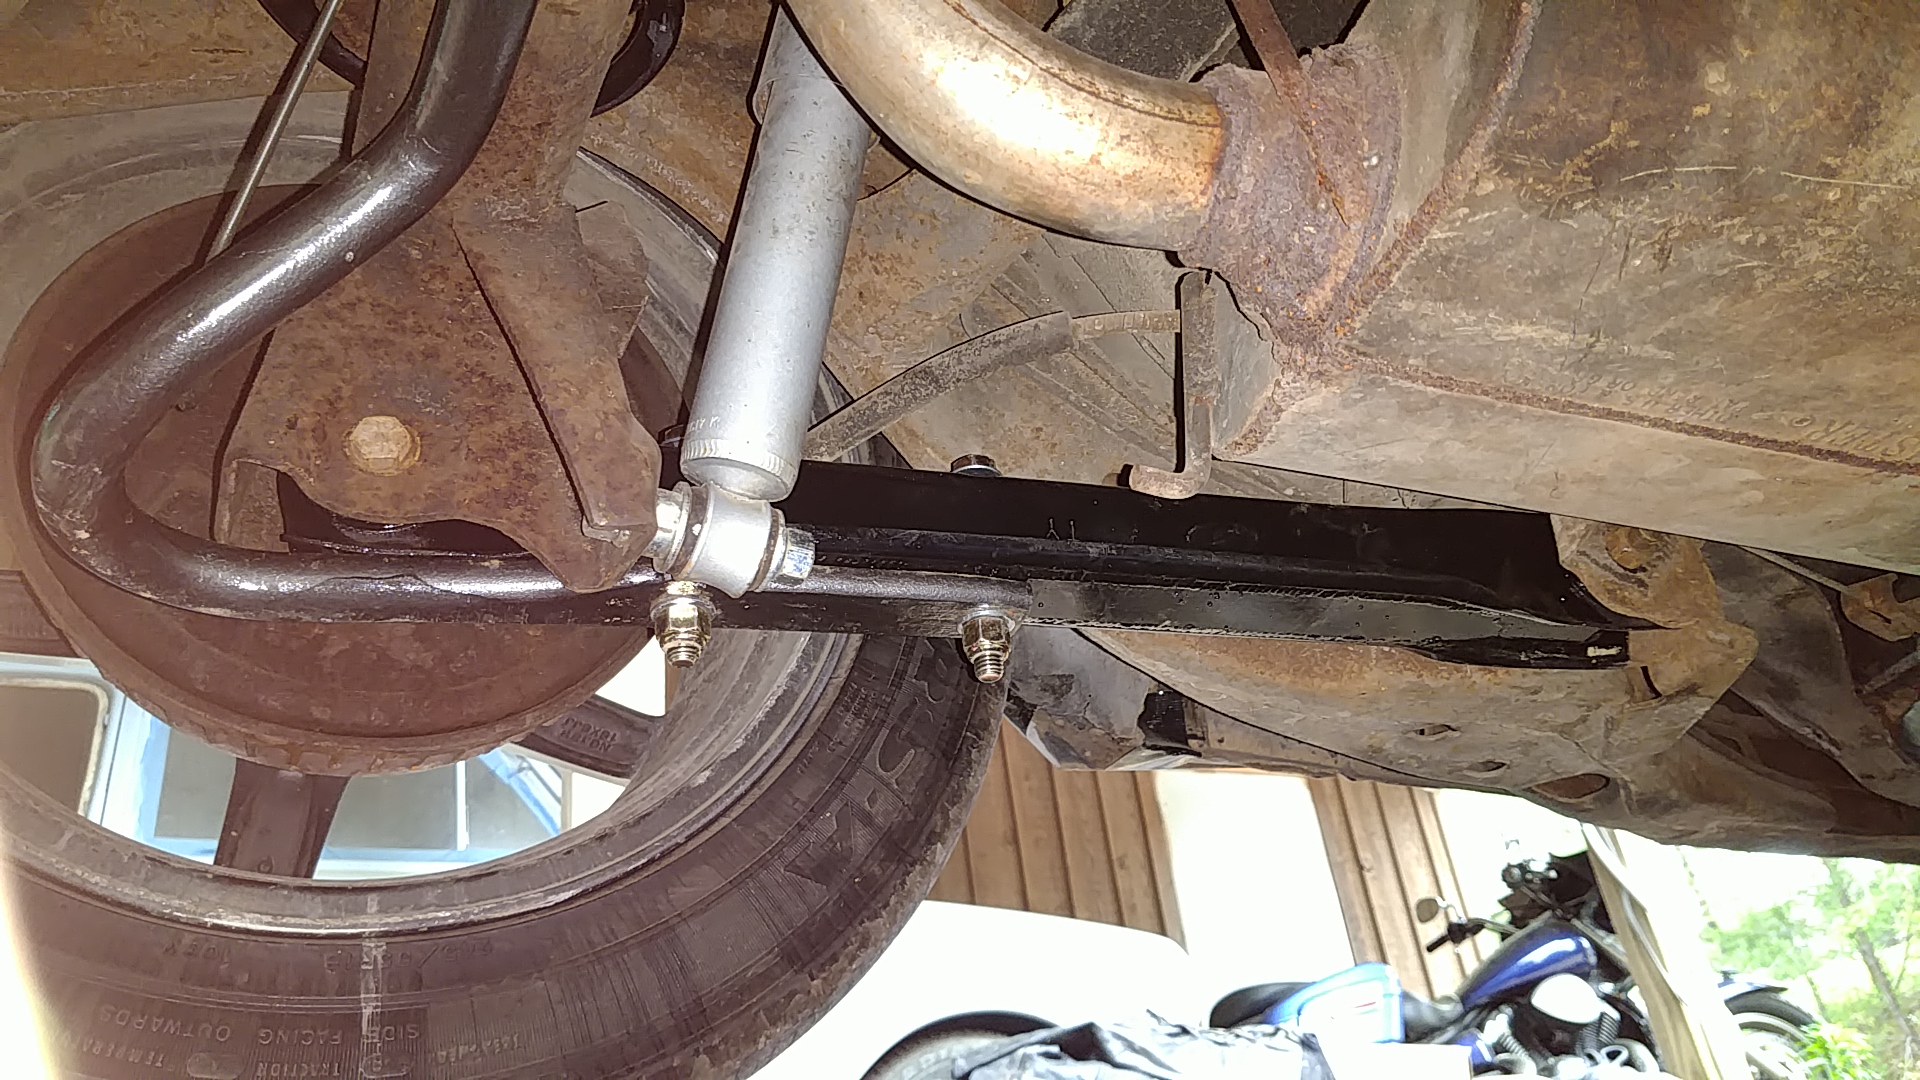
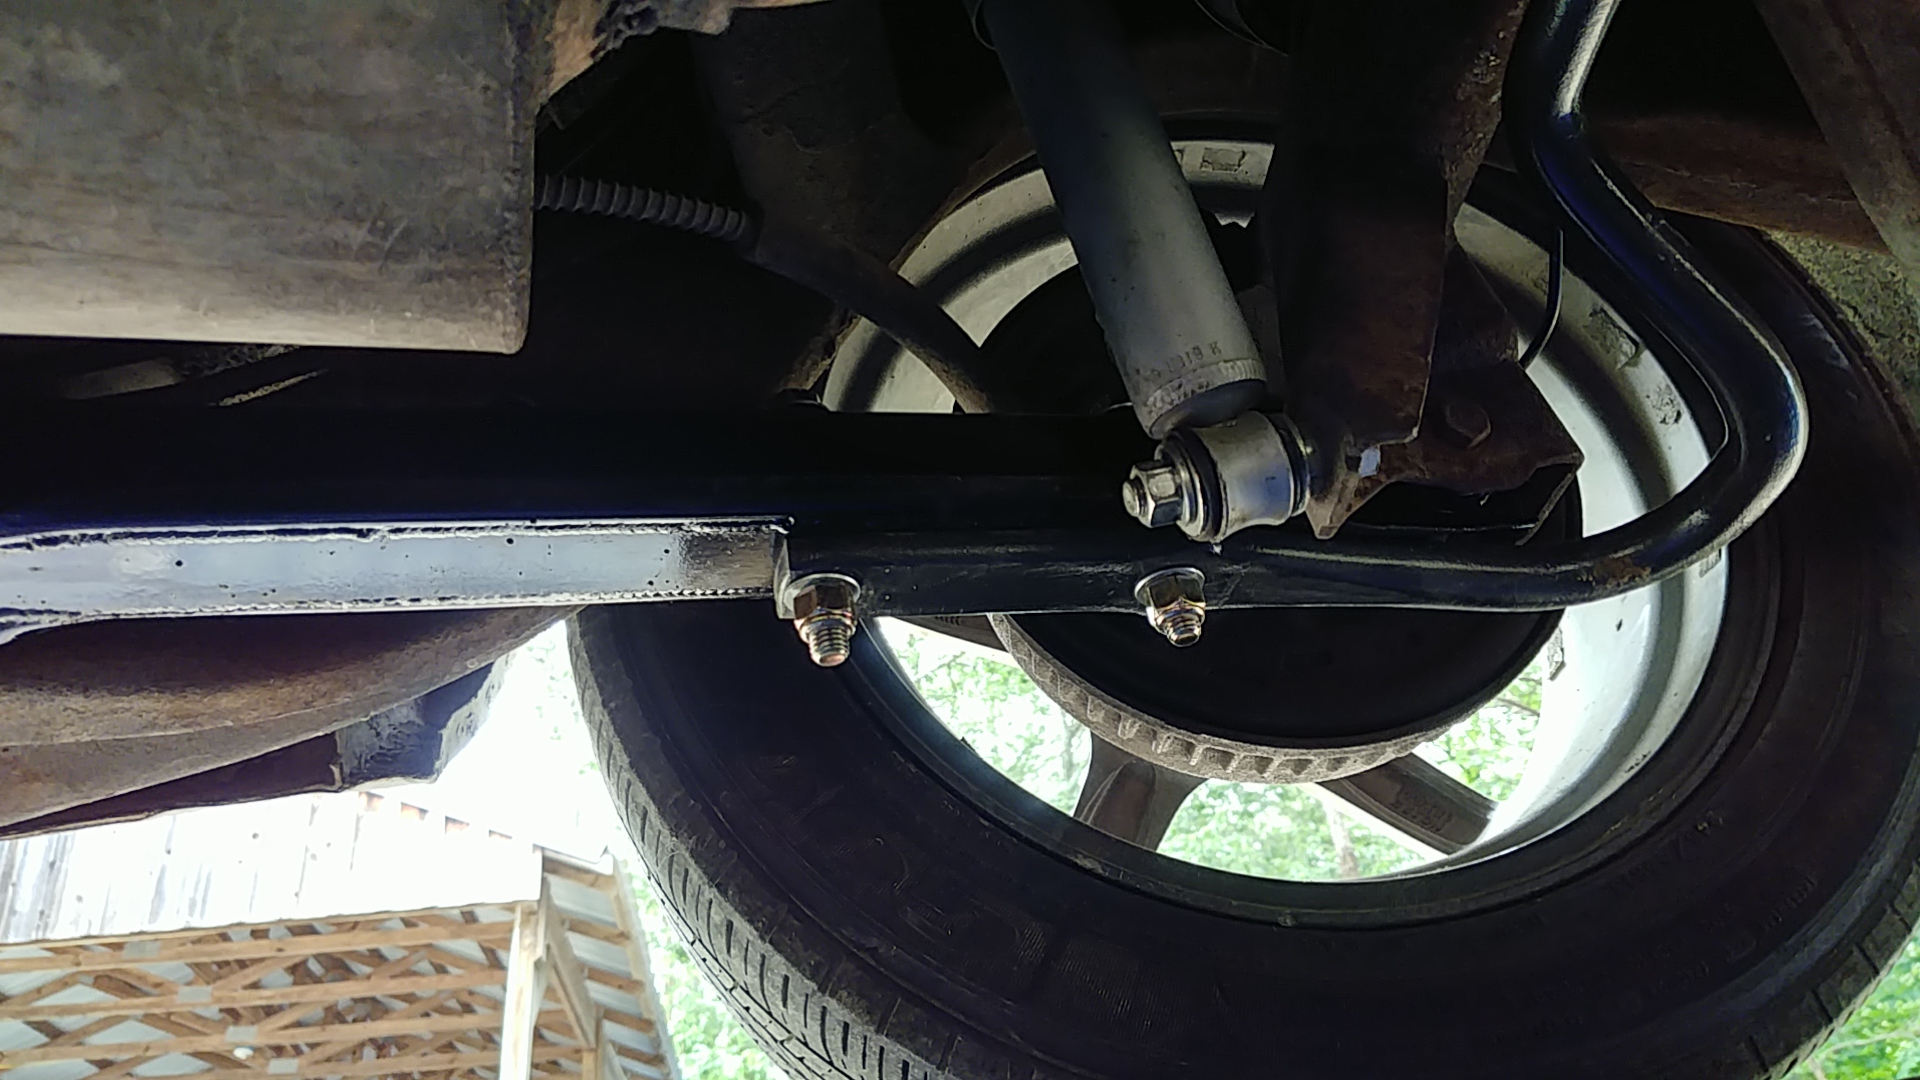
2 1/2" holes 4.5 and 9.5" from center of the bushing.
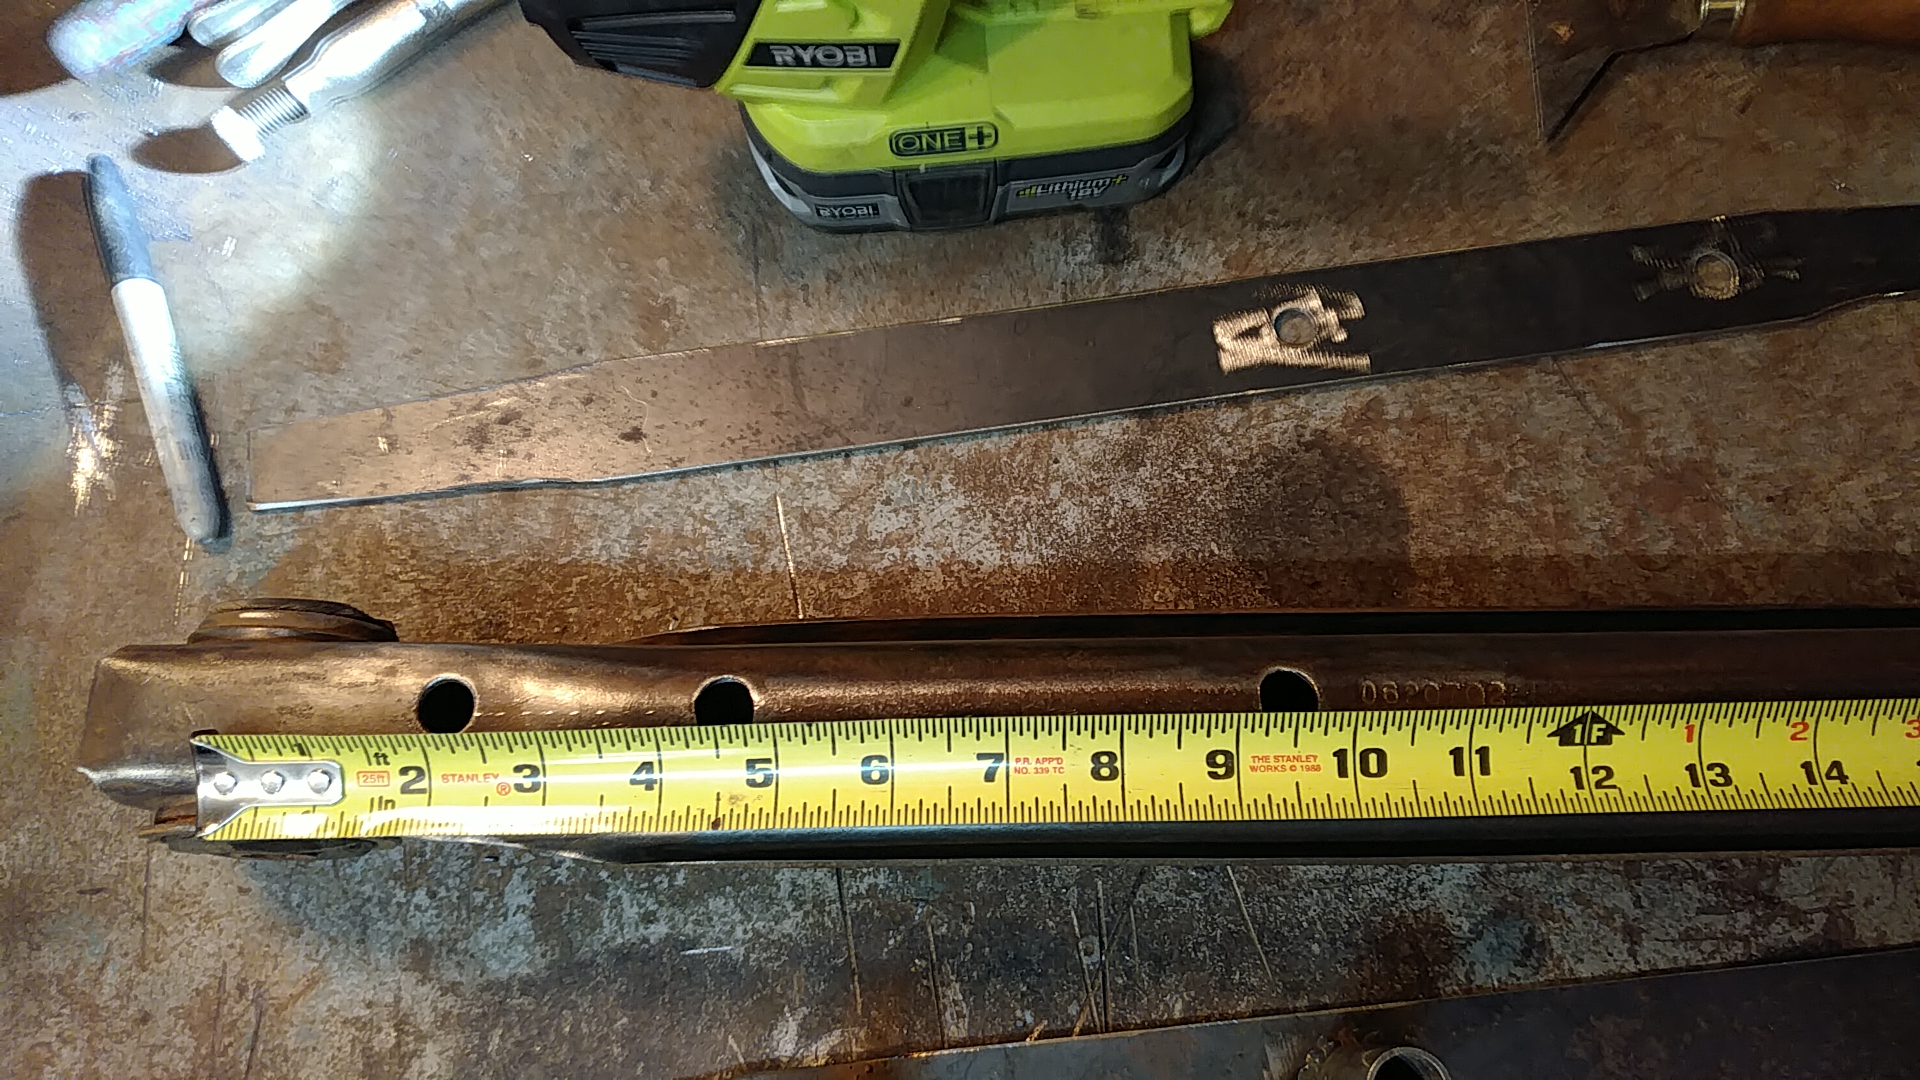
2 strips of steel 22"~ and 1.5" wide, tapered at the ends to fit into the control arms. I didn't make my pieces exactly 22" so I had to find the holes but if you make them 22" the 4.5 and 9.5" measurements will work here too.
The 1/2" holes are centered in the 1.5" strip so 1/2" on either side.
The shims to keep the control arm from collapsing with the bolts installed is 3/4" tubing that I cut a little more than 2" but I had to grind them down a bit so 2" should work. Check before the final welds.
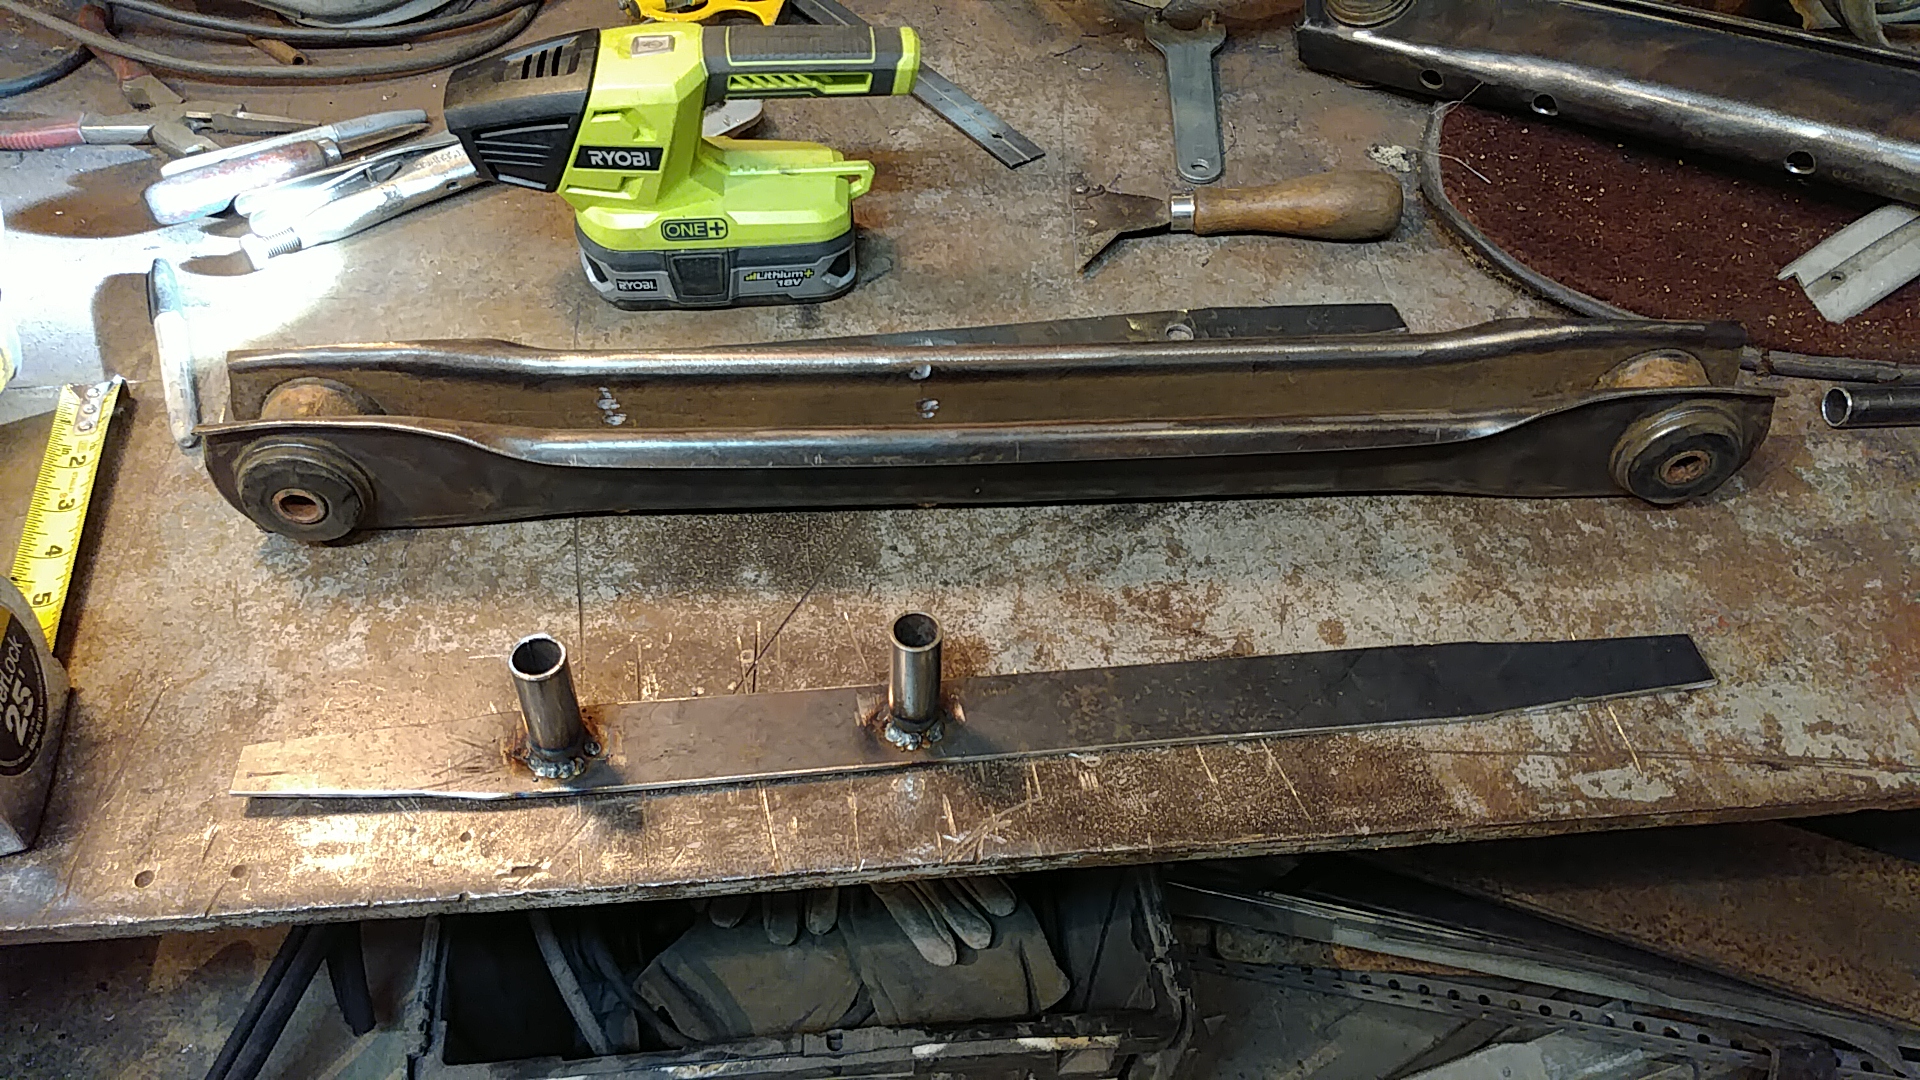
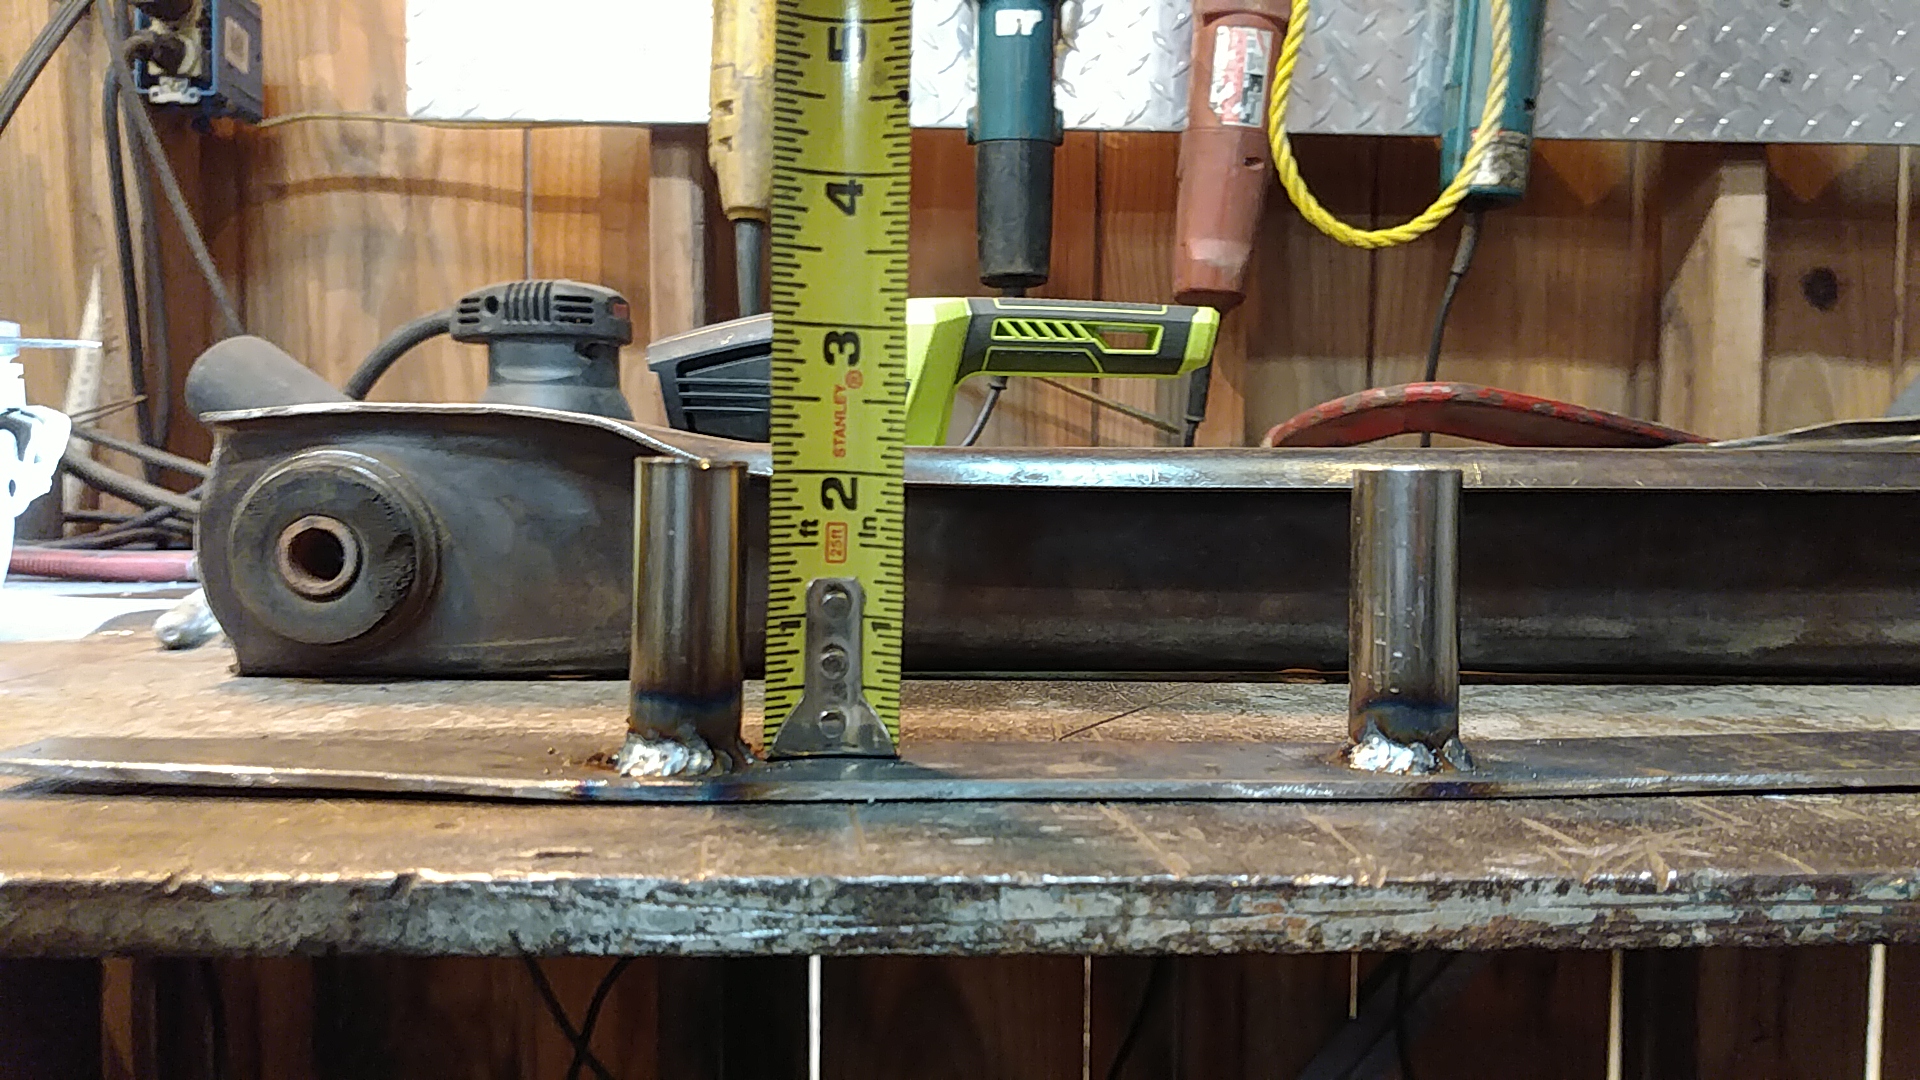
Then clamp everything down and weld the crap out of it. I put the 1/2" bolts through both holes to make sure everything lined up and left them until I tacked it all down.

I'll get a picture of the swaybar installed soon, hopefully under my new posi rear end.
SonOfTheGrim- G3GM Member
- Street Cred : 6
Re: Rear sway bar measurements and adaptation.
![]() by fasrnur Sat May 20, 2017 4:15 pm
by fasrnur Sat May 20, 2017 4:15 pm
fasrnur- G3GM Enthusiast

- Street Cred : 9
Re: Rear sway bar measurements and adaptation.
![]() by SonOfTheGrim Sat May 20, 2017 4:54 pm
by SonOfTheGrim Sat May 20, 2017 4:54 pm
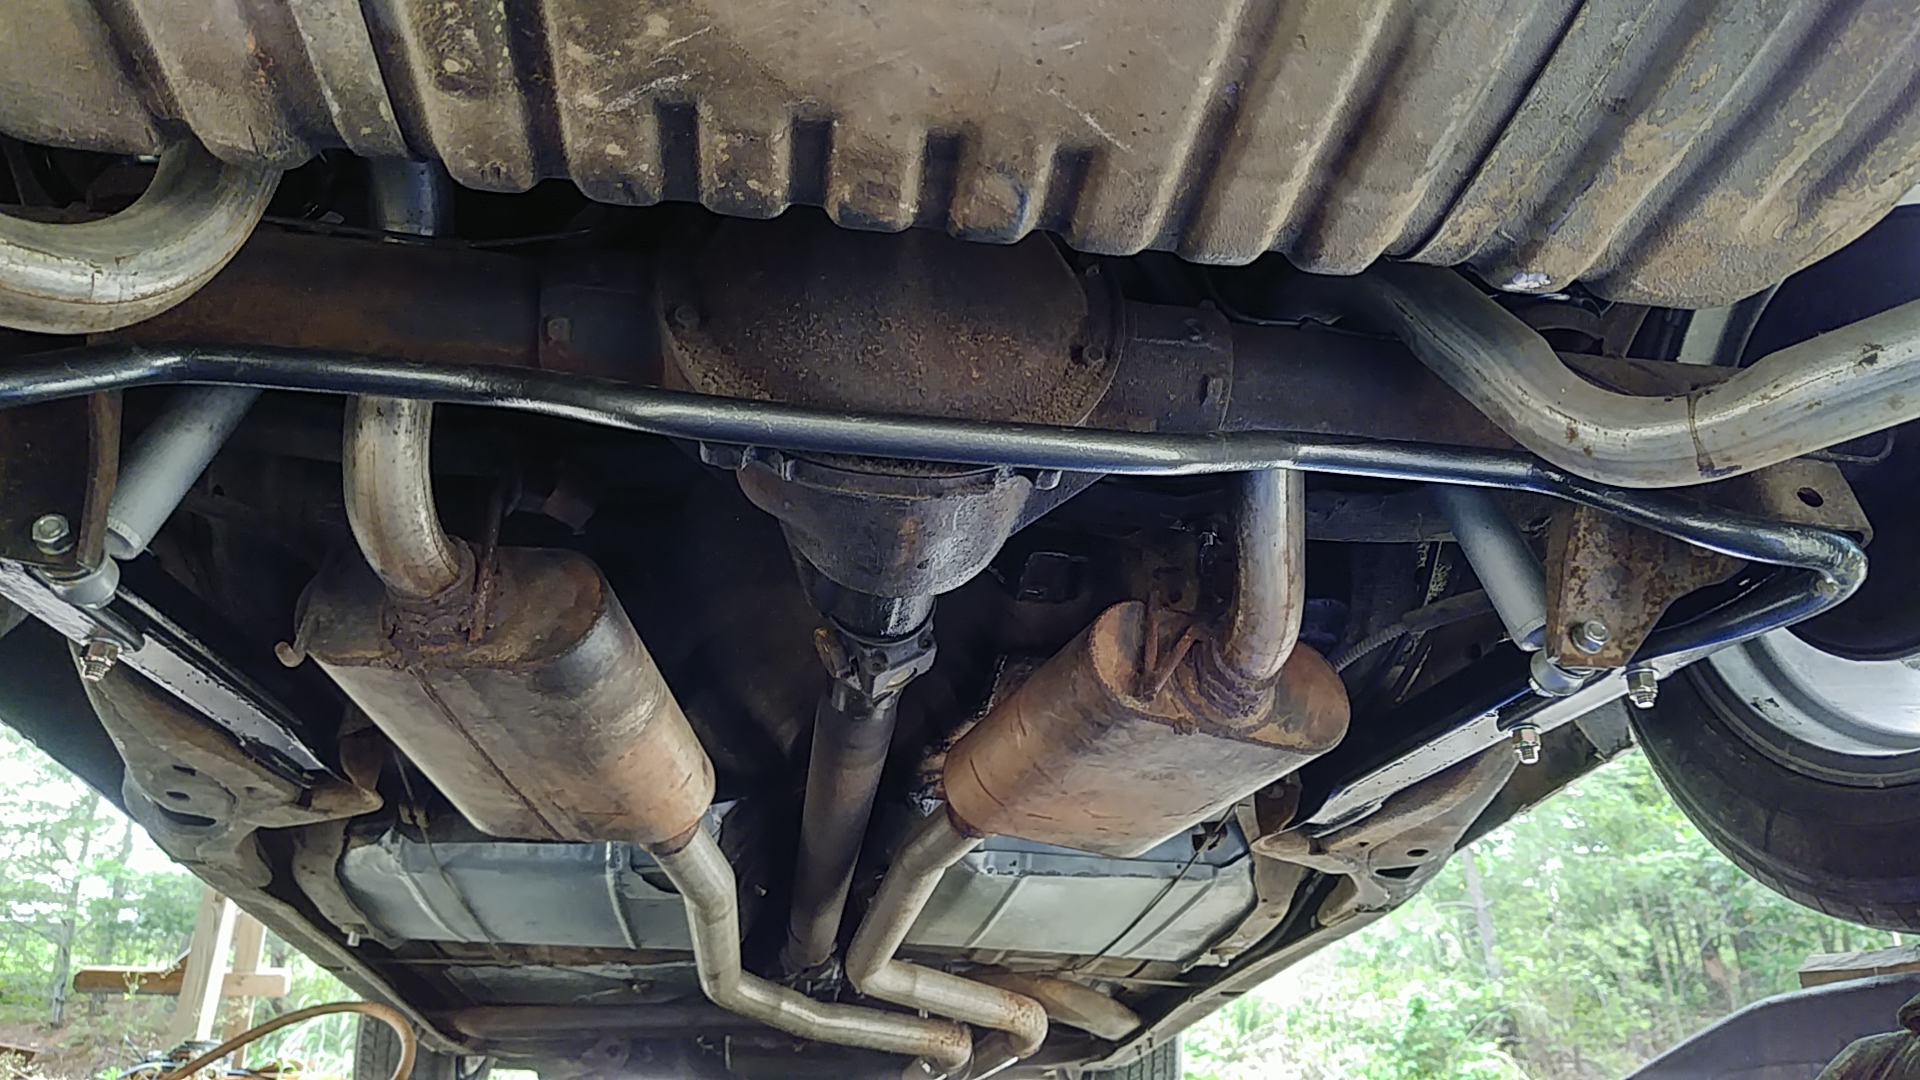
My next project is gonna be my single sided crossmember so I can use the long tube headers I got. My whole exhaust needs to be redone or replaced.
Last edited by SonOfTheGrim on Sun May 21, 2017 12:25 am; edited 1 time in total
SonOfTheGrim- G3GM Member
- Street Cred : 6
Re: Rear sway bar measurements and adaptation.
![]() by fasrnur Sat May 20, 2017 5:12 pm
by fasrnur Sat May 20, 2017 5:12 pm
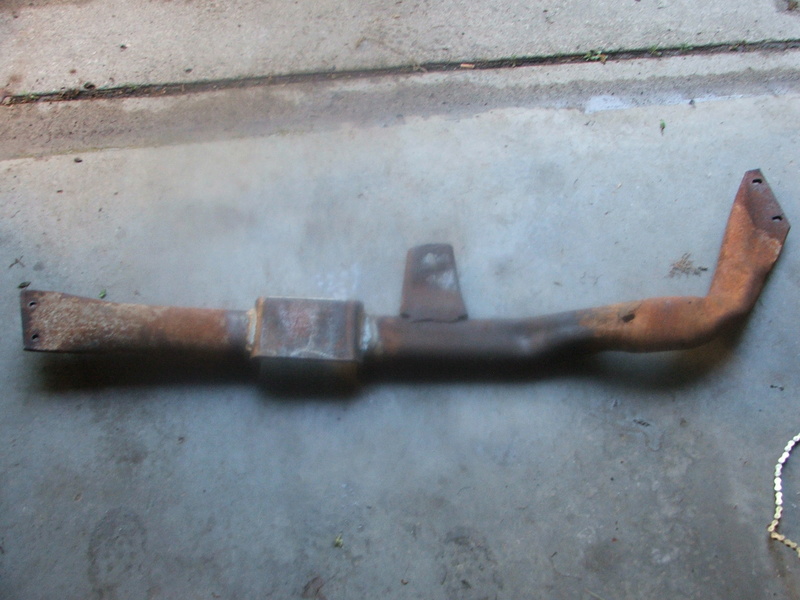

You're welcome sir. I couldn't afford the store bought crossmember when I did my exhaust, so until I can, this is what I did.
fasrnur- G3GM Enthusiast
- Street Cred : 9
Re: Rear sway bar measurements and adaptation.
![]() by SonOfTheGrim Sat May 20, 2017 5:16 pm
by SonOfTheGrim Sat May 20, 2017 5:16 pm
My other thought was flattening the exhaust tubing a bit to fit under the bar. Wonder what effect that would have on performance.
SonOfTheGrim- G3GM Member
- Street Cred : 6
Re: Rear sway bar measurements and adaptation.
![]() by fasrnur Sat May 20, 2017 6:44 pm
by fasrnur Sat May 20, 2017 6:44 pm
Maybe these guys would have something you could use?
http://www.racemufflers.com/Straight-Oval-Tubing-s/2005.htm
fasrnur- G3GM Enthusiast
- Street Cred : 9
Re: Rear sway bar measurements and adaptation.
![]() by SonOfTheGrim Sat May 20, 2017 9:14 pm
by SonOfTheGrim Sat May 20, 2017 9:14 pm
SonOfTheGrim- G3GM Member
- Street Cred : 6
Re: Rear sway bar measurements and adaptation.
![]() by pila Sat May 20, 2017 10:20 pm
by pila Sat May 20, 2017 10:20 pm
pila- Donating Member

- Street Cred : 43
Re: Rear sway bar measurements and adaptation.
![]() by fasrnur Sun May 21, 2017 12:03 am
by fasrnur Sun May 21, 2017 12:03 am
fasrnur- G3GM Enthusiast
- Street Cred : 9
Re: Rear sway bar measurements and adaptation.
![]() by SonOfTheGrim Sun May 21, 2017 12:21 am
by SonOfTheGrim Sun May 21, 2017 12:21 am
SonOfTheGrim- G3GM Member
- Street Cred : 6
Re: Rear sway bar measurements and adaptation.
![]() by SonOfTheGrim Mon May 22, 2017 11:57 pm
by SonOfTheGrim Mon May 22, 2017 11:57 pm
I haven't driven it yet because my intake manifold is off as I am in the middle of plugging the exhaust crossover channel but hopefully tomorrow I will take it down the mountain and test out the sway.
I also went to the scrap yard today and found a piece to mod my crossmember for my headers.
Man the bottom of my car is ugly...
SonOfTheGrim- G3GM Member
- Street Cred : 6
Re: Rear sway bar measurements and adaptation.
![]() by thatfnthing Tue May 23, 2017 8:34 am
by thatfnthing Tue May 23, 2017 8:34 am

thatfnthing- Donating Member
- Street Cred : 65
Re: Rear sway bar measurements and adaptation.
![]() by SonOfTheGrim Thu May 25, 2017 2:49 am
by SonOfTheGrim Thu May 25, 2017 2:49 am
My goal the whole time has been to fix the boatyness that these cars have and I've thought that it was coming mostly from the rear, but with a 7/8" rear sway bar is that going to overpower the wimpy 5/8" front bar?
SonOfTheGrim- G3GM Member
- Street Cred : 6
Re: Rear sway bar measurements and adaptation.
![]() by fasrnur Thu May 25, 2017 7:20 am
by fasrnur Thu May 25, 2017 7:20 am
fasrnur- G3GM Enthusiast
- Street Cred : 9
Re: Rear sway bar measurements and adaptation.
![]() by Hawk03 Thu May 25, 2017 8:45 am
by Hawk03 Thu May 25, 2017 8:45 am
I have lowering springs on the front along with 8" wheels. In the rear I have the Impala sway bar and 9.5" wheels. I just ordered the below sway bar to stiffen up the front, it seemed a little loose when I was driving it over the weekend so I'm hoping the bigger sway bar will help.
http://www.ebay.com/itm/330657224503

Hawk03- G3GM Enthusiast
- Street Cred : 18
Re: Rear sway bar measurements and adaptation.
![]() by fasrnur Thu May 25, 2017 8:28 pm
by fasrnur Thu May 25, 2017 8:28 pm
fasrnur- G3GM Enthusiast
- Street Cred : 9
Re: Rear sway bar measurements and adaptation.
![]() by SonOfTheGrim Fri May 26, 2017 1:00 am
by SonOfTheGrim Fri May 26, 2017 1:00 am
So maybe I don't need to look for a different sway bar after all. But I'm curious, is this a stock bar or did someone upgrade in a previous life?
SonOfTheGrim- G3GM Member
- Street Cred : 6
Re: Rear sway bar measurements and adaptation.
![]() by SonOfTheGrim Fri May 26, 2017 1:05 am
by SonOfTheGrim Fri May 26, 2017 1:05 am
Hawk, that is a fancy GOLD bar! Selling the inserts is an idea. Might see what kind of money I'd have to charge to make it worth it.
Fasrnur, that's exactly the feel I'm trying to work on.
I may still get a bigger bar but for now I'll try what I've got. For the record, new GTO stuff is cheap on eBay. I keep finding stuff I want to try on my car.
SonOfTheGrim- G3GM Member
- Street Cred : 6
Re: Rear sway bar measurements and adaptation.
![]() by SonOfTheGrim Thu Jun 08, 2017 1:39 am
by SonOfTheGrim Thu Jun 08, 2017 1:39 am
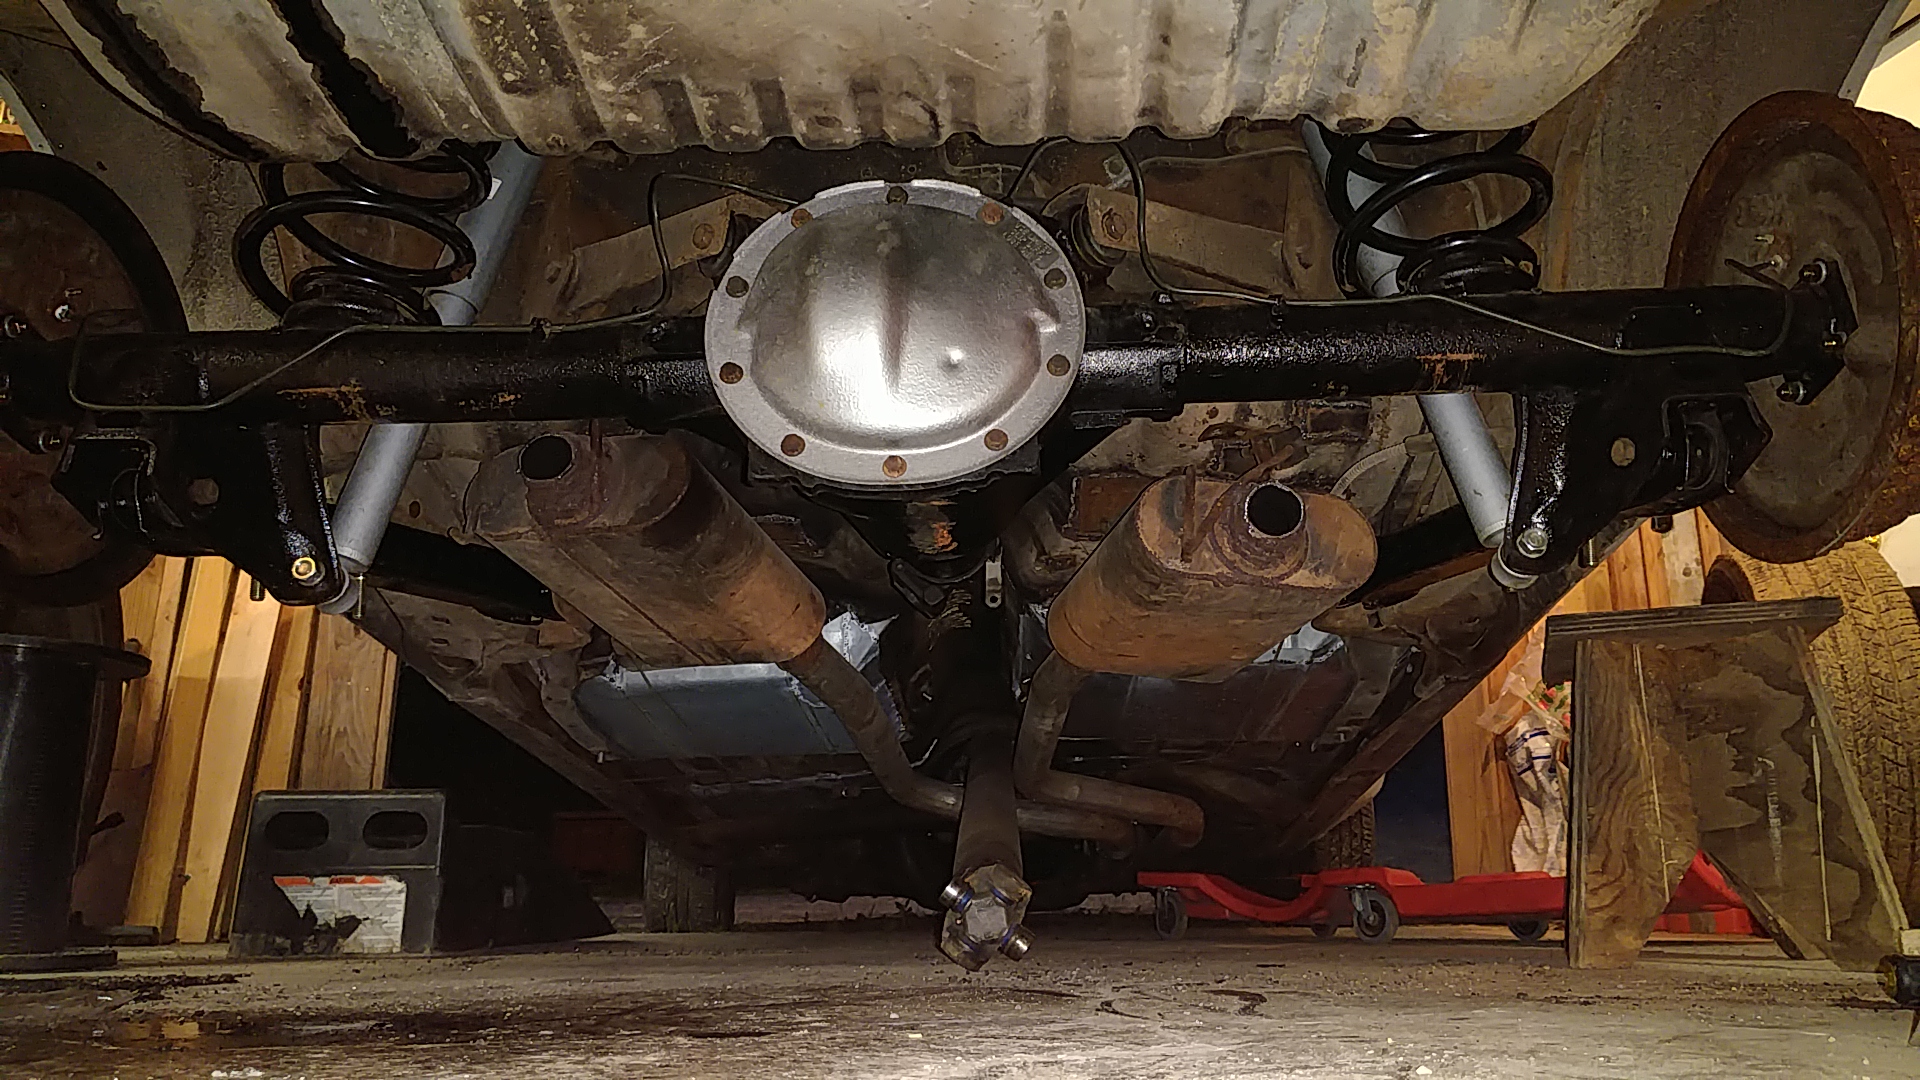
Got my new axle installed finally with minimal issues. Still got to do a couple things while I'm under the car like modding the exhaust and patching the hole I put in the gas tank while modding the exhaust...
On a side note, does anyone know of an epoxy or JB Weld-like substance that will hold up against gas or am I just going to have to drop the tank and weld it up?
Also, does anyone know how much limited slip additive is needed for an 8.5 auburn diff?
SonOfTheGrim- G3GM Member
- Street Cred : 6
Re: Rear sway bar measurements and adaptation.
![]() by clanceman427 Thu Jun 08, 2017 9:24 am
by clanceman427 Thu Jun 08, 2017 9:24 am
clanceman427- G3GM Enthusiast
- Street Cred : 16
Re: Rear sway bar measurements and adaptation.
![]() by bigredlaguna Thu Jun 08, 2017 9:37 am
by bigredlaguna Thu Jun 08, 2017 9:37 am

bigredlaguna- G3GM Senior Member

- Street Cred : 53
Re: Rear sway bar measurements and adaptation.
![]() by SonOfTheGrim Thu Jun 08, 2017 5:51 pm
by SonOfTheGrim Thu Jun 08, 2017 5:51 pm
I already have the additive and gear oil too. The bottle of additive says to put the whole bottle in and then top off but I did that with my s10 when I put the camaro diff in it and it completely disabled the posi. I had to drain about 2/3rds of the oil and replace it with straight gear oil for the posi to lock up.
I would just go with that measurement but that was a 7.5" axle and this is 8.5". I'm thinking I'll just start with 2oz and add more if I get too much wheel hop.
SonOfTheGrim- G3GM Member
- Street Cred : 6
Re: Rear sway bar measurements and adaptation.
![]() by brownbomber77 Sat Jun 24, 2017 6:56 pm
by brownbomber77 Sat Jun 24, 2017 6:56 pm
brownbomber77- G3GM Member
- Street Cred : 4
Page 2 of 3 • 1, 2, 3 ![]()

 Similar topics
» Rusty's progress Done stuff again LOL
» Rear Sway Bar Bracket
|
|
|
» Pate Swap Meet - Texas Motor Speedway - G3 Parts Goldmine
» '73 Laguna coupe - factory 454- SoCal $2500
» Dash Solutions
» Rusty's progress Done stuff again LOL
» 1973 4 door laguna frame same as 1973 2 door chevelle
» Anyone good at photoshop?
» '77 Monte Carlo Landau - Parting out - 61k miles on car
» Dash assembly for 73-77 Malibu/Monte/El Camino,etc.
» Window louvers