


My 74 build

My 74 build
![]() by Silentknight85 Mon Feb 06, 2017 2:17 pm
by Silentknight85 Mon Feb 06, 2017 2:17 pm
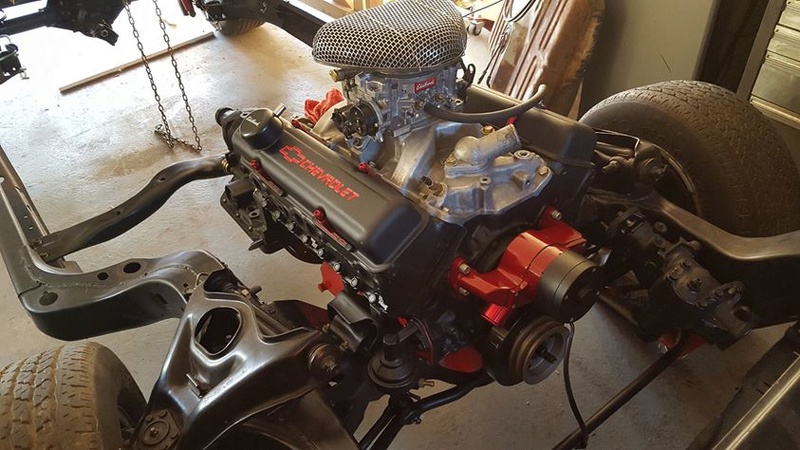
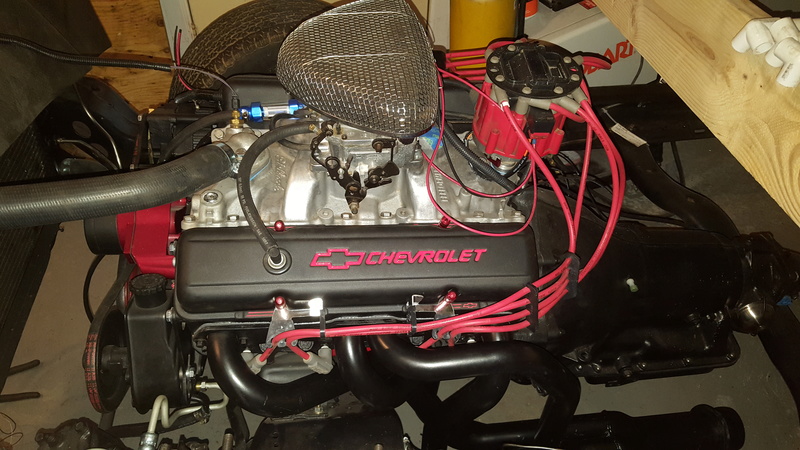
I was lucky enough to get a hold of new frame a few years ago, so my frame is set and just about everything on it has been replaced and ready for the body to be returned to it. There are a few minor differences between the 74 and 75 frame, but nothing that halted progress for long. The drive train is in place and progress is regularly being made on the the engine.
The frame was easy. Everything on the frame was easy. I went through and rebuilt or replaced everything. Again, there were a few issues, but mostly it was hassle free... that or I've just mentally blocked out any large problems I had.
The body is a different story. I'm not a body guy, but I am learning. I think I'm doing well. Time will tell, however. I took a class last winter at the local community college that covered all the body tech basics. I excelled in the class. It covered everything from popping dents with pick and hammer, to polishing up the paint for a show quality finish. I did very well, so I'm hopeful.
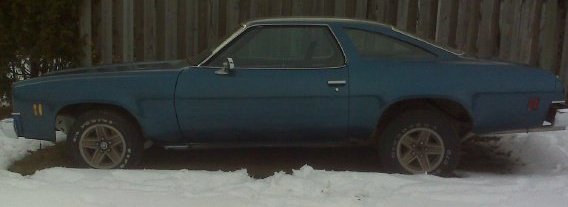
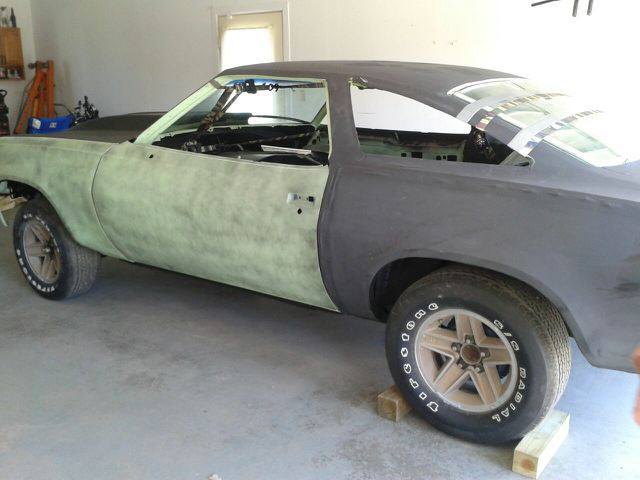
Back in 2010, I paid a guy a lot of money to do the body work on my car. I never assumed I'd ever touch a DA or a body hammer, or cut into sheet metal. I had no experience and figured I'd be better off paying someone else to do the work. This is what it looked like in 2010 prior to the "body guy":
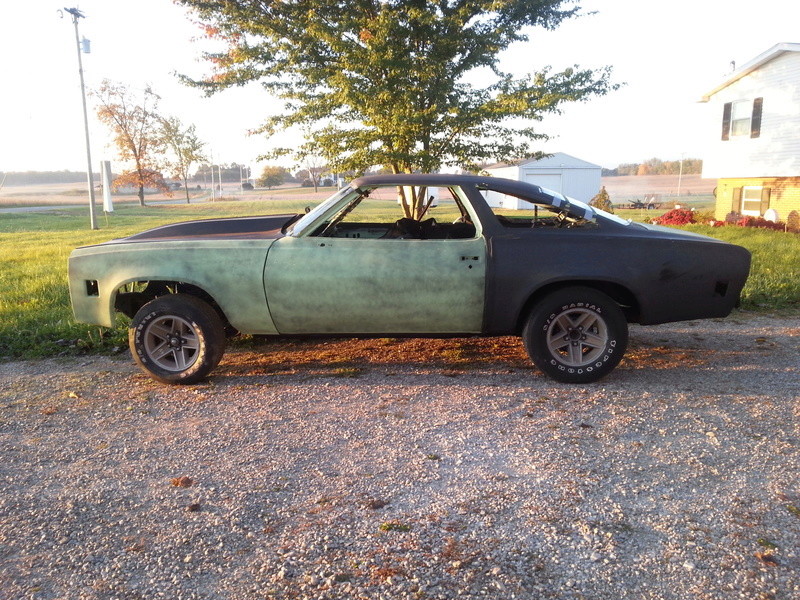
This was the worst mistake of my young car-guy life. This guy screwed me. Royally screwed me. After 3 years, and an embarrassingly large amount of money, I retrieved the unfinished car in worse condition then it was when I sent it off to him. This is the condition after all that time:
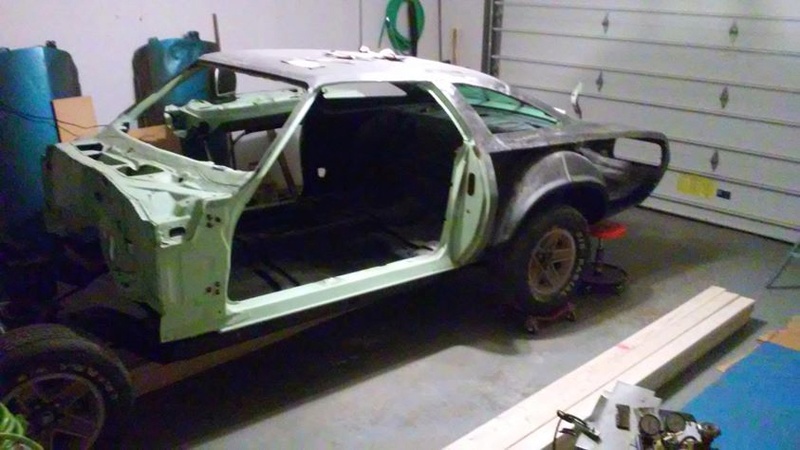
Thus begins the actual body work on my car. The first thing I noticed was that the rear quarter panels were zip screwed on. The zip screws were then taped over and the whole quarters were shot with a black primer. Look past it fast enough and you might miss the fact that they weren't welded in place. So, I got it home and started organizing all the parts, hoping and praying that I didn't leave anything behind. The guy lived 6 hours away from me.
After the parts were out of the car and organized, I ripped off the front clip, unscrewed the quarter panels, removed the doors and started planning for getting the body off the frame. I was bound and determined to examine every inch of this car. I did not and still do not trust a single thing this bozo did.

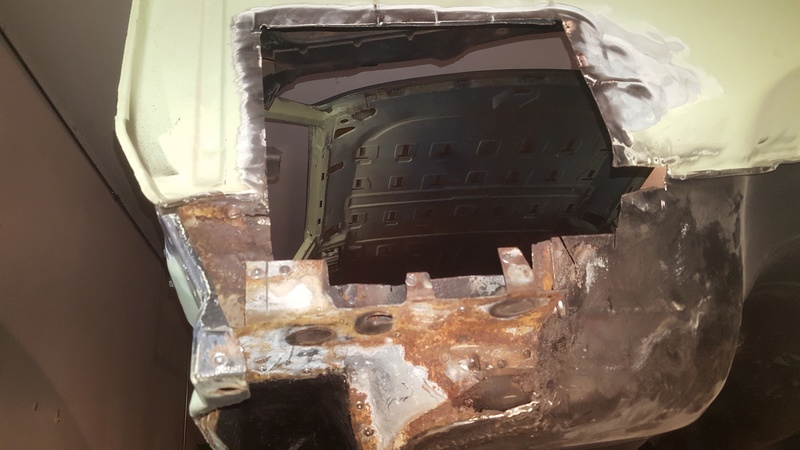
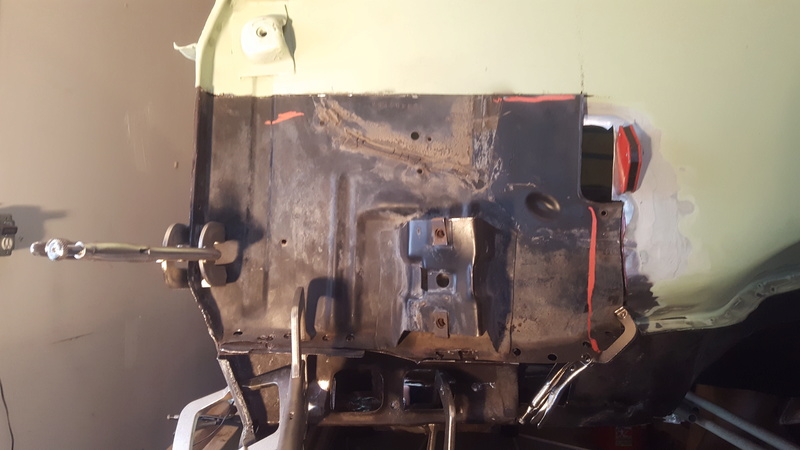
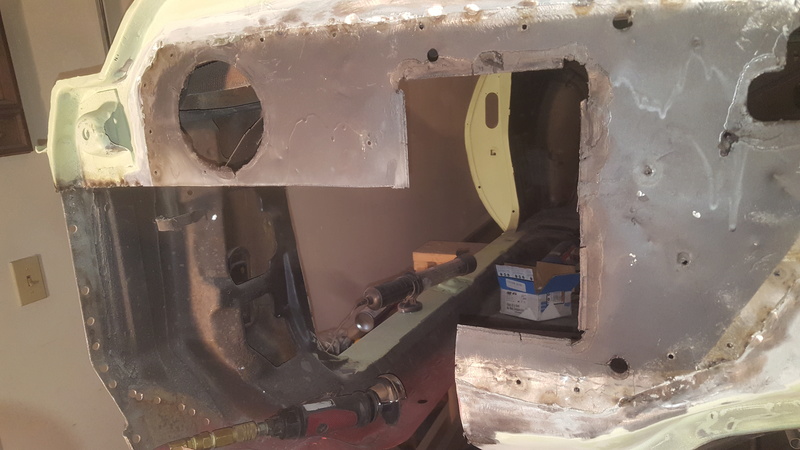
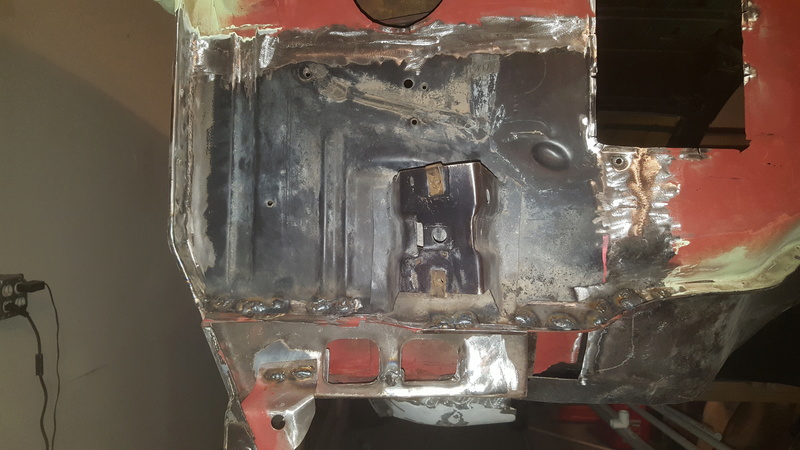
One thing that I learned is that if I saw green tape, it means it was covering something up. There was green tape covering up several rust holes throughout the body. There was also green tape hiding the fact that the lower pinchweld on the passenger side of the firewall was missing. I'm not sure his actual intentions with the tape, but seeing as he thought I was coming down to see the progress on it, him hiding things he couldn't fix makes sense. Anyways, yes green tape. Lots of green tape hiding lots of unrepaired rust holes, missing metal, etc.. Like this (look closely by the passenger side inner fender bracket):
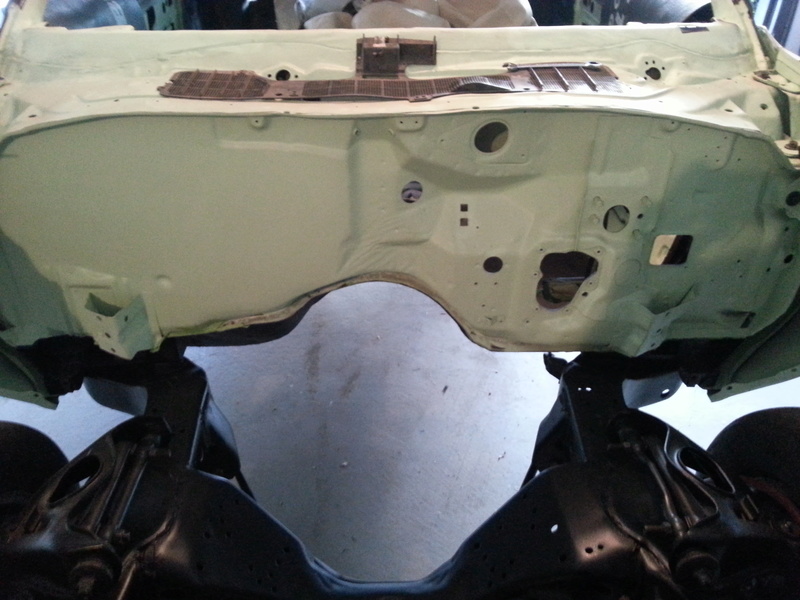
Upon further inspection:
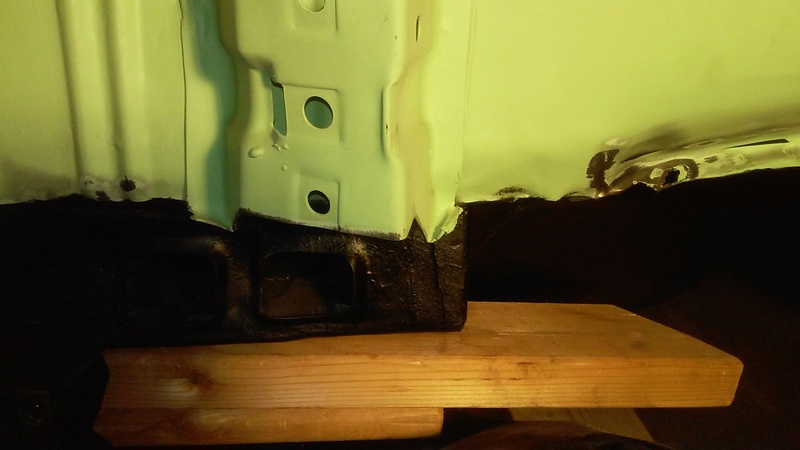
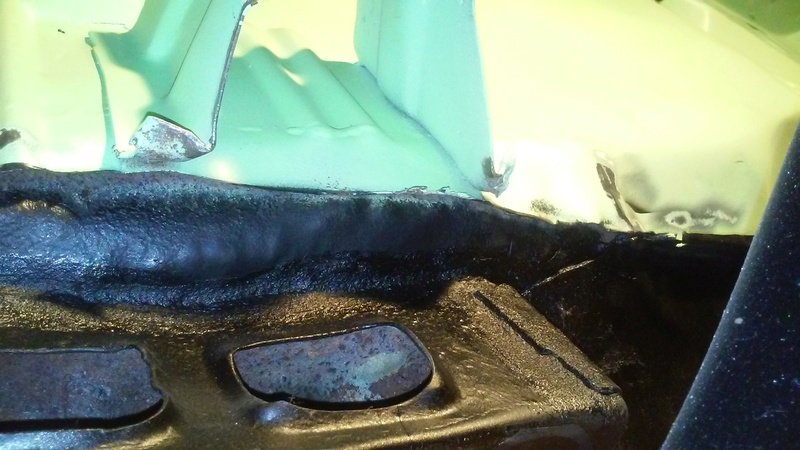
Remember the accident I mentioned earlier? My theory is that the accident caused something large to push into the firewall/torque box area. I came across this conclusion because the torque box itself was slanted towards the rear of the car, where the drivers side torque box was not. When that happened, it damaged the pinch weld, which, after many years, led it to rotting away. Now, with no sealed pinch weld between the engine compartment and the cab, moisture got in and rotted away the floor board and everything in between. That's where I am at now. I am working on replacing the entire section. I had another post related to how the guy just slapped on the new floor pans on top of the rotted floor pans, without prepping them first. So, now I have no passenger front floor pan and a hole in my firewall.
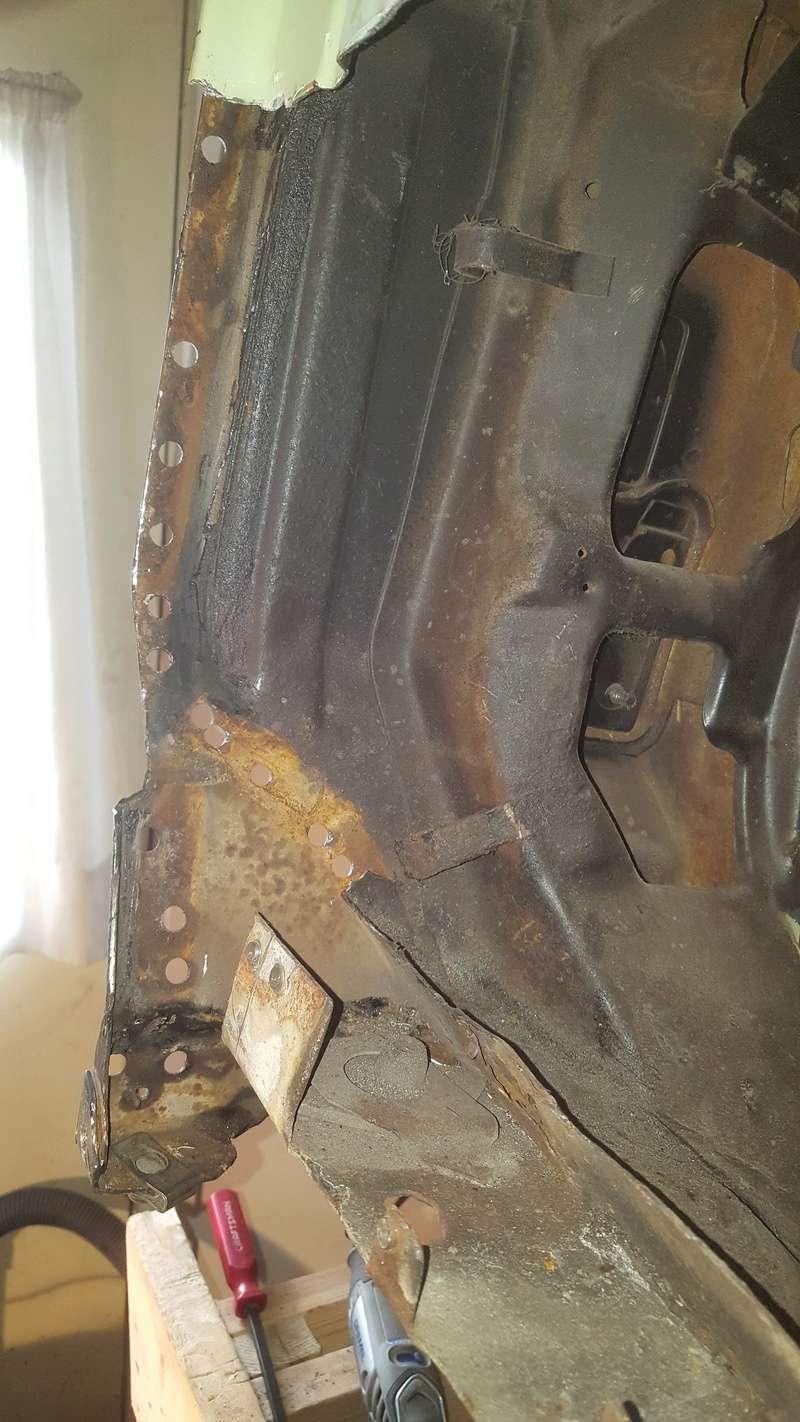
I first started by removing the inner fender mount. This was not the best way to do this, I learned. I thought it would give me better access to the area to rebuild it. Little did I know, there are 3 layers in that section: torque box, floor pan, and firewall. 3 layers make up that pinch weld.
The rusty piece of "floor pan" that you can see at the bottom of the hole is a patch that someone put in. It obviously did nothing to keep moisture out.
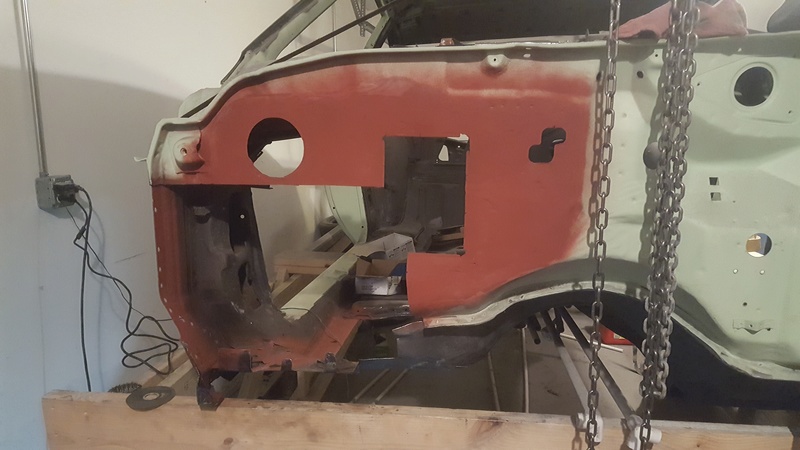
Realizing that cutting the section out where I did made it pretty hard to put back together (I was dumb enough to cut through the beads), I decided to cut out a larger section. I'd repair this area as a whole and weld it back together. It would be easier. Or so I thought:

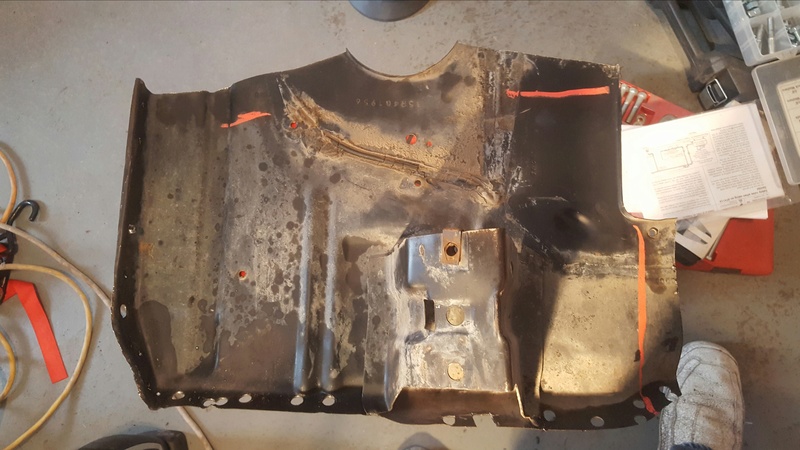
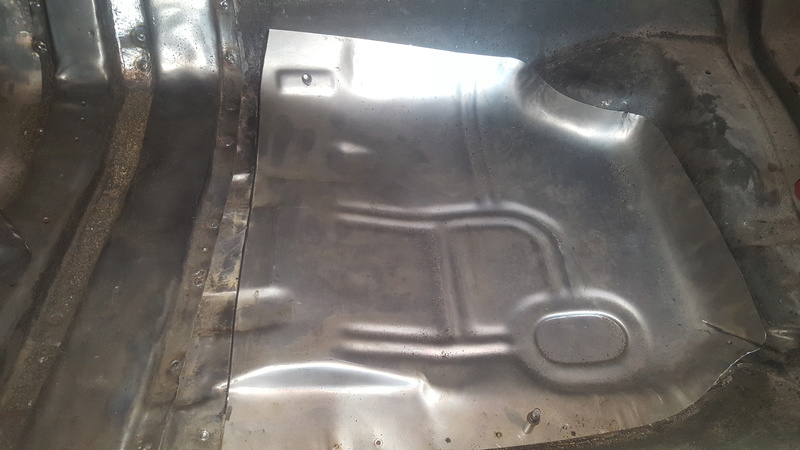
As you can see, I also tried to fix the torque box, without actually knowing what it looked like. Joe73 provided some pictures, and they helped me realize I was out of my league. There was no way I could accurately repair this area. I started hunting around for a replacement 'section'. The section included the firewall, torquebox and atleast part of the floor pan. I wanted the pinch weld section intact. Some of you mentioned desert valley auto parts. They were able to provide me with the section I needed. Here is the firewall section after I separated it from the torque box and floor pan pieces:
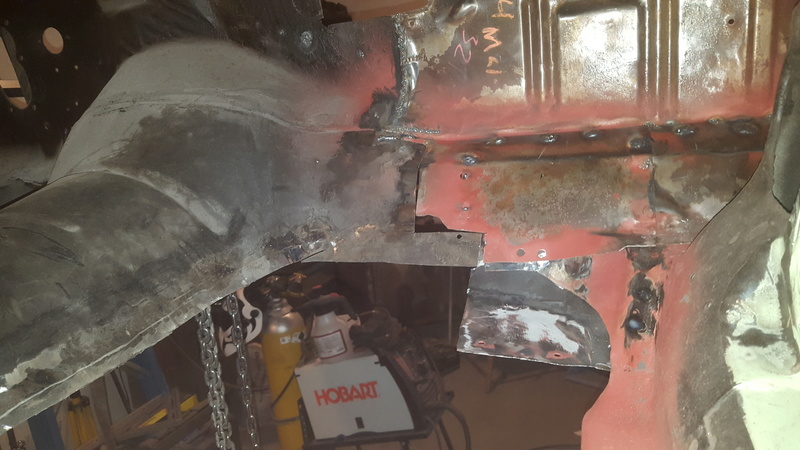
And here I am dissecting the affected area. Notice how bad some of the parts are rusted, warped, etc.. (also notice the bad patch attempts on the floor pan).


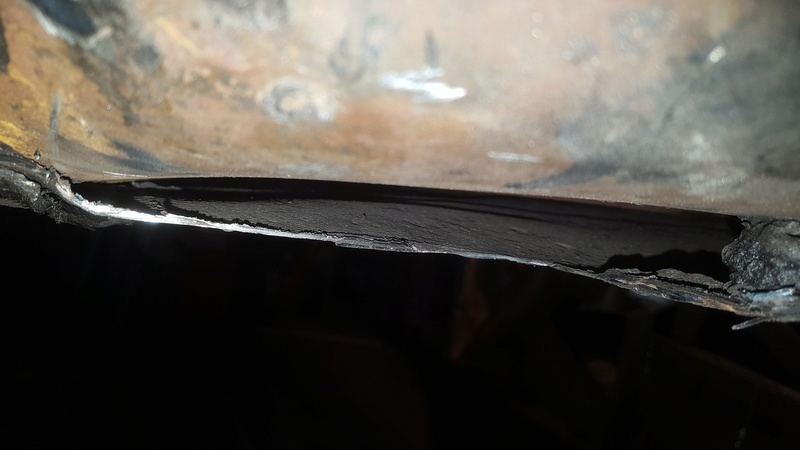
And two floor pans on top of each other. He used seam sealer to plug a rust hole in the lower panel, which you can see in the bottom right corner.
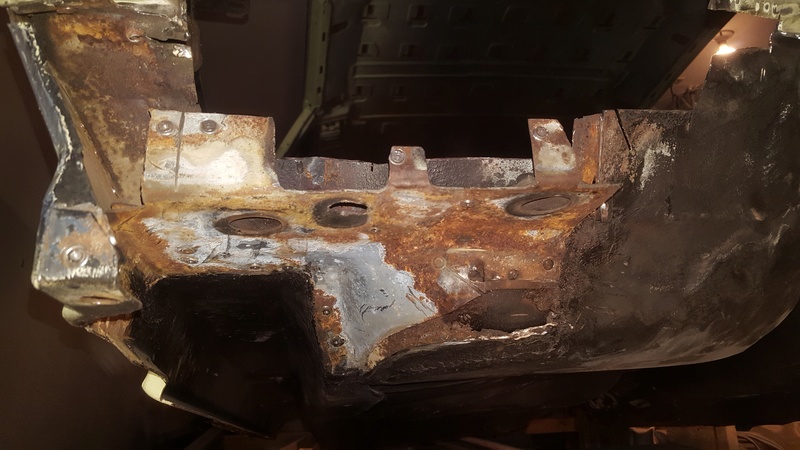
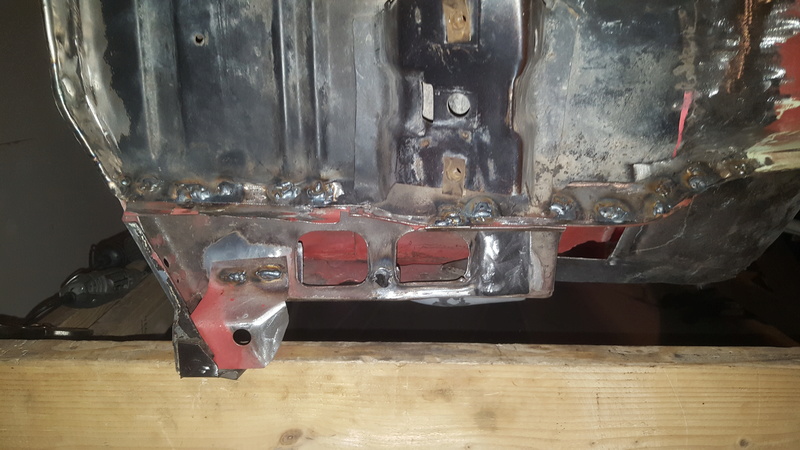
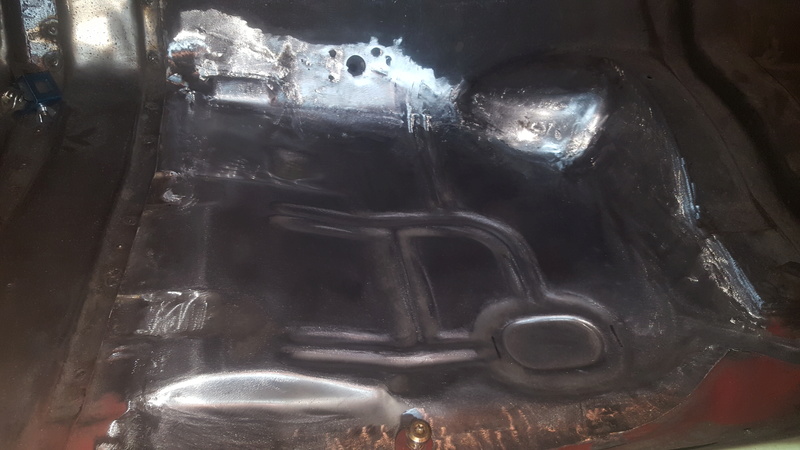
And that lead me to removing the floor pans and reinstalling the torque box innards (part of the rocker panel):
I mocked up the new firewall section. The beads and lines do not line up perfectly with the original section (different stamping machines, locations, etc.. most likey), but I can make it work and look good with some persuasion and body filler:
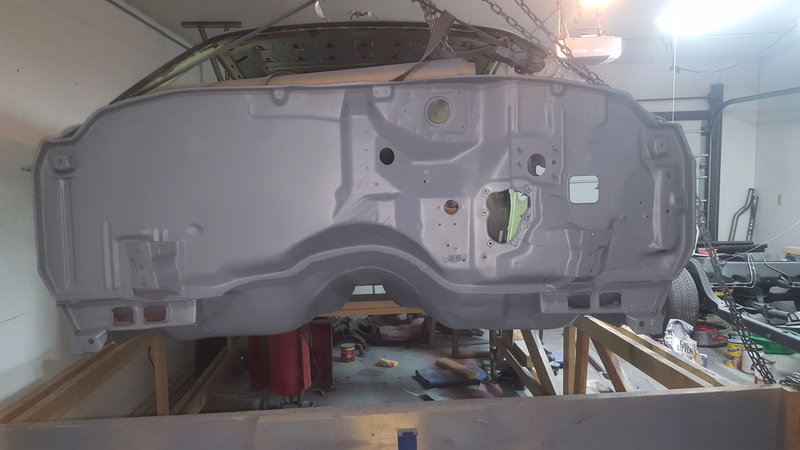
And this is where I am currently at. I wanted to get this area fixed first, before the body went back on the frame. Then I need to turn to other areas of the body. As of now, I need a new floor pan. Who would you guys recommend for floor pans for our cars? Sherman auto? OPG? Who sells the best pans?
Thanks!
Silentknight85- Donating Member

- Street Cred : 4
Re: My 74 build
![]() by Roadcaptain S3 Mon Feb 06, 2017 5:41 pm
by Roadcaptain S3 Mon Feb 06, 2017 5:41 pm
It sucks that you have to do all this. I hear horror stories all the time about ****heads masquerading as body men. I think there are actually more turds out there than legit craftsmen.
My nitwit brother in law was one of them, til it caught up to him.
I've never bought any replacement panels, but I think that the floor pans are pretty much all manufactured by the same company.I think I would try to buy them from the best vendor with the best reputation and return policy just in case.
Keep at it!

Roadcaptain S3- Donating Member
- Street Cred : 26
Re: My 74 build
![]() by fasrnur Mon Feb 06, 2017 9:03 pm
by fasrnur Mon Feb 06, 2017 9:03 pm
I've been in the automotive industry in some sort of capacity now since 1975.
I've mostly been in the parts side of it but have done my own work since I was a wee tike. lol So, a LONG time!
Now, for the question about floor pans? I work for LKQ which now owns Goodmark Industries. I know there is at least one LKQ Salvage yard in Michigan that you could call. Where it is at, I'm not sure. Goodmark is a company that GM has let certify the parts they sell as "GM quality restoration parts" That should tell you how good they are and fit. Here's a link to the floor pan pieces.
https://www.goodmarkindustries.com/p-9865-front-floor-patch-rh-73-77-a-2-door-31-l-4034-505-73r.aspx
Also before I sign of.....where did you get the hood? I want one like that, but haven't been able to find one. I like that the scoop actually is like the Z28's at the windshield.
Good luck, keep your chin up, and I wish you the best of luck on your project.
Jeff.....
fasrnur- G3GM Enthusiast

- Street Cred : 9
Re: My 74 build
![]() by Damon23 Mon Feb 06, 2017 9:15 pm
by Damon23 Mon Feb 06, 2017 9:15 pm
Damon23- G3GM Member

- Street Cred : 5
Re: My 74 build
![]() by Silentknight85 Mon Feb 06, 2017 9:23 pm
by Silentknight85 Mon Feb 06, 2017 9:23 pm
fasrnur wrote:
Also before I sign of.....where did you get the hood? I want one like that, but haven't been able to find one. I like that the scoop actually is like the Z28's at the windshield
I either got it from opgi.com or usbody.com. It was 09 when I bought it, so that's a bit fuzzy. Yeah, dude also chipped the fiberglass on the hood and scratched the hell out of my Recaro seat.
Silentknight85- Donating Member
- Street Cred : 4
Re: My 74 build
![]() by Silentknight85 Tue Feb 07, 2017 12:42 pm
by Silentknight85 Tue Feb 07, 2017 12:42 pm
Damon23 wrote:Just plug away, one project at a time. It seems to be a common theme, bodyshops and bodymen ripping people off. Especially the guy that does it on the side, takes your money and never works on the stuff. Shops that do insurance jobs are no fun either. They use your car as filler work and you get put on hold.
Yeah, I agree. Back in 08 my truck went into a body shop for repair, after someone hit the side of the bed. Insurance covered it. They charged the insurance for a new bed panel, but it was never actually replaced. And then after about a year the paint started bubbling and leaking water. I should have taken it back, but never did. Now my passenger side bed panel, at the wheel well, is completed rotted out.
Last edited by Silentknight85 on Tue Feb 07, 2017 12:47 pm; edited 1 time in total
Silentknight85- Donating Member
- Street Cred : 4
Re: My 74 build
![]() by Silentknight85 Tue Feb 07, 2017 12:45 pm
by Silentknight85 Tue Feb 07, 2017 12:45 pm
(Not my car).
Silentknight85- Donating Member
- Street Cred : 4
Re: My 74 build
![]() by 73ss Tue Feb 07, 2017 7:19 pm
by 73ss Tue Feb 07, 2017 7:19 pm
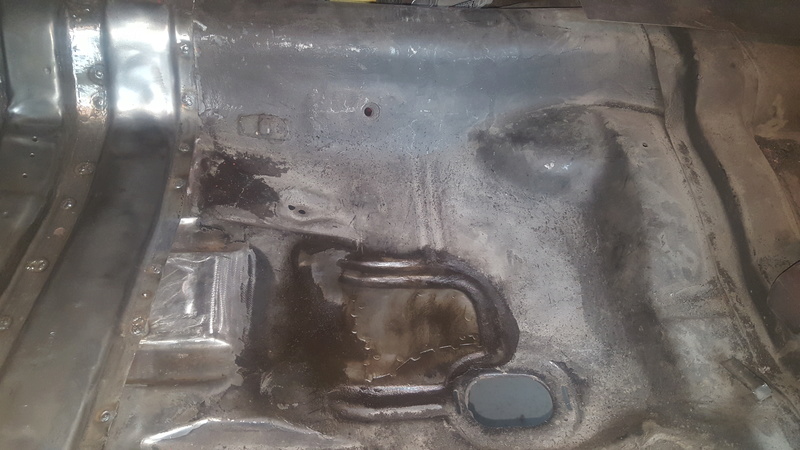
Silentknight85 wrote:And I have a question regarding the firewall. What is the backwards 'Z' shaped cutout used for?
(Not my car).
heater hoses, there should be a foam/rubber type filler that fits around the heater pipes. Nice work you have done. Stinks that happened to you. I was fortunate to find that the guy that painted my car in the early 90's was still in business and doing well. I took my car to him last year for a fresh up.

73ss- G3GM Enthusiast
- Street Cred : 11
Re: My 74 build
![]() by knightfan26917 Sun Feb 12, 2017 11:31 pm
by knightfan26917 Sun Feb 12, 2017 11:31 pm
Roadcaptain S3 wrote:I admire your dedication. You're doing a heckuva good job and I look forward to watching your progress. I appreciate the post and your attention to detail.
^^^^ this ... oh my goodness, THIS.
Cort, www.oldcarsstronghearts.com
pig&cowValves.paceMaker * 1979 CC to 2003 MGM + 81mc
"Come along & share the good times while we can" | Lynn Anderson | 'Rose Garden'

knightfan26917- G3GM Senior Member

- Street Cred : 8
Re: My 74 build
![]() by Silentknight85 Mon Feb 13, 2017 8:23 am
by Silentknight85 Mon Feb 13, 2017 8:23 am

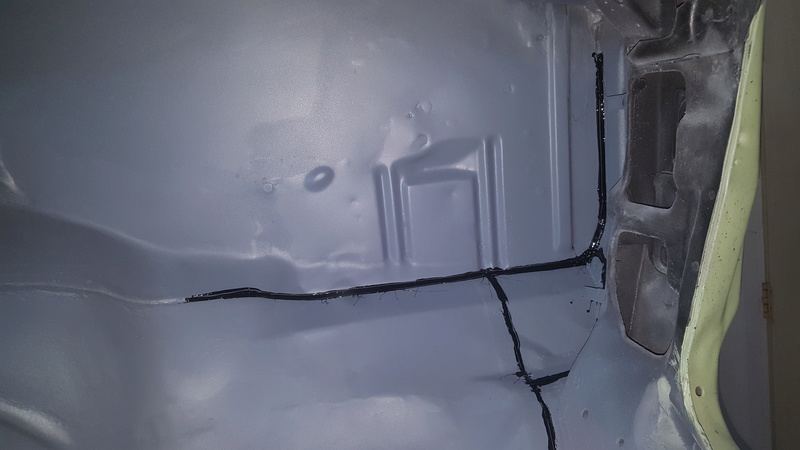
I worked the metal to straighten it out as best as I could, welded up the screw holes, and some of the bigger holes. There's no reason to leave it unfinished, even if it is getting covered up again. It took me 30 minutes, maybe? It's the small stuff that matters. Anyways, The panel was pretty bad, so I couldn't get all the waviness out of it, I think it's stretched a bit, and I've never been good at metal shrinking, but it does look a lot better! I shot it with weld through primer and am going back to scuff it up and throw some fiberglass filler on the bigger holes and around the edges of the blower motor and heater core cutouts. I'm also contemplating properly patching off those two holes. I don't want to leave them open, but would also hate to permanently close them up, if I ever do want to get AC/heat in the car. It'd be a lot of work to make the firewall look good enough to leave uncovered, though. We'll see later on in life.
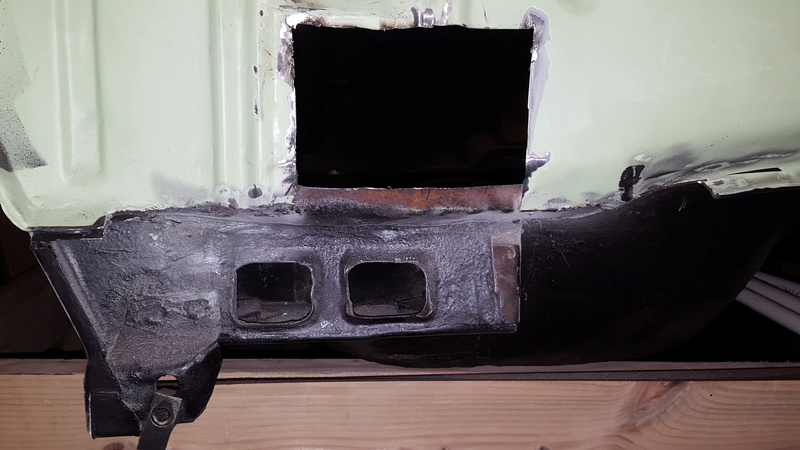
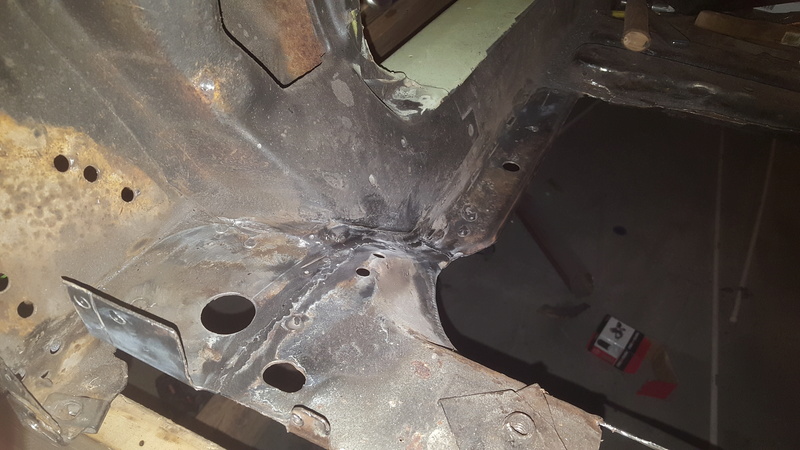
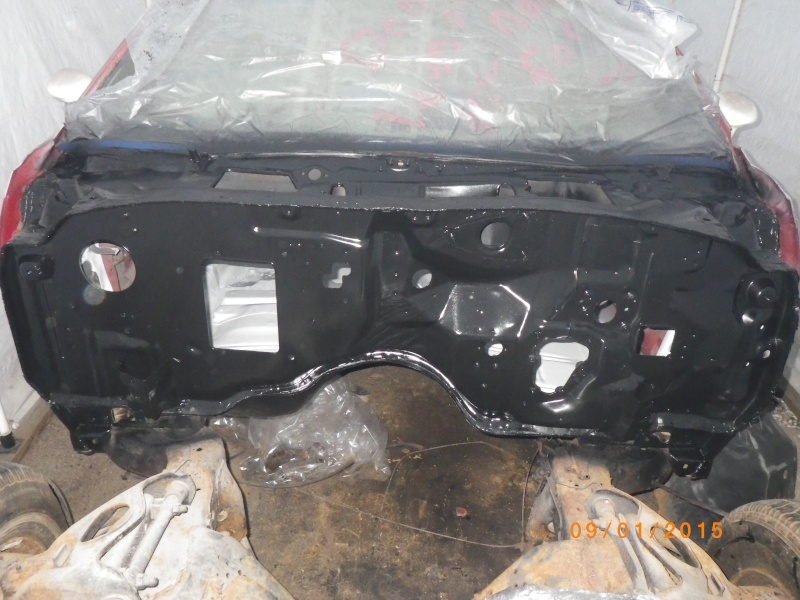
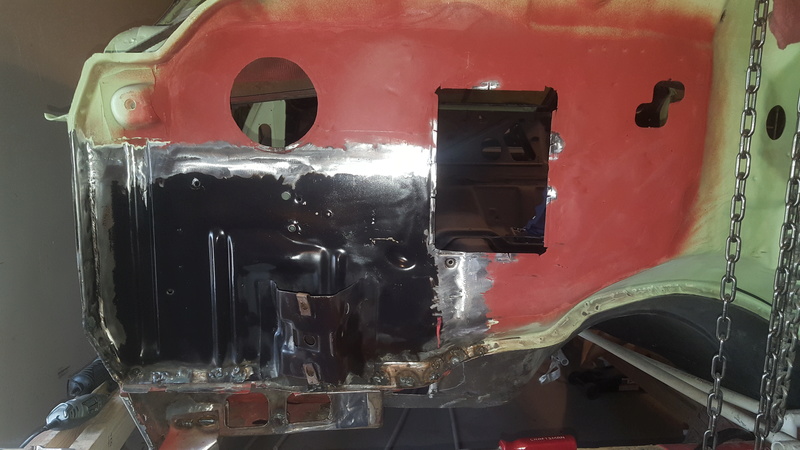
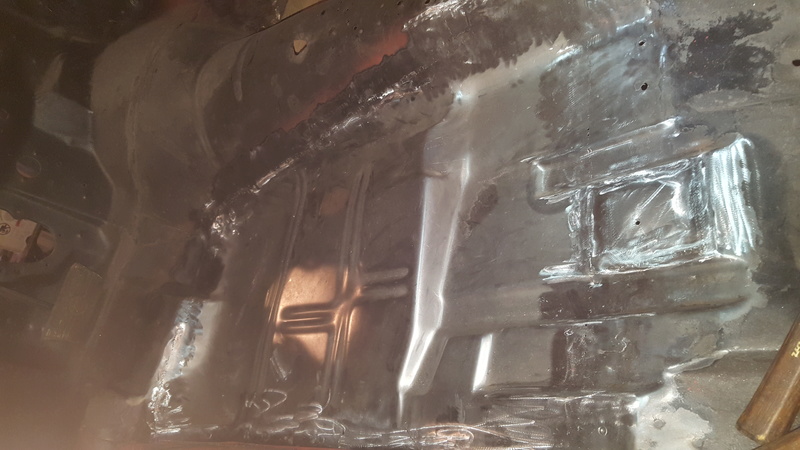
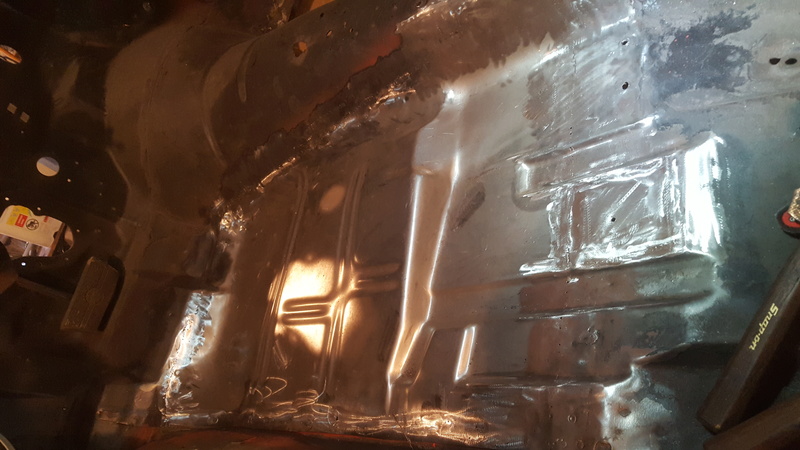
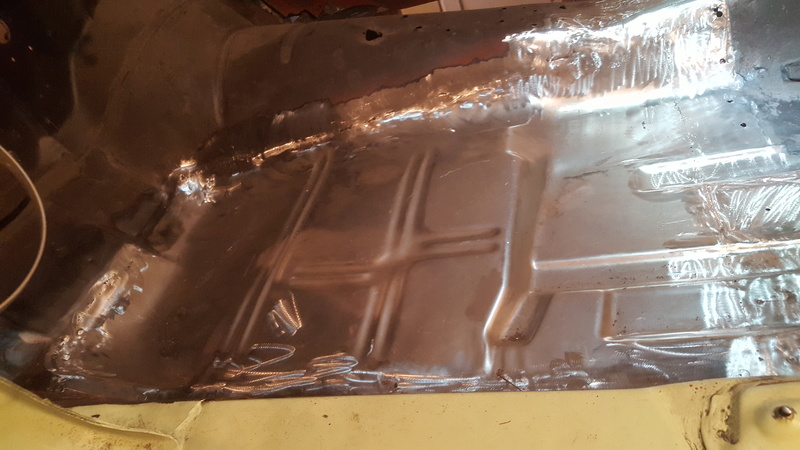
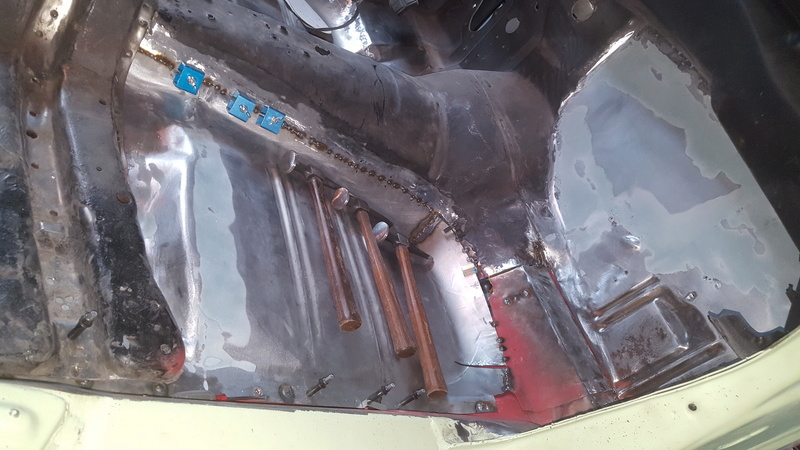
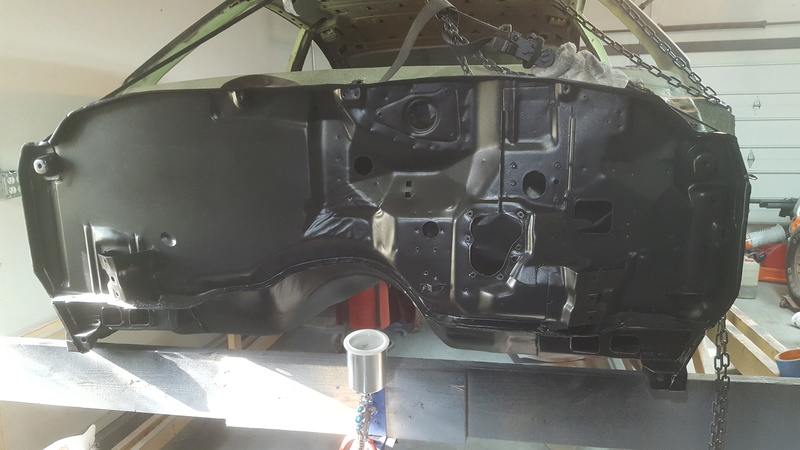
Then the next part was pretty simple. Weld in the new donor firewall section. By simple, I mean spending an hour making sure everything is perfectly lined up. I mocked up the three peices in this area needed to make sure it was aligned properly: The torque box, the upper floor plan sections, and the firewall piece. I tweeked it countless times until I felt it was just right. As mentioned in my first post, my firewall and the donor firewall weren't stamped exactly the same. I put a few tack welds in place and worked the new piece until it lined up. Mostly this was around the long depression at the left hand side, and around the corner where it meets up to the door jamb. That took me a few minutes but it lined up eventually. The only thing left that doesn't line up is the pinch weld. It's a bit too high, but I think I can solve that problem later on. After a couple hours of welding and grinding, I have a new firewall:
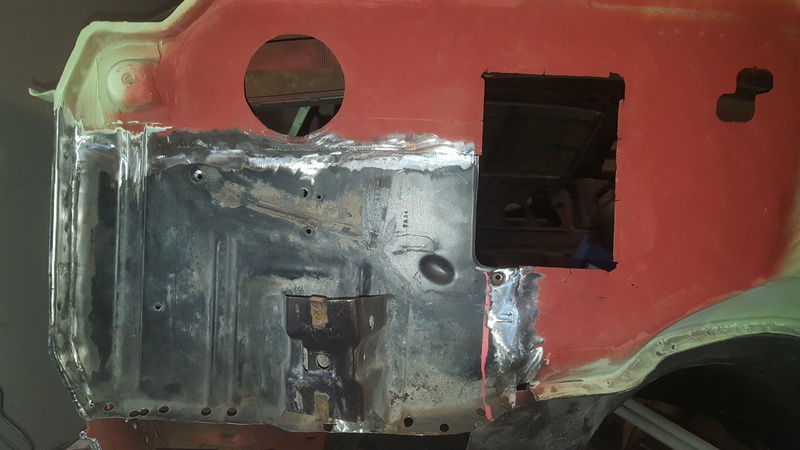

I still have to dress a few welds, and fill in a few holes, but that's minor, the real work is done. After the last weld is ground, I will be applying fiberglass filler, both inside and outside, to ensure zero moisture penetration at the weld sites. I want the original panel to look good, be sealed, and be worry free, before the panel goes on that will be used to smooth this area. But for now, this is where I'm at.
Silentknight85- Donating Member
- Street Cred : 4
Re: My 74 build
![]() by Silentknight85 Mon Feb 13, 2017 8:51 am
by Silentknight85 Mon Feb 13, 2017 8:51 am
Silentknight85- Donating Member
- Street Cred : 4
Re: My 74 build
![]() by Hs1973 Mon Feb 13, 2017 12:54 pm
by Hs1973 Mon Feb 13, 2017 12:54 pm
I have been in the body business for 30 years, and have learned the hard Way to awoid using any spraycan type of primer on bodypanels. The only spray i use is weldtrough between panels. All other is either epoxy or the primer that my paintshop uses. Its more labor intensive and cost a little more, but its a better result in the end.

Hs1973- G3GM Enthusiast
- Street Cred : 14
Re: My 74 build
![]() by Silentknight85 Mon Feb 13, 2017 1:17 pm
by Silentknight85 Mon Feb 13, 2017 1:17 pm
Silentknight85- Donating Member
- Street Cred : 4
Re: My 74 build
![]() by Hs1973 Tue Feb 14, 2017 4:09 pm
by Hs1973 Tue Feb 14, 2017 4:09 pm
Hs1973- G3GM Enthusiast
- Street Cred : 14
Re: My 74 build
![]() by Silentknight85 Tue Mar 28, 2017 1:48 pm
by Silentknight85 Tue Mar 28, 2017 1:48 pm
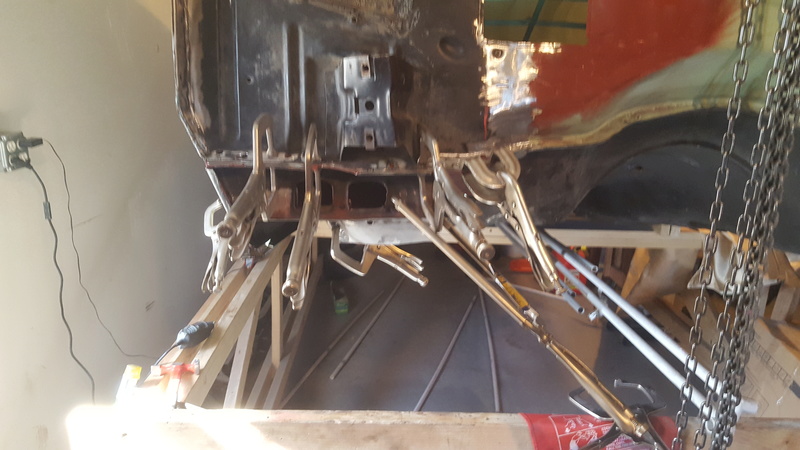
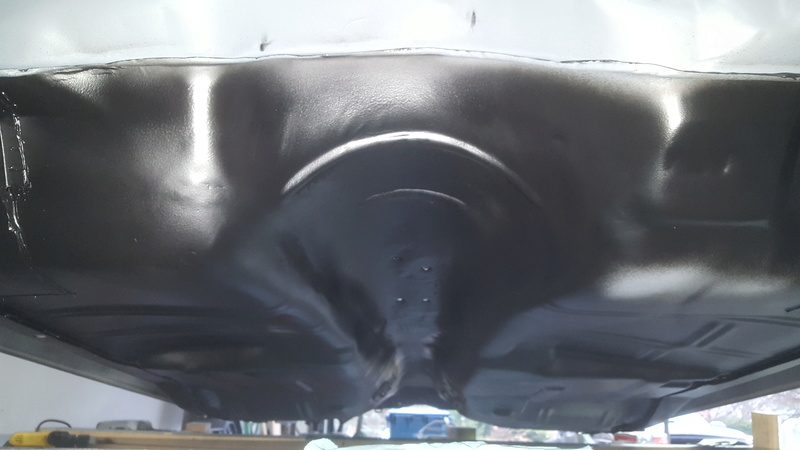
Oh, and yes, those are pretty big rosette welds on the firewall/torque box pinchweld. I'm new to rosette welds. But they ground down flush just fine (no pics of this, yet). I still need to finish smoothing all those welds out and then shaping the pinchweld to look more stock.
Finally some forward progress. I've been waiting years to get to the point where I am moving forward with this build.


Silentknight85- Donating Member
- Street Cred : 4


thatfnthing- Donating Member
- Street Cred : 65
Re: My 74 build
![]() by Silentknight85 Wed Mar 29, 2017 6:46 am
by Silentknight85 Wed Mar 29, 2017 6:46 am
Silentknight85- Donating Member
- Street Cred : 4
Re: My 74 build
![]() by Hs1973 Wed Mar 29, 2017 7:55 am
by Hs1973 Wed Mar 29, 2017 7:55 am
Hs1973- G3GM Enthusiast
- Street Cred : 14
Re: My 74 build
![]() by Silentknight85 Wed Mar 29, 2017 8:58 am
by Silentknight85 Wed Mar 29, 2017 8:58 am
Hs1973 wrote:Looks like you are getting the hang of it. The best work is the work you do yourself.
I agree. At this point, I'm not sure I could trust anyone else to work on my cars. At least I know what's been done, when I do it.
Silentknight85- Donating Member
- Street Cred : 4
Re: My 74 build
![]() by thatfnthing Wed Mar 29, 2017 9:09 am
by thatfnthing Wed Mar 29, 2017 9:09 am
Silentknight85 wrote:Okay, I just got excited.
Hang onto that -- that's what will keep you going when the project seems never-ending.
thatfnthing- Donating Member
- Street Cred : 65
Re: My 74 build
![]() by pila Wed Mar 29, 2017 4:04 pm
by pila Wed Mar 29, 2017 4:04 pm
pila- Donating Member
- Street Cred : 43
Re: My 74 build
![]() by Silentknight85 Mon Dec 04, 2017 8:52 am
by Silentknight85 Mon Dec 04, 2017 8:52 am
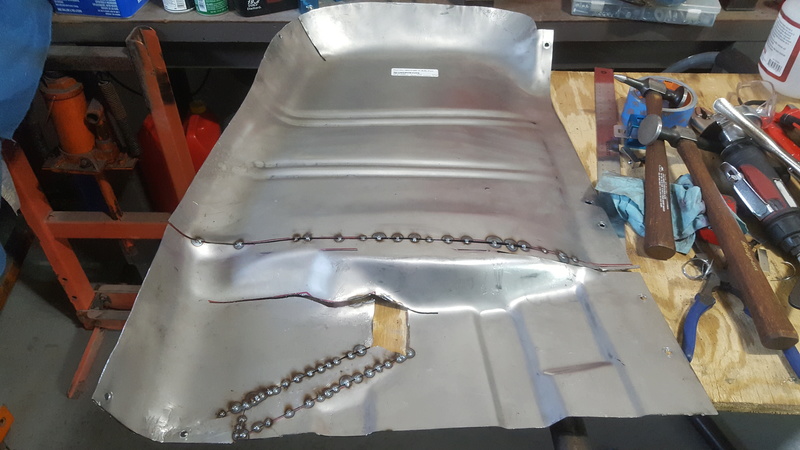
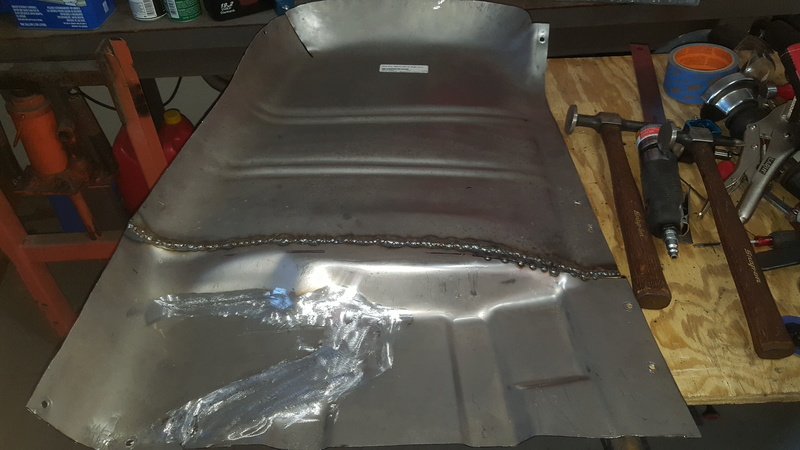
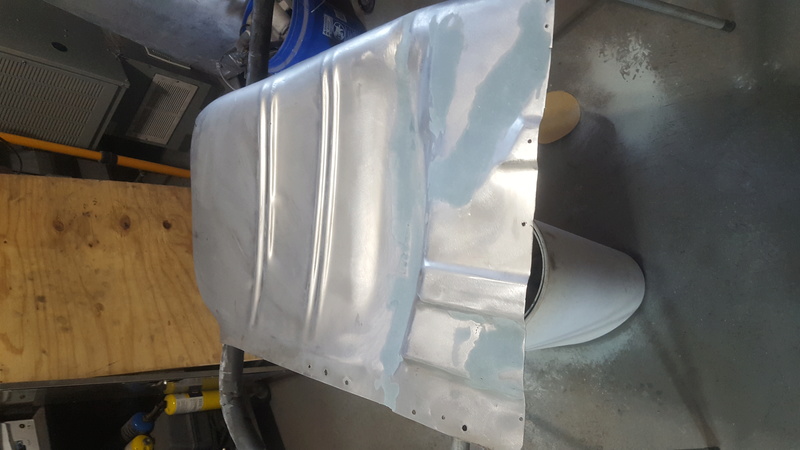
The last time many of you saw the progress of my build, I had just welded in the driver side front floor pan, and was simultaneously repairing the passenger side of the firewall. I was only planning on replacing the front floor pans, but then found some crappy repairs with the rears so I did those, too. I'll let the pictures do the storytelling from here:

I had to remove 4 or 5 inches out of the passenger side floor pan. The front crossmember wouldn't have gone back in correctly without this modification.


Silentknight85- Donating Member
- Street Cred : 4

Hawk03- G3GM Enthusiast
- Street Cred : 18
Roadcaptain S3- Donating Member
- Street Cred : 26


|
|
|
» 1973 Chevelle SS, 350, 4spd. build
» Who works on 73-77 "soft" steering wheels?
» Blue door jamb sticker
» Factory am/fm
» Painting Interior Plastic
» Need driver side bucket seat 73 Laguna
» triangle stainless window trim
» door interior trim retainer clips
» Rusty's progress motor Parts arrived LOL Half are on