


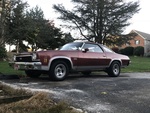
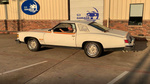
1973 Chevelle SS, 350, 4spd. build
G3GM :: G3 :: General Discussion
Page 9 of 17 •  1 ... 6 ... 8, 9, 10 ... 13 ... 17
 ![]()
Re: 1973 Chevelle SS, 350, 4spd. build
![]() by Joe73 Sun May 27, 2018 10:45 am
by Joe73 Sun May 27, 2018 10:45 am
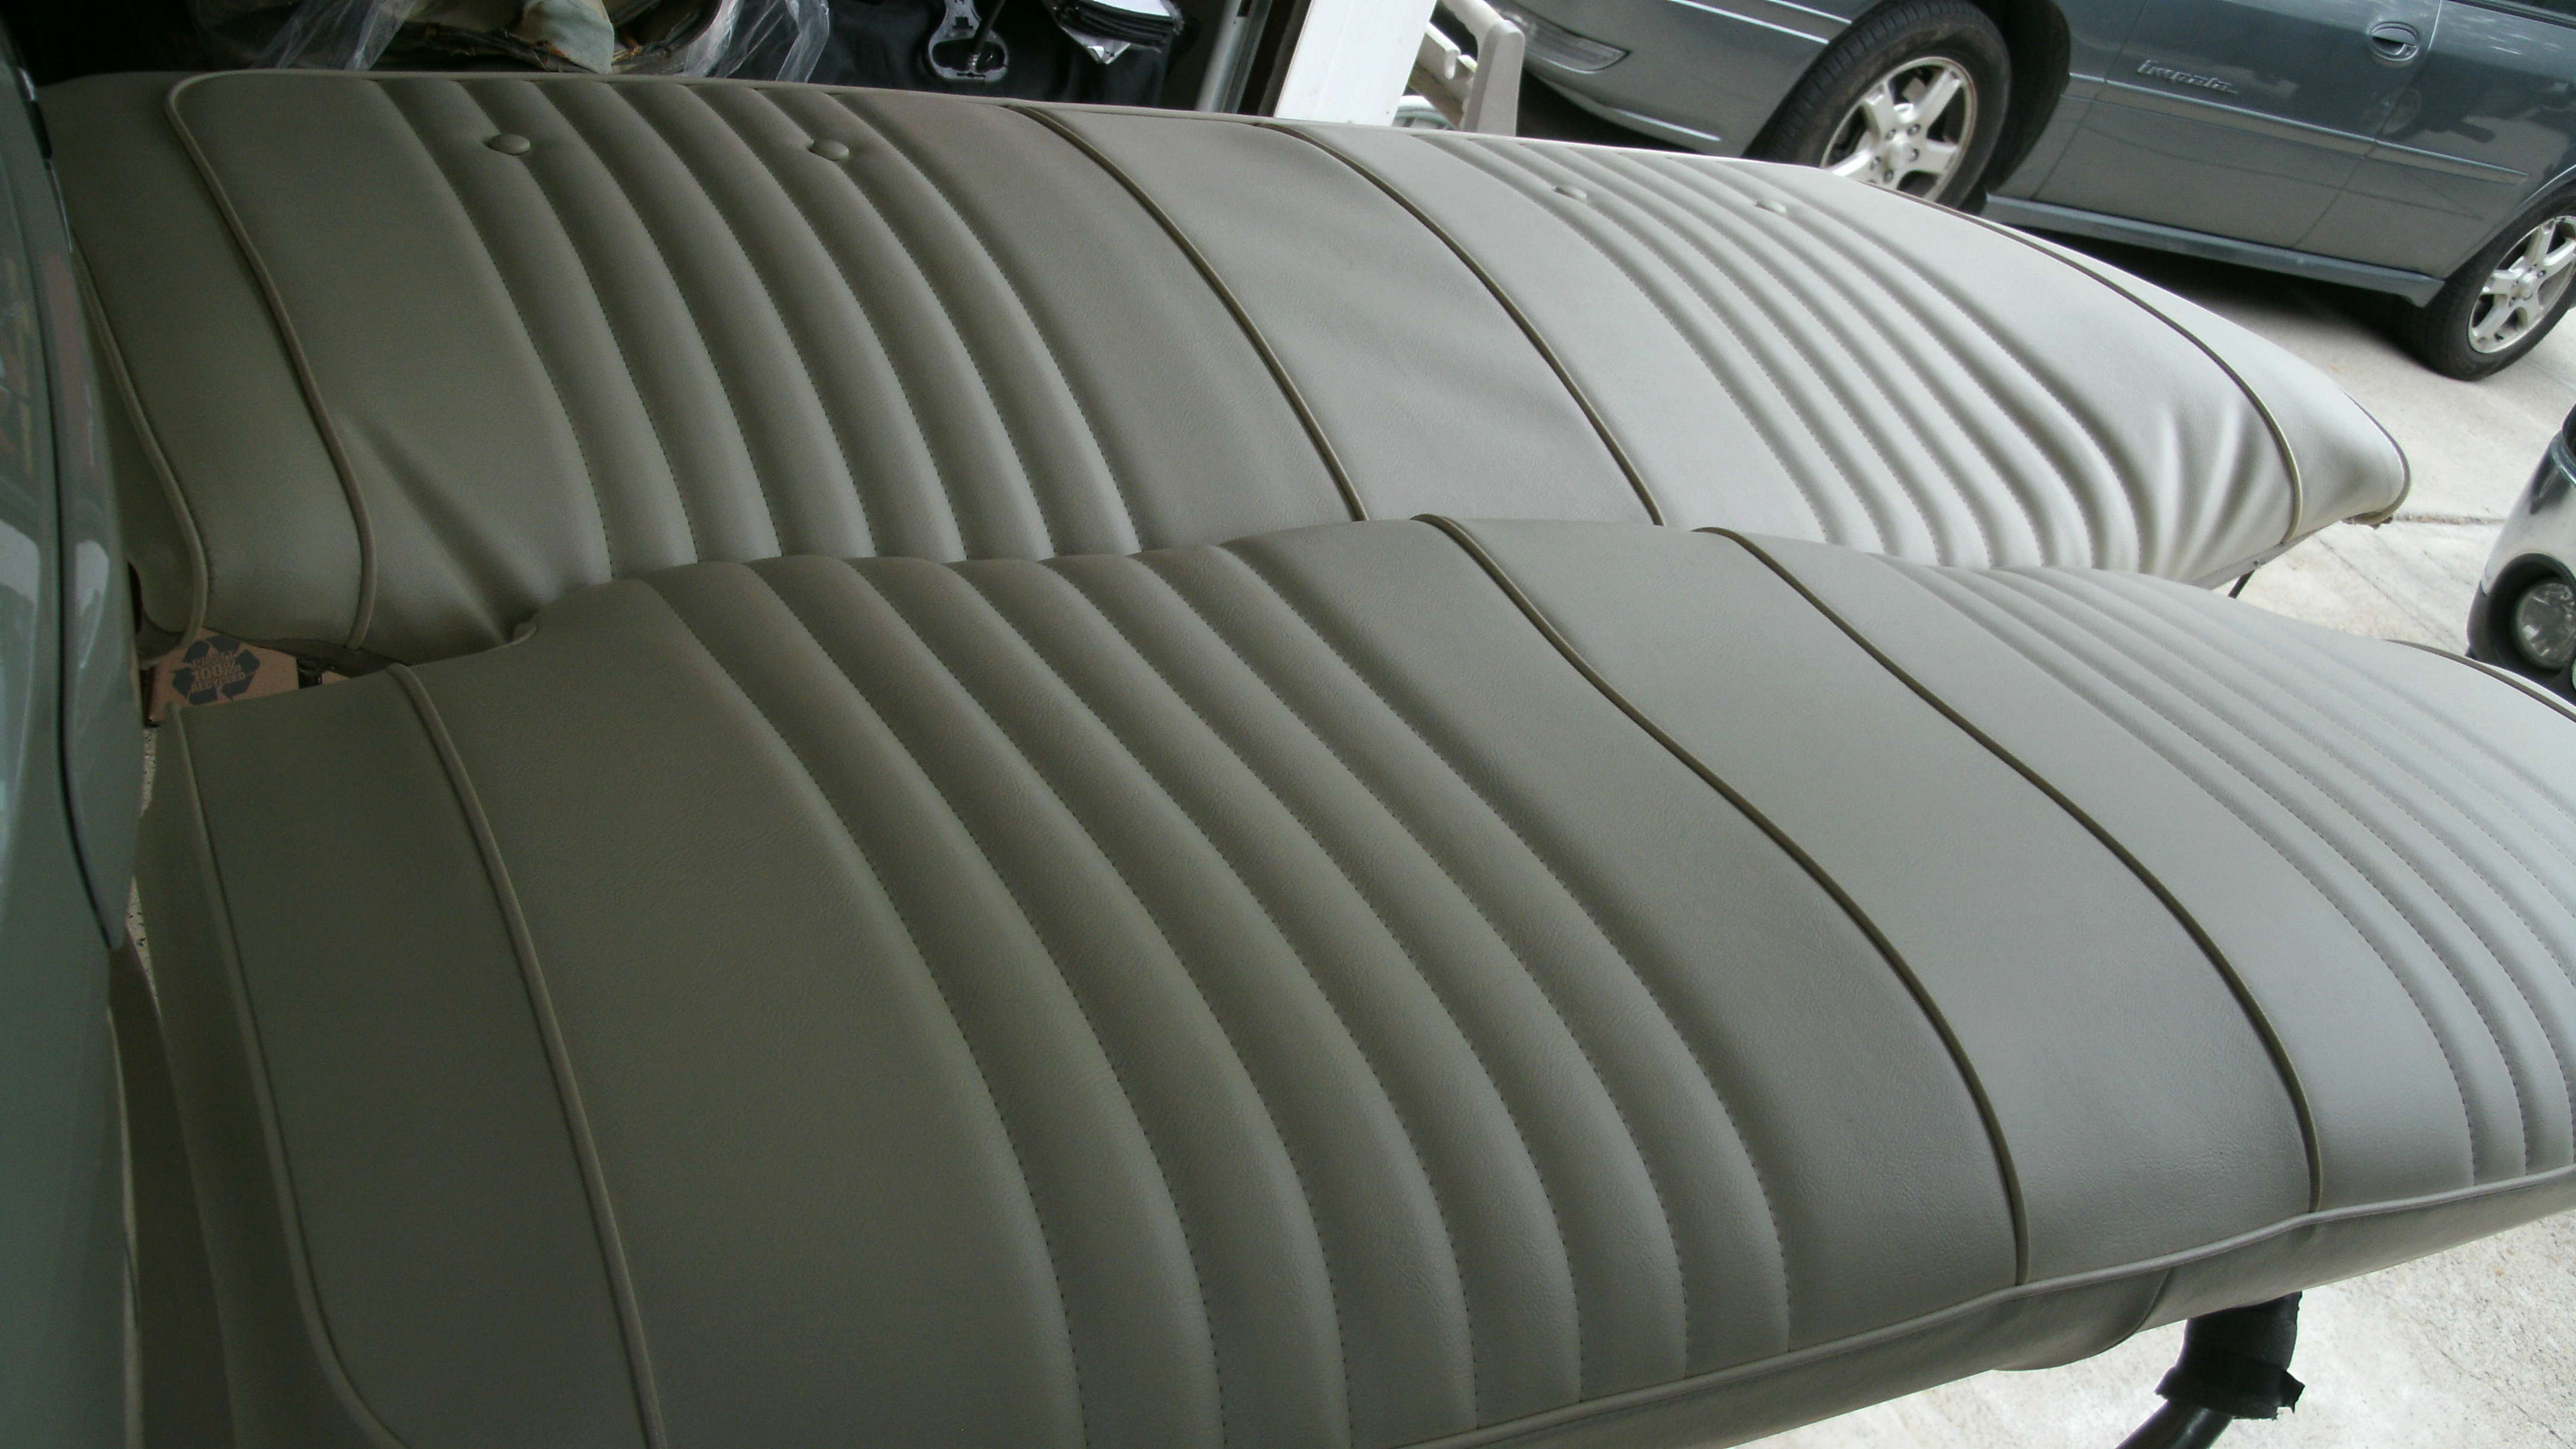
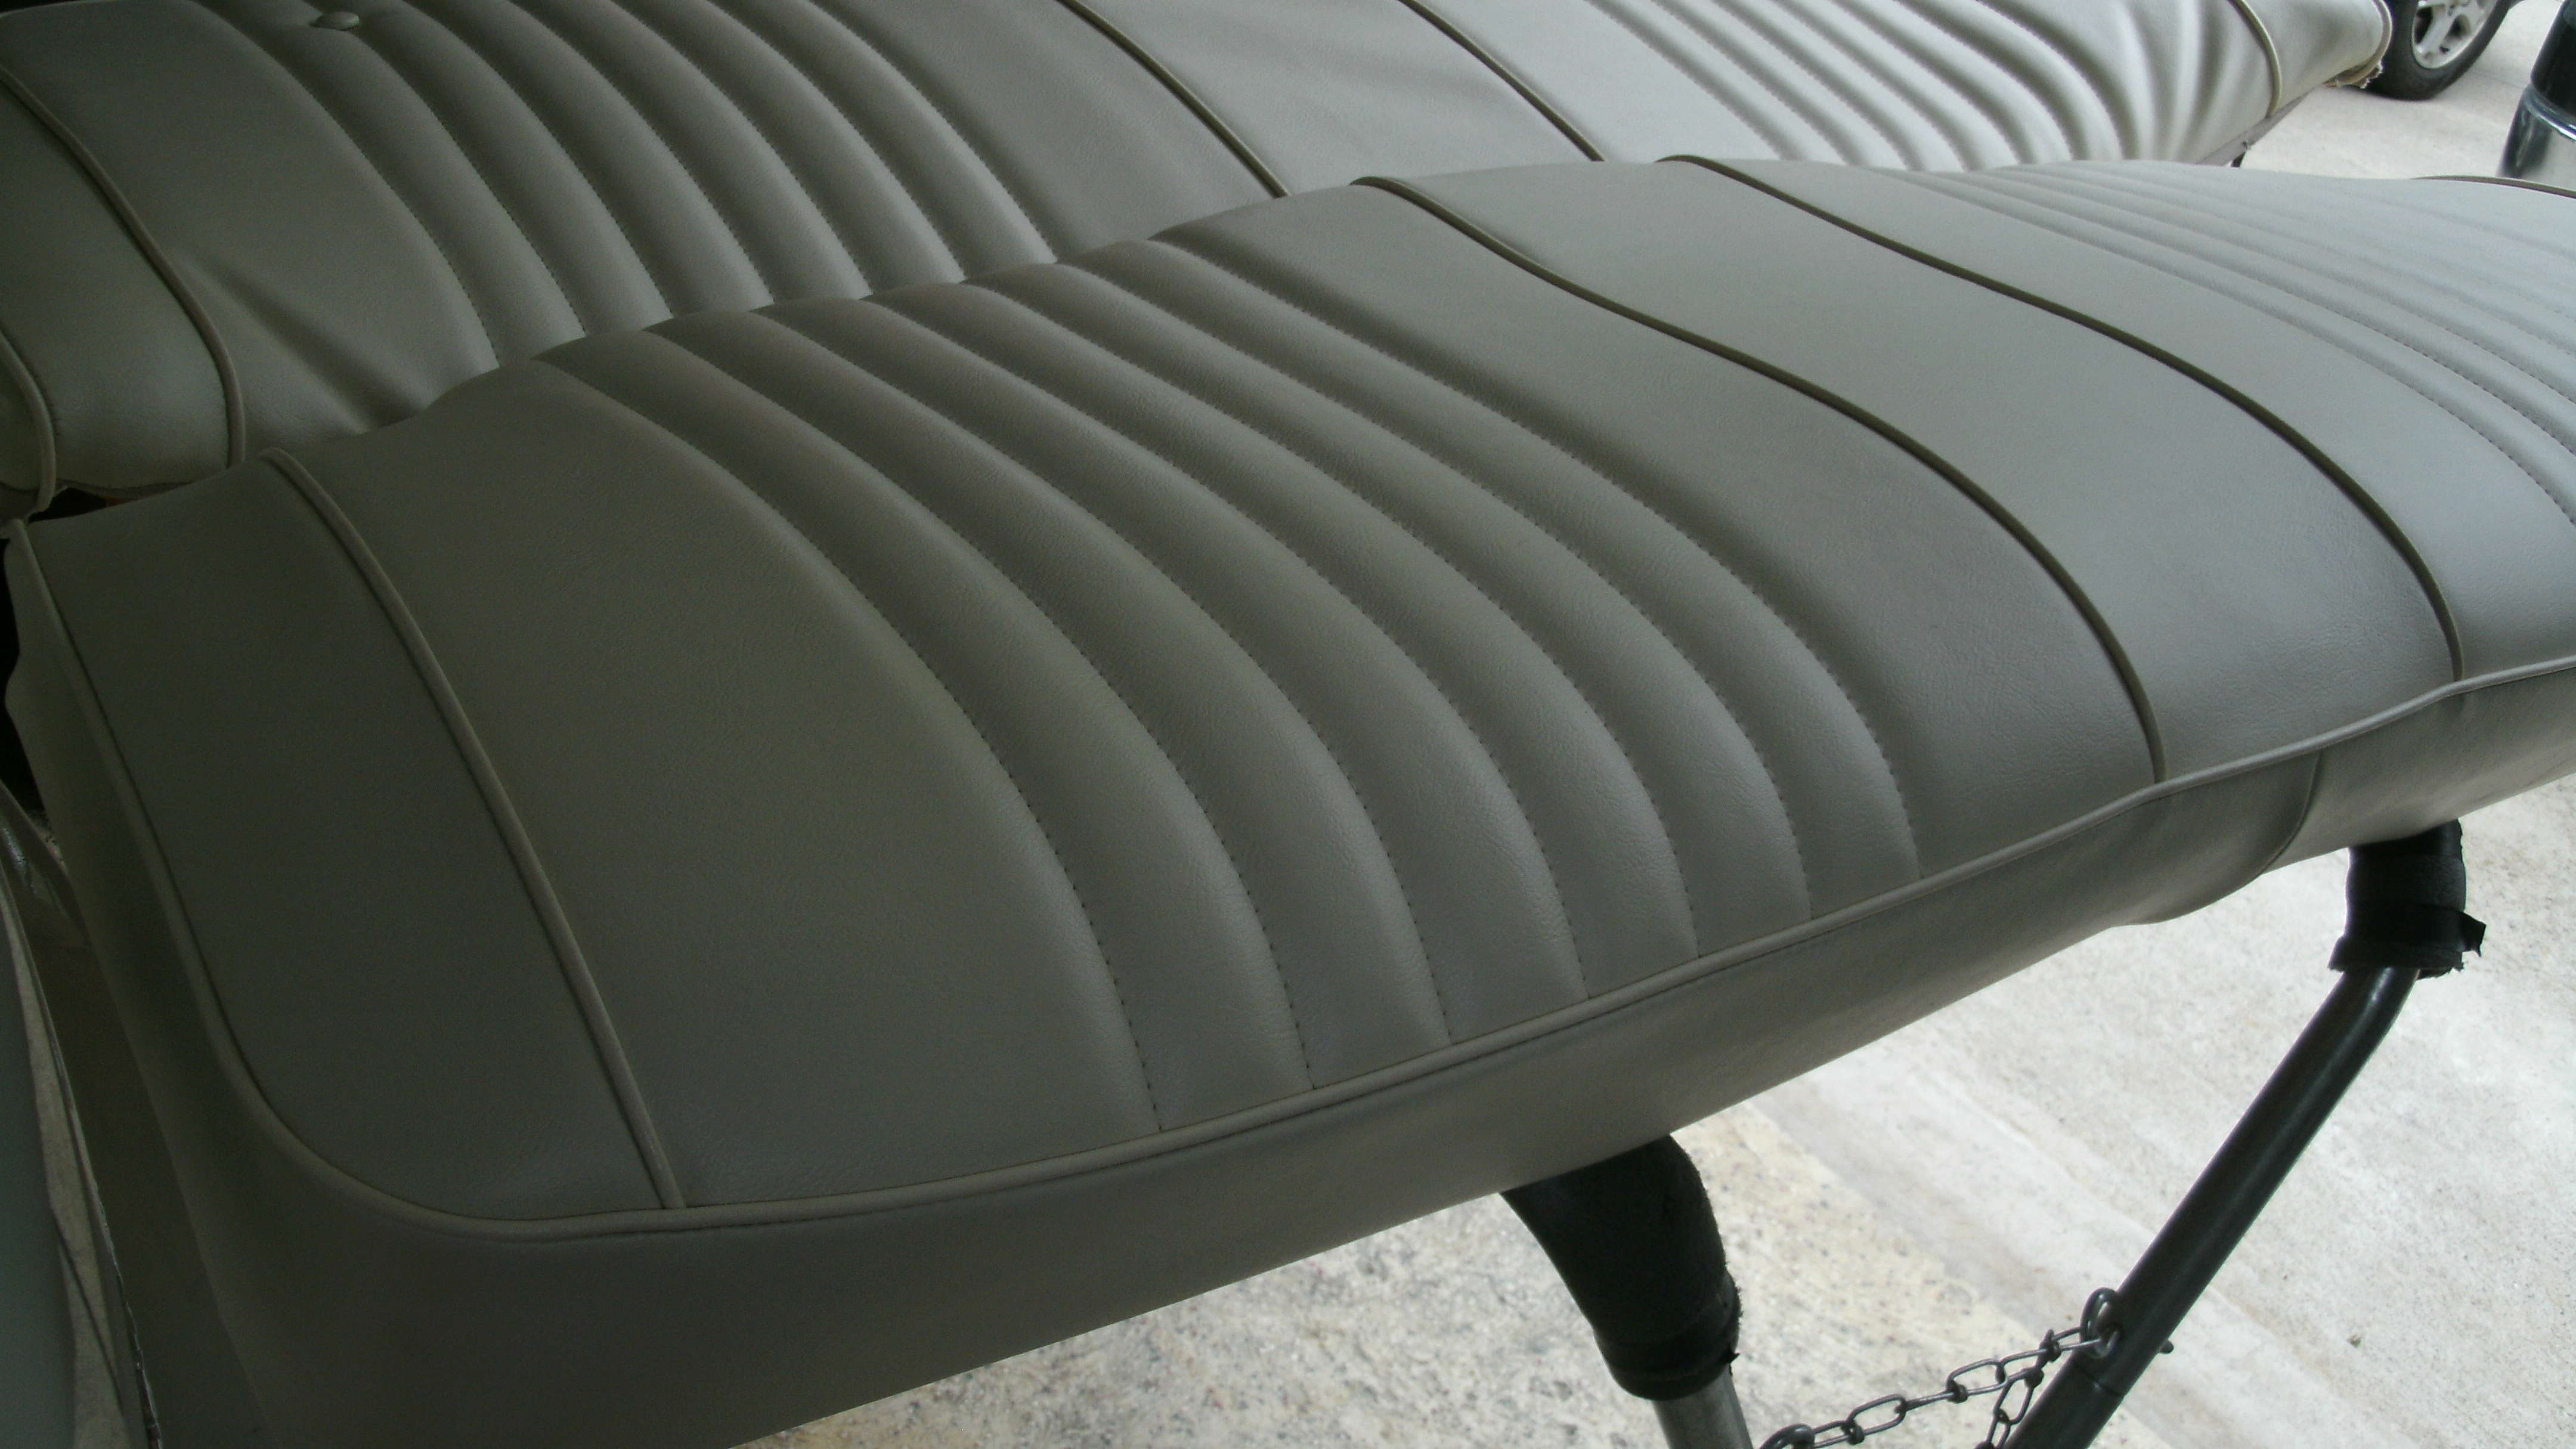
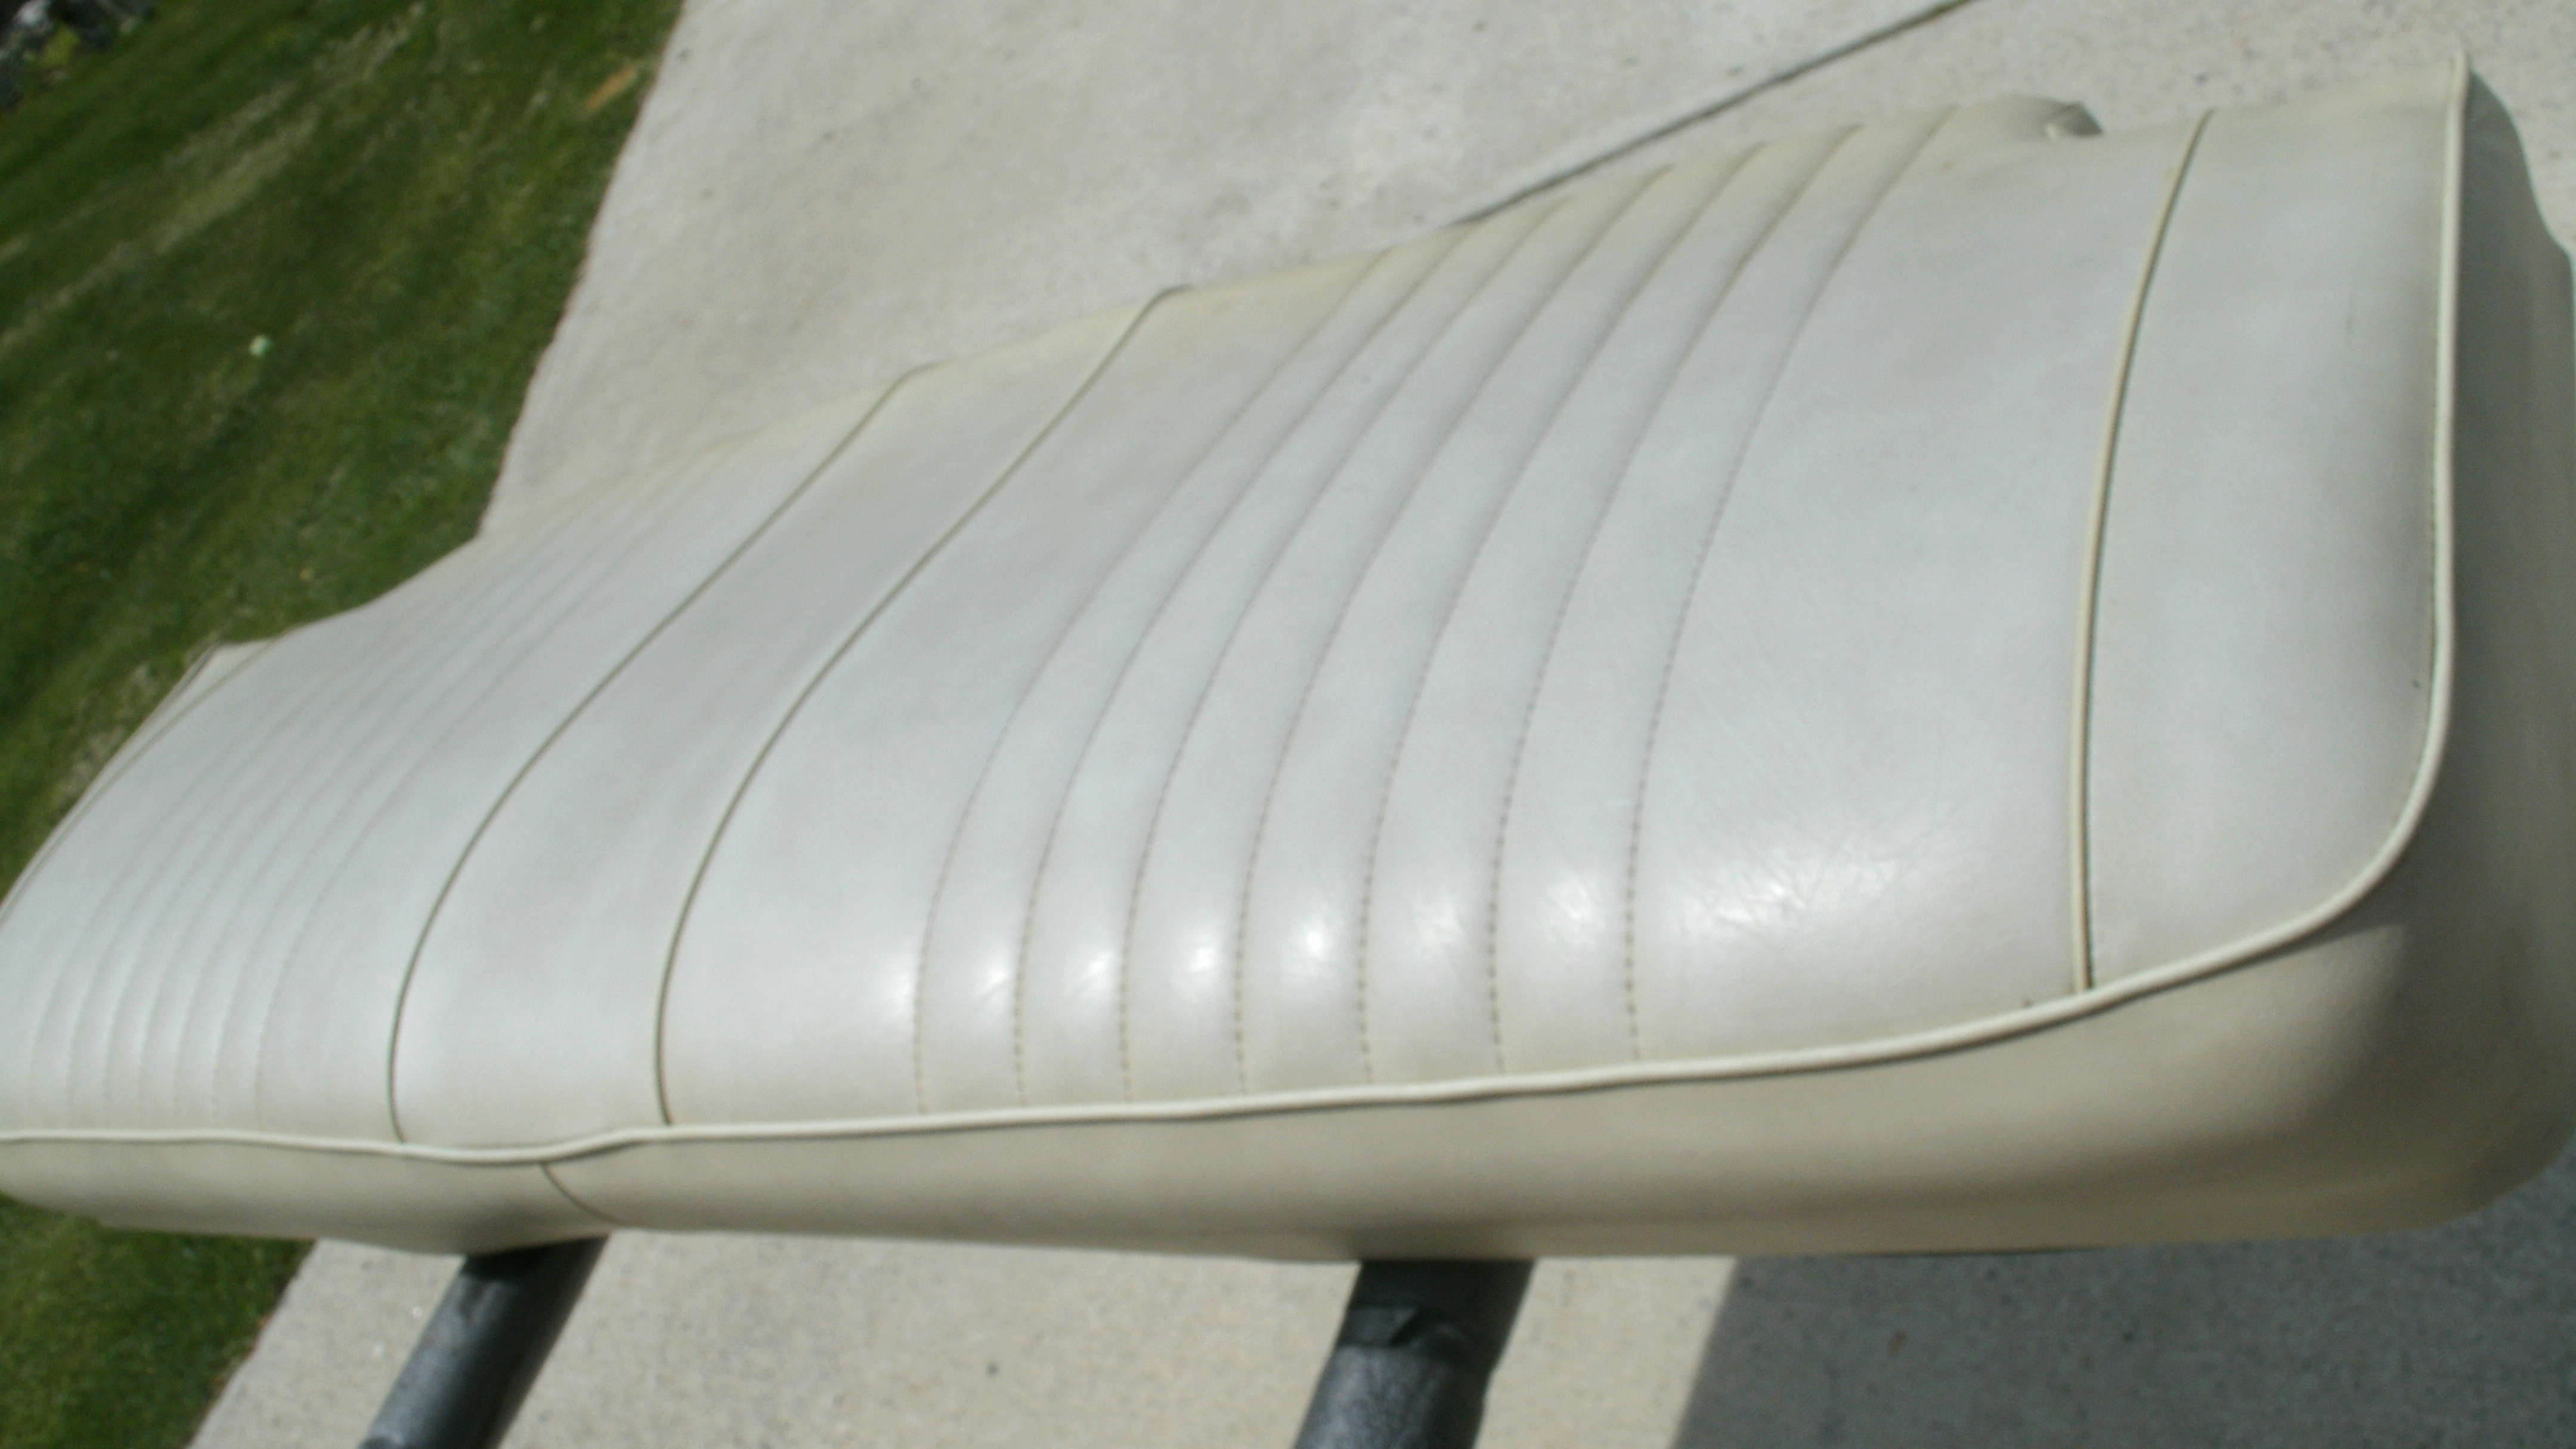
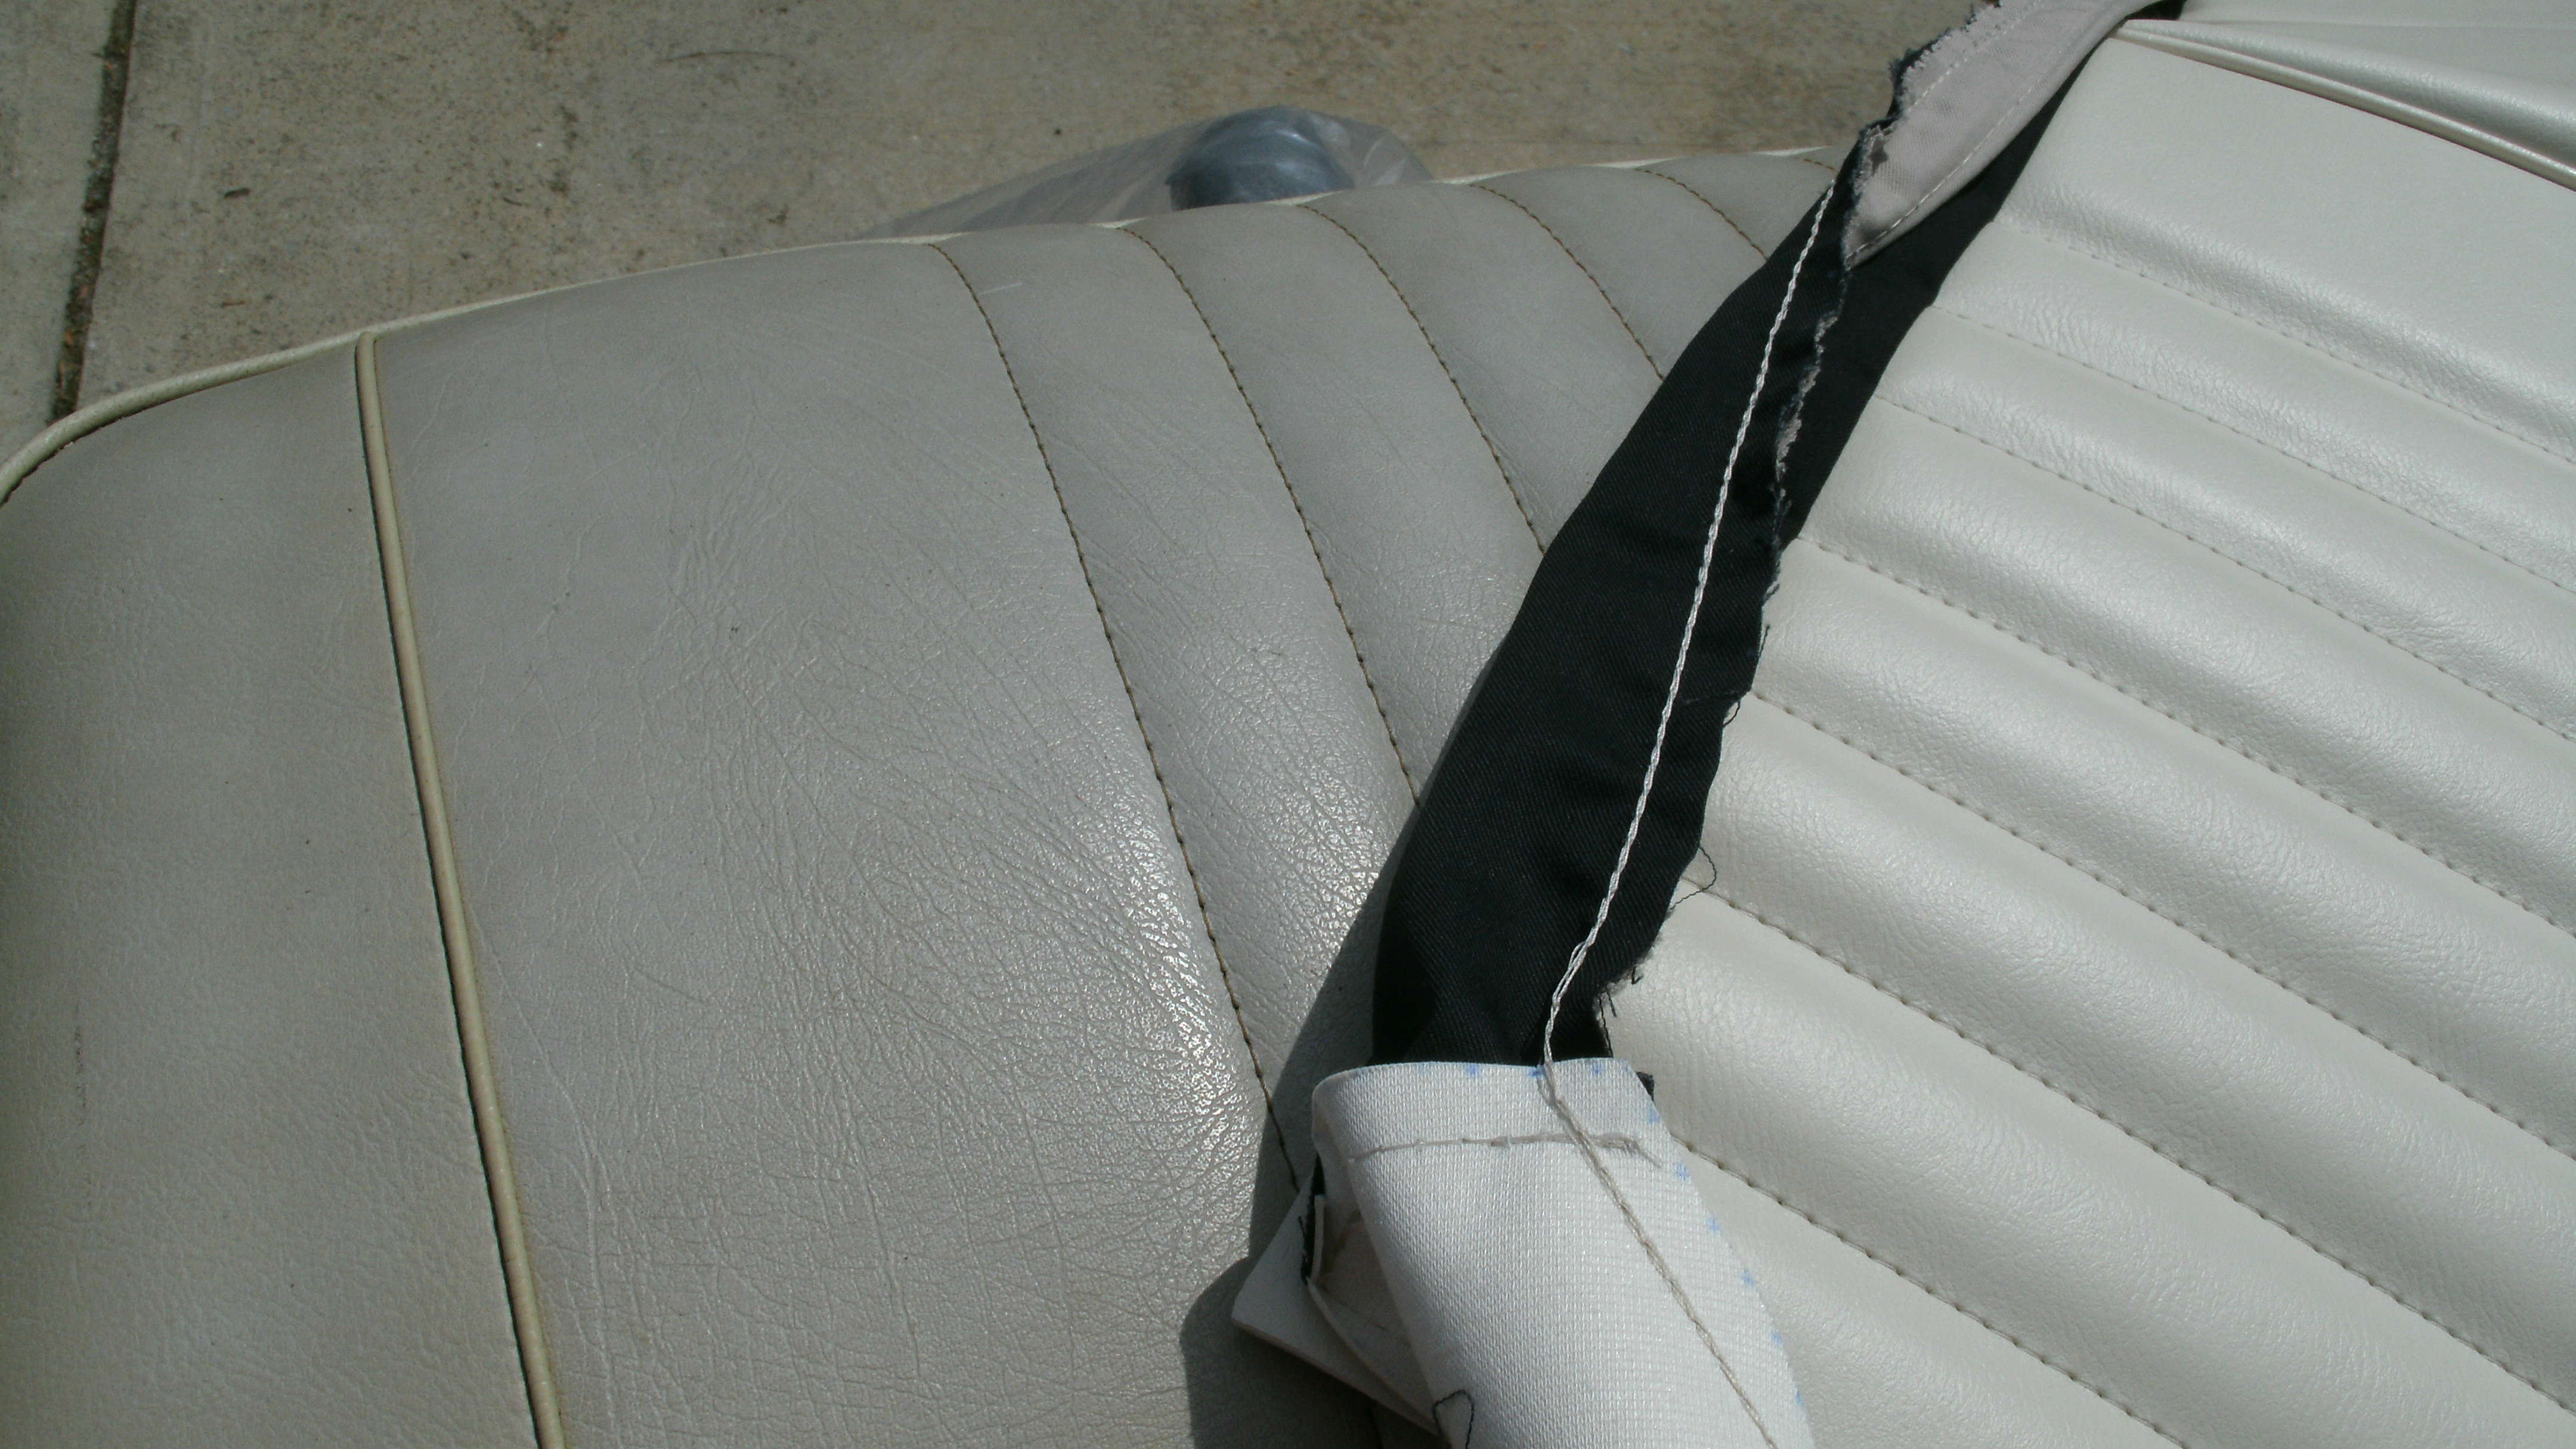
The color difference from my original "neutral" interior compared to NEW is amazing. I took the original covers off the upright and bottom of the back seat. Installed the new covers and hog ringed it up. Havent done this stuff in decades. I'm real happy with the results and the quality of the Acme upholstery. I do have a wrinkle in the lower corners of the uprights that I couldnt get out. Right where the seat belts come out. But I"m going to leave them in the sun for awhile since for everything to settle. I dont intend on installing my interior anytime soon. Then if it doesnt look right I'll pop the back out and let my buddy correct it. Otherwise, I'm happy with it. Planning on wrapping them in plastic and put them in storage. In the last pic you can see the color difference between the original upholstery and the new.

Joe73- Donating Member

- Street Cred : 83
clanceman427- G3GM Enthusiast

- Street Cred : 16
Re: 1973 Chevelle SS, 350, 4spd. build
![]() by Joe73 Thu Jun 28, 2018 2:45 pm
by Joe73 Thu Jun 28, 2018 2:45 pm

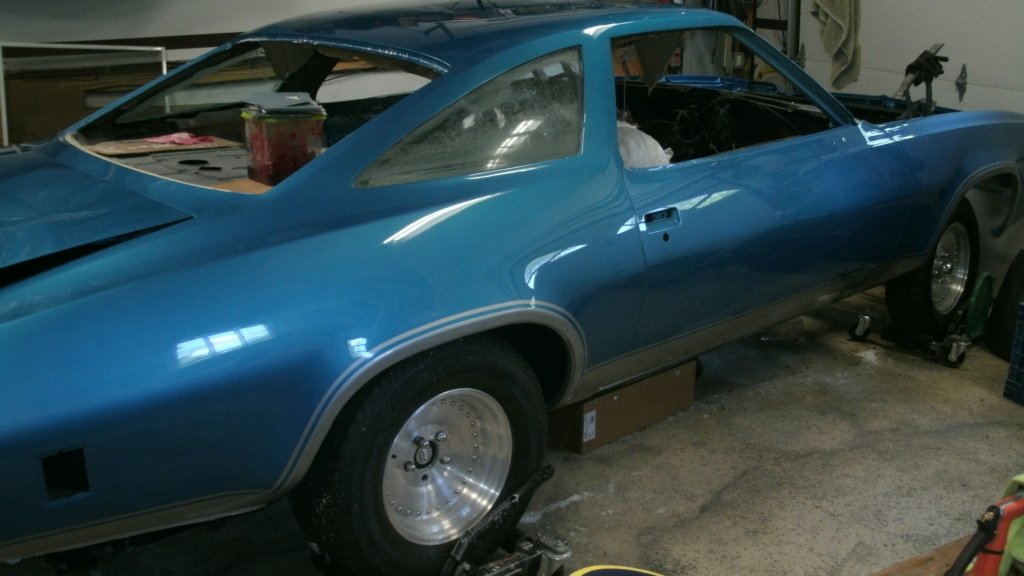
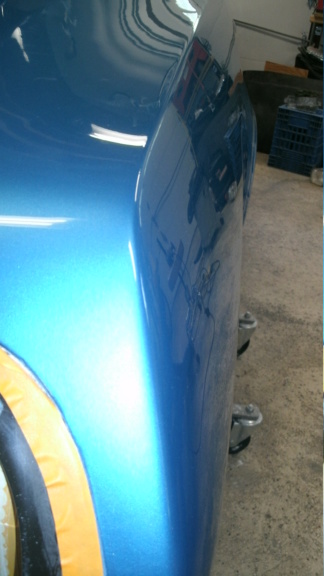
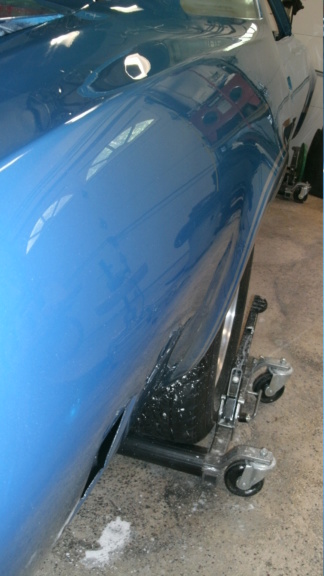
This is a side shot of how it sat for over a year and a half. Untouched, unsanded.

Joe73- Donating Member
- Street Cred : 83
Re: 1973 Chevelle SS, 350, 4spd. build
![]() by Joe73 Fri Jun 29, 2018 10:11 am
by Joe73 Fri Jun 29, 2018 10:11 am

Joe73- Donating Member
- Street Cred : 83
Re: 1973 Chevelle SS, 350, 4spd. build
![]() by 1975 S3 Sat Jun 30, 2018 6:28 am
by 1975 S3 Sat Jun 30, 2018 6:28 am
1975 S3- Donating Member
- Street Cred : 5
Joe73- Donating Member
- Street Cred : 83
Re: 1973 Chevelle SS, 350, 4spd. build
![]() by ant7377 Sun Jul 01, 2018 9:30 am
by ant7377 Sun Jul 01, 2018 9:30 am
ant7377- G3GM Addict

- Street Cred : 36
Re: 1973 Chevelle SS, 350, 4spd. build
![]() by Joe73 Sun Jul 01, 2018 4:22 pm
by Joe73 Sun Jul 01, 2018 4:22 pm
Joe73- Donating Member
- Street Cred : 83
Re: 1973 Chevelle SS, 350, 4spd. build
![]() by Joe73 Tue Jul 03, 2018 8:01 am
by Joe73 Tue Jul 03, 2018 8:01 am

Joe73- Donating Member
- Street Cred : 83
Re: 1973 Chevelle SS, 350, 4spd. build
![]() by Hawk03 Tue Jul 03, 2018 9:39 am
by Hawk03 Tue Jul 03, 2018 9:39 am
What products do you use? I'm not all that happy with my paint job, the guy painted it in garage so all kinds of stuff got in the paint. He also didn't do a good job of cutting and buffing so I need to do it again.

Hawk03- G3GM Enthusiast
- Street Cred : 18
Re: 1973 Chevelle SS, 350, 4spd. build
![]() by Joe73 Tue Jul 03, 2018 11:20 am
by Joe73 Tue Jul 03, 2018 11:20 am
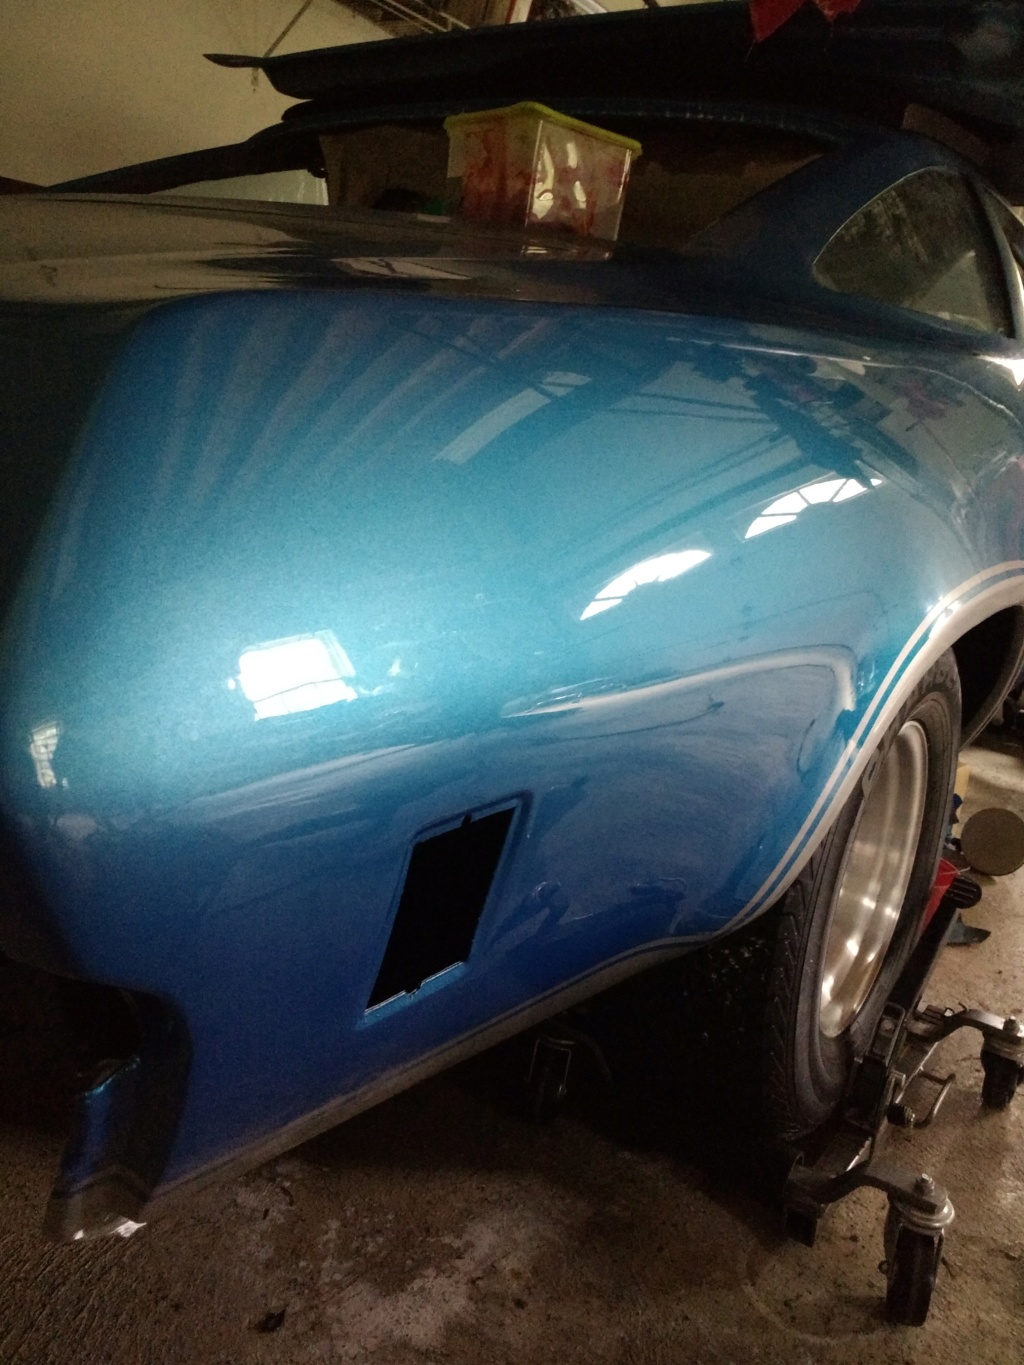
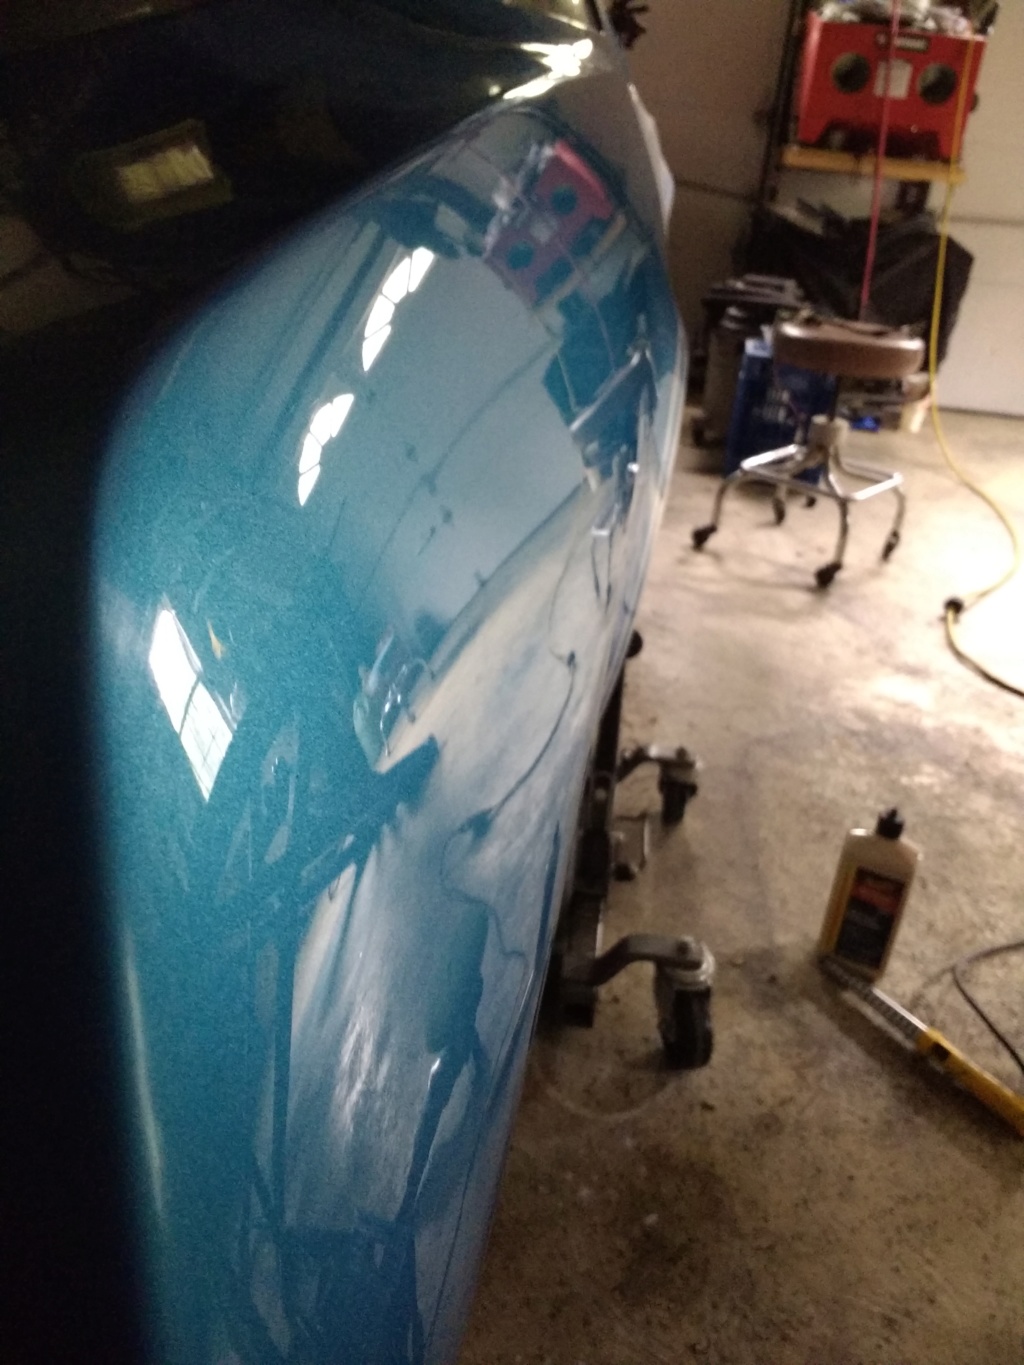
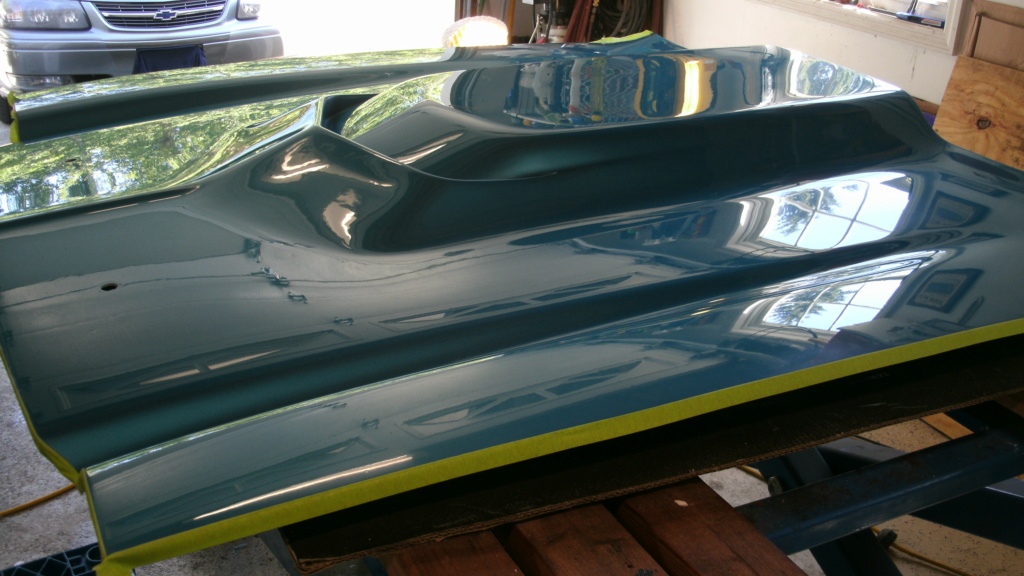
I always go to bare metal. Then immediately wash with water based (alcohol) then wash with mineral based wax and grease removers. Then directly into Southern Polyurethane Epoxy. Then I can take a breather. Their epoxy has a recoat time of 7 days without sanding.
Then I do any bodywork or skim coating. All body work goes ON TOP of the epoxy. If I break through the epoxy, when that spot is done, I reshoot some epoxy over it. Once the whole car is done, and right before paint, I shoot a sealer coat on the whole car. Sealer coat is the same epoxy just reduced down so it flows on nice and seals everything.
Then color. Alot of choices of brands. I did about 2 months or research and reading on brands. I'm on the SPI forum (southern polyurethane) and my best choices at the time (most importantly coverage and then price) were Pro-Spray and Matrix. I mail ordered the Pro-Spray. 2 gallons of blue and 2 quarts of argent silver for the stripes and wheels. Came to just under $500 shipped.
I used Southern Polyurethane Universal Clear. The reviews are unbelievable and alot of high end restorations that sold for over 100k have had that clear on them. Priced at $160 a gallon WITH activator and FREE shipping. You can read their tech sheets for all their products on line. And their customer service is amazing. Most of the time the owner actually answers the phone.
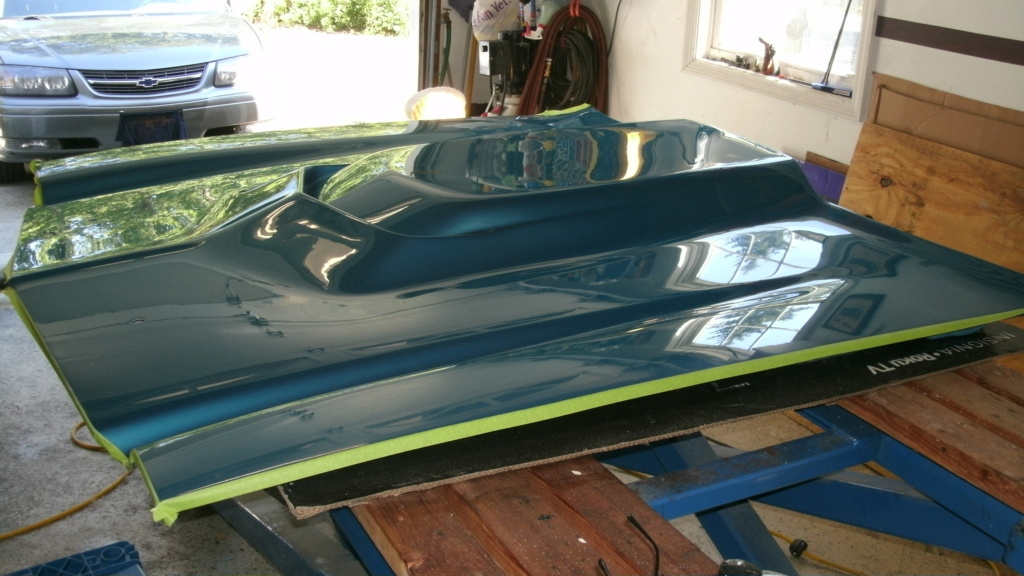
For Filler, I like Rage Gold or Rage Ultra, Evercoat Everglass (fiberglass work on my hood), Evercoat Metal-Glaze for skim coating final work if need be. The Rage filler is really smooth with no pin holes. Real easy to work with. I found that after it sets up, I hit the spot with some sand paper one quick pass then blow off the paper to get the filler off it and the paper is good as new.
I used SPI Black Epoxy for the bottom of my car after it was dustless blasted and all undercoating removed. I thinned it with 10% Acetone to give me the satin look.
As for sanding. Always wet!! Grit to start with depends on how the paint laid. My final coat of clear is a "flow" coat where you reduce your clear so its flows and lays down real flat. You want to do that coat as heavy as possible but try not to run it. I started sanding with 1300, then 1500, 2000 then 3M 3000 grit Trizact on the DA sander.
Those are the products I used after long research. I'm sure theirs plenty of other great stuff out there.
Joe73- Donating Member
- Street Cred : 83
Re: 1973 Chevelle SS, 350, 4spd. build
![]() by Joe73 Thu Jul 05, 2018 2:50 pm
by Joe73 Thu Jul 05, 2018 2:50 pm
Joe73- Donating Member
- Street Cred : 83
Re: 1973 Chevelle SS, 350, 4spd. build
![]() by crice63 Fri Jul 06, 2018 1:20 am
by crice63 Fri Jul 06, 2018 1:20 am
crice63- Donating Member
- Street Cred : 2
Re: 1973 Chevelle SS, 350, 4spd. build
![]() by Joe73 Mon Jul 09, 2018 4:26 pm
by Joe73 Mon Jul 09, 2018 4:26 pm
Joe73- Donating Member
- Street Cred : 83
Re: 1973 Chevelle SS, 350, 4spd. build
![]() by g3chevy / Mr Pontiac Mon Jul 09, 2018 6:51 pm
by g3chevy / Mr Pontiac Mon Jul 09, 2018 6:51 pm
g3chevy / Mr Pontiac- Donating Member
- Street Cred : 34
Re: 1973 Chevelle SS, 350, 4spd. build
![]() by Joe73 Mon Jul 09, 2018 10:08 pm
by Joe73 Mon Jul 09, 2018 10:08 pm
Joe73- Donating Member
- Street Cred : 83
Re: 1973 Chevelle SS, 350, 4spd. build
![]() by g3chevy / Mr Pontiac Tue Jul 10, 2018 12:59 pm
by g3chevy / Mr Pontiac Tue Jul 10, 2018 12:59 pm
g3chevy / Mr Pontiac- Donating Member
- Street Cred : 34
Re: 1973 Chevelle SS, 350, 4spd. build
![]() by Joe73 Tue Jul 10, 2018 1:01 pm
by Joe73 Tue Jul 10, 2018 1:01 pm
Joe73- Donating Member
- Street Cred : 83
Re: 1973 Chevelle SS, 350, 4spd. build
![]() by thatfnthing Thu Jul 12, 2018 9:04 am
by thatfnthing Thu Jul 12, 2018 9:04 am


thatfnthing- Donating Member
- Street Cred : 65
Joe73- Donating Member
- Street Cred : 83
Re: 1973 Chevelle SS, 350, 4spd. build
![]() by Mcarlo77 Tue Jul 17, 2018 11:18 pm
by Mcarlo77 Tue Jul 17, 2018 11:18 pm
Joe73 wrote:Thank you very much.
I always go to bare metal. Then immediately wash with water based (alcohol) then wash with mineral based wax and grease removers. Then directly into Southern Polyurethane Epoxy. Then I can take a breather. Their epoxy has a recoat time of 7 days without sanding.
Then I do any bodywork or skim coating. All body work goes ON TOP of the epoxy. If I break through the epoxy, when that spot is done, I reshoot some epoxy over it. Once the whole car is done, and right before paint, I shoot a sealer coat on the whole car. Sealer coat is the same epoxy just reduced down so it flows on nice and seals everything.
Then color. Alot of choices of brands. I did about 2 months or research and reading on brands. I'm on the SPI forum (southern polyurethane) and my best choices at the time (most importantly coverage and then price) were Pro-Spray and Matrix. I mail ordered the Pro-Spray. 2 gallons of blue and 2 quarts of argent silver for the stripes and wheels. Came to just under $500 shipped.
I used Southern Polyurethane Universal Clear. The reviews are unbelievable and alot of high end restorations that sold for over 100k have had that clear on them. Priced at $160 a gallon WITH activator and FREE shipping. You can read their tech sheets for all their products on line. And their customer service is amazing. Most of the time the owner actually answers the phone.
For Filler, I like Rage Gold or Rage Ultra, Evercoat Everglass (fiberglass work on my hood), Evercoat Metal-Glaze for skim coating final work if need be. The Rage filler is really smooth with no pin holes. Real easy to work with. I found that after it sets up, I hit the spot with some sand paper one quick pass then blow off the paper to get the filler off it and the paper is good as new.
I used SPI Black Epoxy for the bottom of my car after it was dustless blasted and all undercoating removed. I thinned it with 10% Acetone to give me the satin look.
As for sanding. Always wet!! Grit to start with depends on how the paint laid. My final coat of clear is a "flow" coat where you reduce your clear so its flows and lays down real flat. You want to do that coat as heavy as possible but try not to run it. I started sanding with 1300, then 1500, 2000 then 3M 3000 grit Trizact on the DA sander.
Those are the products I used after long research. I'm sure theirs plenty of other great stuff out there.
Really appreciate your sharing which products and methods you used to paint your car. Your work definitely shows that you've mastered the do-it-yourself paint job. I've always wanted to give it a try...but, am always left scratching my head when researching all the different paints, primers, fillers, etc. Then, on top of all that, having a correct air compressor setup is crucial to achieving a nice paint job, too. So, I'm curious to know the details of your air system. What size compressor is required? How is it plumbed...and, what type of filters, traps, etc are used to capture moisture/particles so they don't get in the paint? What size/type of spray gun do you use?
Mcarlo77- Donating Member
- Street Cred : 77
Re: 1973 Chevelle SS, 350, 4spd. build
![]() by Joe73 Wed Jul 18, 2018 7:13 am
by Joe73 Wed Jul 18, 2018 7:13 am
The air enters my two car garage on the left side, about 3 feet off the floor. It then enters a system of 3/4" pipe. Upon entering the pipe, there is a T with a foot dropper leg with a ball valve on it. This it to allow easy removal of condensation. So the air goes first into a vertical pipe(with the drop leg) alongside the garage door just to the top of the door. Then follows across the top of the garage door and passes across the second garage door ending about 3 inches higher. So 3/4" line is pitched by 3 inches to direct the condensation. Then an elbow, short nipple, elbow and more of the same pipe to go back across the two garage doors. This return line is also pitched 3 inches. All told, its about 50 feet of 3/4" piping pitched a total of 6 inches.
At the end of the system I have an air pressure gauge which I leave full open, and a water separator. Nothing fancy just a normal one with a bronze filter inside. The bowl is about the size of a softball. It doesnt catch huge amounts of moisture but I drain it once a week in the summer. But the ball valve where the air enters the garage, that is drained daily and catches at least a pint every other day. And of course you have to drain the valve on the compressor often as well. Compressor air makes it HOT and has ALOT of moisture in it. There are alot of ways of removing the condensation from compressed air. This system works for me. It was cheap using threaded pipe and it takes up unused space directly above the garage door.
For pressures, I leave my system wide open direct from the compressor. That way I can run all my air tools easily. When it comes to spraying, I use a MOISTURE CATCH and air regulator at each gun.
As for fittings and moisture catch. I use ONLY HIGH FLOW fittings on all my tools and guns. The more common fittings dont give the air volume most air tools and definitely HVLP guns require. High flow fittings are available everywhere now and I highly recommend them. As for the moisture catch on my guns. It s a small, tennis ball sized, moisture catching filter right at the gun. The regulator gets mounted below it. I'm particular about which moisture catch balls I purchase. If you google them you will see that some are restrictive internally not allowing the proper VOLUME of air to pass. Thats an issue. So research that before you purchase any.
As for guns. My best gun when I want a high end job, is a Devibliss Tekna Copper with 1.3 and 1.4 tips. That covers all the base and clear coat applications. Gun works great. I was lucky enough to buy it from a guy who bought it to spray his car and was done with bodywork. So I got it for $200. Another choice thats been highly recommended has been the Devibliss Pro Lite. I would definitely consider that gun. I think its a bit cheaper when purchasing new. There are plenty of guns out there that work excellent and everyone has their opinion. But I'm not in the business of body work. Im not doing this on a daily or even monthly. I shout when I need to so I want quality that wont break the bank. I watch alot of videos by The Gunman on youtube. Very knowledgeable and tests and rates alot of guns. His work is excellent.
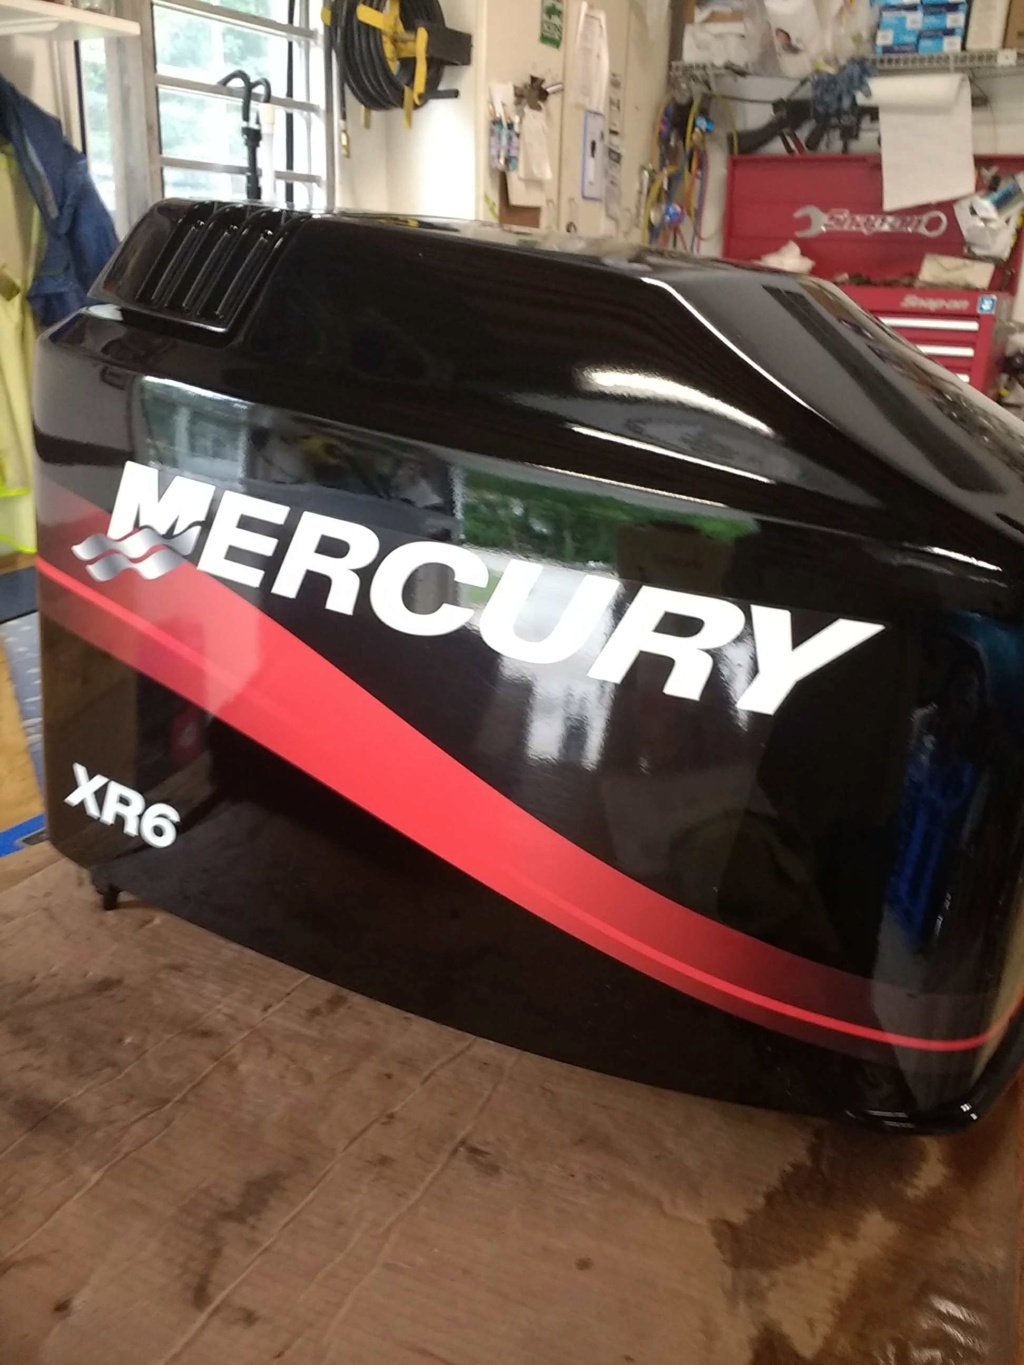
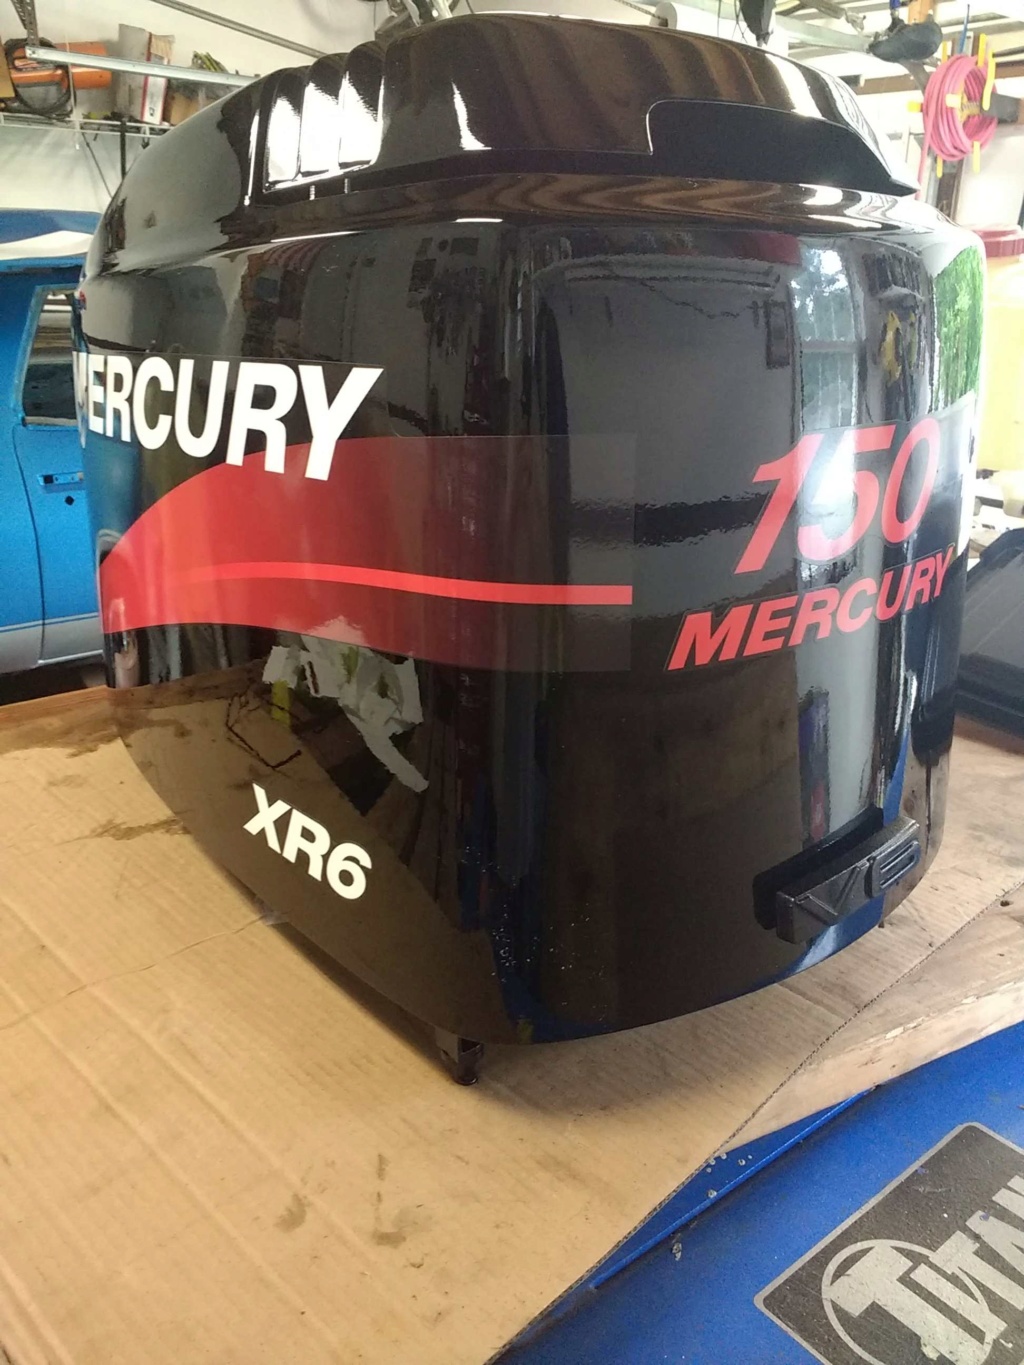
As for other guns. They are all HVLP and cheaper guns. Usually less than $50 each. I have my all around gun which I bought 20 years ago from Grizzly wookworking tools. Gun has been great and lays some nice paint. I just sprayed my boat motor, in black, with that gun. Here's a pic.
Then I have a cheap detail gun with 1.0, 1.2 tips for small pieces.
And I have a heavy primer/filler gun with 2.0 and 2.4 tips. This gun is for laying polyester sprayable fillers. I like Evercoat feather fill and Slick sand. You need a big tip to spray these fillers but two or three coats of them with some guide coat and you have a smooooth surface. But work quick because they setup with a chemical reaction, not air dry. It will harden in your gun. And always observe FLASH times with anything your spraying.
As for gun setup, nothing is set in stone. Research the internet and manufacturers will give gun recommendations or starting points. I always do a test spray on some vertical cardboard. Gun setup takes some practice and patience. Just remember, if your getting alot of orange peel, UP THE AIR PRESSURE. That will atomize it better and lay it smooth. Its easier for fine droplets to mix together than large droplets.
There are alot of ways to set this stuff up and everyone will have an opinion. Not saying mine is the only way, its just what works for me. Good luck with it.
Joe73- Donating Member
- Street Cred : 83
Re: 1973 Chevelle SS, 350, 4spd. build
![]() by Joe73 Wed Jul 18, 2018 7:15 am
by Joe73 Wed Jul 18, 2018 7:15 am
https://www.g3gm.com/t11818-horn-not-working-refurb#111483
Joe73- Donating Member
- Street Cred : 83
Joe73- Donating Member
- Street Cred : 83
Re: 1973 Chevelle SS, 350, 4spd. build
![]() by Joe73 Mon Aug 06, 2018 1:40 pm
by Joe73 Mon Aug 06, 2018 1:40 pm
Joe73- Donating Member
- Street Cred : 83
Page 9 of 17 • 1 ... 6 ... 8, 9, 10 ... 13 ... 17 ![]()

 Similar topics
» frame question on 1973 Chevelle vs 1973 Laguna
» Chevelle SS build
G3GM :: G3 :: General Discussion
|
|
|
» Need driver side bucket seat 73 Laguna
» door interior trim retainer clips
» Rusty's progress motor Parts arrived LOL Half are on
» Painting Interior Plastic
» Anyone good at photoshop?
» El Camino/Sprint LH Aftermarket Quarter Panel FOR SALE
» 1973 chevelle four speed console
» dashes
» Used OEM Hood 73-77